
User's Manual Instruction Manual

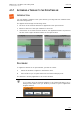
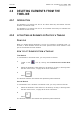
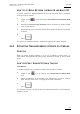
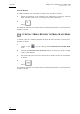
Table Of Contents
- Copyright
- Disclaimer
- Improvement Requests
- Regional Contacts
- Part 1: General Workspace
- Part 2: Logging
- Part 3: Browsing
- Part 4: Ingest
- Part 5: Playout – Control Panel
- Part 6: Playout – Playlist Panel
- Part 7: Editing
- Part 8: Editing
- 1. Introduction
- 2. Browser
- 3. Player
- 3.1 OVERVIEW OF THE PLAYER PANE
- 3.2 ASSIGNING PLAYER CHANNELS TO IPEDIT
- 3.3 VIDEO DISPLAY
- 3.4 DISPLAY ON THE TIMELINE ENGINE
- 3.5 LOADED MEDIA INFORMATION
- 3.6 TRANSPORT & CREATION FUNCTIONS
- 3.7 TIMELINE EDITING BUTTONS
- 3.8 PLAYER TRACK SELECTION
- 3.9 AUDIO MONITORING
- 3.10 LOADING MEDIA ONTO THE PLAYER
- 4. Timeline
- 4.1 OVERVIEW OF THE TIMELINE ELEMENTS
- 4.1.1 Timeline Name and IDs
- 4.1.2 Timeline Display
- 4.1.3 Edit Command Bar and General Editing Functions
- Overview
- Undo
- Redo
- Insert/Overwrite Global Mode
- Set Timeline Mark IN
- Set Timeline Mark OUT
- Mark Current Element Selection
- Clear Timeline Marks
- Delete Between Mark IN and Mark OUT
- Select Elements From (or to) Nowline
- Add Edit at Nowline Position
- Extend
- Extend Slow/Fast
- Match Frame in Player
- Clear Mark IN
- Clear Mark OUT
- 4.1.4 Transition Effects Bar
- Locator Icons
- 4.1.6 Transport Command Bar and Transport-Related Functions
- 4.1.7 Timecode and Duration Fields
- 4.1.8 Timeline Track Selection Buttons
- 4.1.9 Locator/GPI Selection Buttons
- 4.1.10 Scale Bar and Move Bar
- 4.1.11 Audio Volume Automation, Swap & Mute Buttons
- 4.2 TIMELINE MANAGEMENT
- 4.3 TIMELINE EDITING
- 4.4 MARKING AND SELECTING TECHNIQUES
- 4.5 PLACING MEDIA IN THE TIMELINE
- 4.5.1 Applicable Principles
- 4.5.2 Editing Modes From the Player
- 4.5.3 Adding Media in Insert or Overwrite via the Keyboard, ShuttlePRO or Player Icons
- 4.5.4 Adding Media in Insert or Overwrite Using Drag-and-Drop Actions
- 4.5.5 Adding Media Using the Match Frame Replace
- 4.5.6 Changing the Camera Angle of Timeline Elements
- 4.5.7 Appending a Timeline to the Open Timeline
- 4.6 DELETING ELEMENTS FROM THE TIMELINE
- 4.7 MOVING ELEMENTS WITHIN THE TIMELINE
- 4.8 EXTENDING TIMELINE ELEMENTS
- 4.8.1 Introduction
- 4.8.2 Overview of the Extend Actions
- 4.8.3 Extending in Insert or Overwrite Mode
- 4.8.4 Extending OUT in Insert or Overwrite Mode
- 4.8.5 Extending In or OUT in Insert or Overwrite Mode
- 4.8.6 How to Extend IN or Extend IN Slow/Fast a Timeline Element
- 4.8.7 How to Extend OUT or Extend OUT Slow/Fast a Timeline Element
- 4.9 TRIMMING ELEMENTS IN THE TIMELINE
- 4.10 SLIPPING ELEMENTS IN THE TIMELINE
- 4.11 SLIDING ELEMENTS IN THE TIMELINE
- 4.12 TRANSITION EFFECTS
- 4.12.1 Introduction
- 4.12.2 Selection of Transitions and Tracks on Which to Apply the Effects
- 4.12.3 Effect Types
- 4.12.4 Effect Duration
- 4.12.5 Effect Positions
- 4.12.6 Add/ Modify Transition Effect Window
- 4.12.7 Transition Effect Settings
- 4.12.8 Adding Transition Effects
- 4.12.9 Modifying Transition Effects
- 4.12.10 Deleting Transition Effects
- 4.13 AUDIO SWAPS AND MUTES
- 4.13.1 Introduction to the Swap/Mute Function
- 4.13.2 Overview of the Ways to Define Swaps and Mutes
- 4.13.3 Automatic Swap Definition
- 4.13.4 Automatic Mute Definition
- 4.13.5 Manual Swap Definition in the General Display Mode
- 4.13.6 Manual Swap Definition in the Swap/Mute Zoom Mode
- 4.13.7 Swap/Mute Configuration Window
- 4.13.8 Adding Audio Swaps
- 4.13.9 Modifying Audio Swaps
- 4.13.10 Deleting Audio Swaps
- 4.14 ADJUSTING THE AUDIO VOLUME ON THE TIMELINE
- 4.14.1 Introduction
- 4.14.2 Accessing and Leaving the Volume Automation Mode
- 4.14.3 Overview of the Possible Actions
- 4.14.4 Audio Volume Automation Panel
- 4.14.5 How to Change the Graphic Volume Range
- 4.14.6 Preliminary Actions Before Any Increase or Decrease on the Volume Automation Curve
- 4.14.7 Increasing or Decreasing the Global Volume of a Track
- 4.14.8 Increasing or Decreasing the Volume on Part of a Track
- 4.14.9 Modifying the Volume On a Given Position of a Track
- 4.14.10 Resetting the Volume
- 4.15 CONSOLIDATING A PART OF A TIMELINE
- ‘Replace’ Versus ‘Create Clip From Timeline’
- 4.15.2 Process Overview
- 4.15.3 Assigning a Recorder Channel to IPEdit
- 4.15.4 Replace Settings
- 4.15.5 How To Render Part of a Timeline Using the Replace Function
- How To Consolidate a Part of a Timeline Using the Clip Creation From Timeline Function
- 4.15.7 How To Cancel a Consolidation Process
- USING LOCATORS IN IPEDIT
- 4.17 USING GPIS IN IPEDIT
- 4.18 USING MACRO COMMANDS IN IPEDIT
- 4.19 IPEDIT SETTINGS
- 4.1 OVERVIEW OF THE TIMELINE ELEMENTS

IPDirector V.5.8
–
User Manual
–
Part 7: Editing - IPEdit
EVS Broadcast Equipment – July 2010
Issue 5.8.B
101
4.5.7 APPENDING A TIMELINE TO THE OPEN TIMELINE
INTRODUCTION
You can append a timeline to the open timeline, providing that both timelines have
the same configuration.
The append action brings the following result:
• All tracks of the selected timeline are appended to the open timeline.
• Effects at the end of the open timeline are removed.
• If the tracks do not have the same duration, the appended timeline is placed at
the end of the longest timeline element of the open timeline.
PROCEDURE
To append a timeline to an open timeline, proceed as follows:
1. Select the timeline to append in the Browser area.
2. Press CTRL as you drop the timeline to the Timeline Display area.
The timeline is directly appended to the current timeline.
Note
If you simply drop the selected timeline to the Timeline Display area, a
dialog box will open to ask you whether you want to open or append the
dropped timeline: