
User's Manual Owner's manual


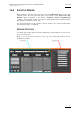
Table Of Contents
- Copyright
- Disclaimer
- Improvement Requests
- Regional Contacts
- Part 1: General Workspace
- Part 2: Logging
- Part 3: Browsing
- Part 4: Ingest
- Part 5: Playout – Control Panel
- Part 6: Playout – Playlist Panel
- Part 7: Editing
- 1. Player Control Panel
- 1.1 INTRODUCTION
- 1.2 USER INTERFACE
- 1.2.1 Opening of Control Panel
- 1.2.2 Overview of the Control Panel
- 1.2.3 Views of The Control Panel
- 1.2.4 Channel Media Pane
- 1.2.5 Transport Functions Pane
- Time Information Group Box
- Left Timecode Field
- Right Duration field
- Play Mode Button
- Browsing within Video Material with the ShuttlePRO
- Jog Bar
- Playlist Element Tags
- Play Button
- Custom Speed Field
- Pause Button
- Fast Rewind Button
- Fast Forward Button
- E/E Button
- Direct Access Buttons to the Trains on the ShuttlePRO
- Snap Button
- Ret Button
- 1.2.6 Clip Creation Pane
- 1.2.7 Clip Information Tab
- 1.2.8 Metadata Tab
- 1.2.9 Ganged Channels Tab
- 1.2.10 Clip-List Tab
- 1.2.11 Control Panel Contextual Menu
- 1.2.12 Settings
- 1.2.13 Control Panel Shortcuts
- 1.3 ASSIGNING A CHANNEL OR THE SOFTWARE PLAYER
- 1.4 LOADING MEDIA
- 1.5 MOVING WITHIN MEDIA
- 1.6 CREATING MEDIA
- 1.7 EDITING MEDIA
- 1.7.1 How to Rename a Loaded Clip
- 1.7.2 How to Modify Playlist Information or Rename a Loaded Playlist
- 1.7.3 How to Edit a Clip Duration
- 1.7.4 Modifying a Playlist Element
- 1.7.5 How to Move Elements Within a Playlist
- 1.7.6 Adding Elements to a Playlist
- 1.7.7 How to Remove Elements From a Playlist
- 1.7.8 Applying a Macro Command on a Playlist Element
- 1.8 DELETING MEDIA
- 1.9 USING KEYWORDS & METADATA
- 1.10 PUBLISHING AND TRANSFERRING MEDIA
- 1.10.1 How to Publish a Clip to a User Group
- 1.10.2 How to Send a Clip to an External Destination
- 1.10.3 How to Send a Playlist to an External Destination
- 1.10.4 How to Export a Playlist
- 1.10.5 How to Export a Part of an Element to a target From the ShuttlePro
- 1.10.6 How to Export a Part of an Element to a target From the Control Panel
- 1.10.7 How to Import a Playlist
- 1.10.8 How to Restore a File to an EVS Video Server
- 1.11 USING GANGED CHANNELS
- Software Player
- Video Display

Issue 5.8.B IPDirector Version 5.8
–
User Manual
–
Part 5: Playout
–
Player Control Panel
EVS Broadcast Equipment – July 2010
54
HOW TO LOAD A TRAIN FROM THE E/E BUTTON
To load a record train in the Control Panel from the E/E button, proceed as
follows:
1. Open the Control Panel and assign a player channel or the Software Player.
2. Right-click the E/E button.
The contextual menu will show the available record trains.
3. Select a record train.
The train is loaded in the Control Panel at the current timecode.
1.4.2 LOADING A CLIP IN THE CONTROL PANEL
To load a clip on a player channel or the Software Player and view it in the
Control Panel, proceed in one of the following ways:
• Enter the clip name in the Name field of the Control panel and press Enter.
• Enter the clip number and location in the LSM ID field, for example 000A/02 and
press Enter.
• Drag-and-drop operation from the Database Explorer, as described below.
HOW TO LOAD A MEDIA BY A DRAG-AND-DROP OPERATION
To load a clip, growing clip, file, playlist or train on a channel from the Database
Explorer, proceed as follows:
1. Right-click in the Channel field of the Control Panel and select a player
channel or the Software Player.
2. Open the Database Explorer from the main menu.
3. In the Clips view or Clip Elements view of the Database Explorer, select the
requested clip in the element grid.
4. Drag it to the Control Panel you wish to load it on.
A clip element is loaded on the Software Player according to the rules defined in
section ‘Loading Rules for the Software Player’ on page 54.
LOADING RULES FOR THE SOFTWARE PLAYER
All types of clip elements may be separately loaded on the Software Player.
However, when the main line corresponding to the clip is selected, instead of a
clip element line, and loaded on the Control Panel, a single clip element will be
loaded according to the following priority rules:
• A lo-res clip element will be loaded before a hi-res clip element.
• A XT clip will be loaded before a file.
It means that when lo-res and hi-res XT clips and files exist, the following priority