
MP3 Player User Manual


Back to Index
You need not switch off your computer when you connect
the unit to the PC since USB is Plug-and-Play.
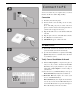
Connection
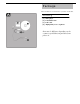
(1) The battery must be in the player.
(2)
Position the PC so that its USB ports can be easily
accessed.
(Note : The USB port(s) may be found on the front
panel or elsewhere instead of the back panel. Refer to
your PC dealer for support if necessary. )
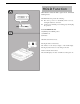
(3)
Plug the flat USB connector of the bundled USB cable
to the PC.
(4) Plug the square connector of the USB cable to the unit.
(5) Press Play button to turn the unit on.
(6) USB IDLE will appear on LCD of the unit.
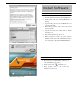
Install and Update
(7) System will detect the new hard
ware exists in your
system and install each of them automatically.
(8) Upon the driver installation is completed, run the
Play
Update
utility that is now available in the start menu
of your Windows system.
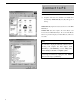
Verify Correct Installation of the unit
(9) When the Player Update
is completed, the player is
ready to use. If you wish to check that whether MP3
Flash Player has properly installed on your system,
double -click on My Computer
icon on the desktop of
your Windows.
(10) You will observe your MP3 Flash Player shows up a
s
Removable Disk (F:) and (G:) drives in Windows.
(11) Removable Disk (F:) implies the built-
in flash
memory of the MP3 Flash Player.
Removable Disk (G:) drive implies the
Smart Media
Card
(if any) inserted into the MP3 Flash Player. In
case if Smart Media Ca
rd is not present in the player,
Removable Disk (G:) will not be accessible.
Connect to PC
For Windows Users