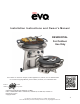
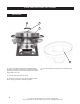
R Installation Instructions and Owner’s Manual RESIDENTIAL For Outdoor Use Only Pour obtenir un manuel en français, veuillez appeler Evo, America, LLC au 503-626-1802. Cleaning Instructions For a French Language Manual, please call Evo, America, LLC at 503-626-1802. Tested & Listed By Portland Oregon USA evoamerica.com Certification: ANSI Z21.58-1995/CGA 1.
Warnings FOR YOUR SAFETY FOR YOUR SAFETY 1. Do not store or use gasoline or other flammable vapors and liquids in the vicinity of this or any other appliance. 2. An LP Tank not connected for use shall not be stored in the vicinity of this or any other appliance. If You Smell Gas: 1. Shut off gas to appliance. 2. Extinguish any open flame. 3. Remove grill cooking surface. 4. If odor continues, immediately call your gas supplier or your fire department.
Lifetime Limited Warranty Evo America, LLC warrants to the original residential consumer-purchaser that the Evo grill shall be free from rust-through on all metal surfaces and shall be free from defects in materials and workmanship under normal and reasonable use from the original date of purchase. Evo promises to replace, at its determination, any product or component that is defective and covered under this warranty for as long as you, the registered original consumer-purchaser, owns the grill.
Table Of Contents Assembly Note Warnings ---------------------------------------------------2 Your Evo Flattop Grill is shipped either Limited Warranty ----------------------------------------3 partially assembled or fully assembled.
Notes To Installer or Person Assembling Grill: Leave these instructions with consumer. To Consumer: Keep these instructions for future reference. Complete Now For Future Reference Serial # _____________________________ Date of Purchase ______________________ Place of Purchase _____________________ Evo America, LLC 20360 SW Avery Ct., Tualatin, OR 97062 USA Phone 503.626.1802 | Fax 503.213.5869 | evoamerica.com | support@evoamerica.
Safety Reminders SAFETY PRECAUTIONS • • Installation of grill must conform with local codes, or in absence of local codes, with National Fuel Gas Code, NFPA 54 / ANSI Z223.1-latest edition. Handling of LP tanks must conform to NFPA / ANSI 58-latest edition. Do not install or use grill within 36” of combustible materials from back and sides of grill. Grill shall not be located under unprotected overhead (enclosed carport, garage, porch, patio) made of combustible construction.
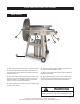
Know Your Grill From Front To Back Front of Grill 8 7 9 4 5 10 3 2 11 6 1 - Control panel with inner and outer burner control knobs and electronic ignition. Right side of panel contains serial number, certification number and safety instructions. Left-side of panel contains lighting and safety instructions. 2 - Inner burner control knob for controlled temperature across the center portion of grill cooking surface. Inner burner controls cooking area to an 14” radius from center.
Know Your Grill From Front To Back Top of Grill 14 13 12 15 15 12 - Hood constructed of easy to clean stainless steel for converting your grill into a patio oven, for roasting, smoking, steaming or warming. The hood also protects your cooking surface when not in use. 15 - Hood Hook support for resting hood on backside of drip pan. 13 - Vent for exhausting steam or vapors. 14- Handle for moving your hood onto the cooking surface, and for moving your hood to the resting position.
Know Your Grill From Front To Back Back of Grill 20 19 18 22 24 23 21 18 - Rear handle for lifting and pushing your grill into position. 19 - Stainless steel waste tray mounted to slide rails under drip pan provides overflow waste removal from drip pan and convenient clean out. 20 - Grill shown with hood resting from drip pan. When hood is not in use, it is recommended to support it from drip pan at the rear location. For complete access to cook surface, remove hood from grill and store separately.
Fastener Package Listed in Order of Assembly Group Parts List Qty Grill Assembly Components 1 1 1 2 1 3 1 1 1 1 1 Right Front Leg Left Front Leg Rear Leg Leg Supports ( LP Only ) Removable Leg Support ( LP Only ) Leg Supports ( Natural Gas Only ) Lower Rack Drip Pan Waste Tray Regulator / Hose Assembly ( LP Only ) Natural Gas Quick-Disconnect Hose Qty Key 6 10 1/4” - 20 x 1/2” Phillips Screw - Stainless Steel 6 11 1/4” - 20 Nyloc Nut - Stainless Steel Wheels to Lower Rack 2 20 3/8” x 7/8” - F
Assembling The Grill Some parts may contain sharp edges. Wear protective gloves as necessary. Legs to Lower Rack 1. Position bottom of right leg with label marked RIGHT to lower rack and slide over axle. 2. Visually align screw holes and place phillips screw (10) into first mounting hole. 3. Secure to lower rack by first installing Nyloc Hex Nut (11). Securely tighten screws by holding screwdriver steady against screw head and using wrench to tighten nyloc hex nut. 4.
Assembling The Grill Leg Supports To Leg Frame Some parts may contain sharp edges. Wear protective gloves as necessary. Propane (LP) models have two leg supports (left-side and front) that are installed using philips screws and nyloc hex nuts. The third leg support (right-side) is a removable with keyway cutouts that install over pre-installed fasteners (see Removable Leg Support below).
Assembling Your Evo Grill Leg Assembly To Burner Unit 1. Stand completed leg assembly in an upright position with the control panel facing forward. 2. Place burner unit over leg assembly with control panel centered between front legs with right and left wheels on each side. 3. Gently lower skirt onto leg assembly making sure the upper tab of each leg rests outside the burner unit skirt. 4. Allow the skirt to gently slide into the vertically angled mounting channels of each leg. 5.
Assembling Your Evo Grill Some parts may contain sharp edges. Wear protective gloves as necessary. Drip Pan To Burner Unit 1. Lower drip pan over burner skirt with the round clean-out hole of drip pan positioned on the left side of the control panel. The three detent clips and waste container rails must be facing downward. 2. Rest the drip pan on the three support brackets which are riveted to the burner skirt 3. Position the three detent clips just before each support bracket. 4.
Assembling Your Grill Rear Handle To Burner Unit 1. Some parts may contain sharp edges. Wear protective gloves as necessary. Install Rear Handle to rear of burner unit using two each of phillips screw (60), and nyloc hex nut (61). Hood Handle & Hood Support 1. Install handle to outside of hood by locating phillips screws (70) through the handle and into the hood. 2. From inside hood, simultaneously install the hood support with phillips screw. 3.
Installing LP Tank To Grill Removing Leg Support Propane (LP) Models Only 1. From right side of grill, grasp removable leg support at each end and lift upward. Once the leg support is disengaged from the keyway fasteners, lift leg support outward. The keyway fasteners are tensioned with a spring that secures the removable leg support to the right and rear legs. 2. Tilt removable leg support to one side and remove from leg frame. 3.
Installing LP Tank To Grill Connecting Regulator To Tank Valve Refer to the diagram at the right and complete the following steps: 1. Be sure both grill burner valves are in the Off position. 2. Make sure the gas tank valve handwheel is in the closed position. Turn clockwise ( left to right ) to a full stop. 3. Remove the protective cap from the gas tank valve. 4.
Installing Natural Gas Connection To Grill General Specifications For Piping Note: Contact your local city inspection department for building codes regarding the installation of Natural Gas connection and outdoor gas appliances. In the absence of Local Codes, you must conform to the latest edition of ANSI Z223.1. Gas Main Supply Outside Wall 1. This grill is designed to operate at 7 inches water column pressure ( .2526 psi ). 2.
Installing Natural Gas Connection To Grill Installing Natural Gas Hose Your natural gas grill is shipped with the natural gas quick-disconnect hose preinstalled to the control manifold. To complete assembly, the hose must be routed under the heat shield and through the rear leg. Hose routed under heat shield. DANGER Natural gas hose must be routed under heat shield.
Installing Natural Gas Connection To Grill Checking For Gas Leaks DANGER Do not use an open flame to check for gas leaks. Be sure that are no sparks or open flames in the area while you check for gas leaks. Flames and sparks will result in a fire or explosion which can cause serious bodily injury or death and damage to property. Note: All factory-made connections have been thoroughly checked for gas leaks. The burners and ignition system has been flame tested.
Recognizing Abnormal Gas Operation Abnormal Gas Operation Right Flame Wrong Flame Yellow Tip Excessive Yellow Tipping Light Blue Light Blue Dark Blue Dark Blue Any of the following are considered to be abnormal operation and may require servicing: • • • • • Excessive yellow tipping of the burner flame (See diagram above). Sooting up of cooking utensils. Burners not igniting properly. Burners failing to remain alight. Gas valves, which are difficult to turn.
Grill Maintenance, Cooking Techniques, and Recipes Grill Maintenance Regular cleaning and care for your Evo flat-top cooking surface will keep your grill looking and functioning it’s best. Caring for Evo’s cook surface is much like maintaining cast iron cookware. When the surface requires cleaning, there are a few basic cleaning techniques to use. For quick and routine cleaning between preparations, a metal spatula works for removing the majority of surface debris.
Cooking Poultry Boneless cuts that have been flattened to an even thickness with a meat mallet cook more evenly and more quickly. Poultry that has been prepared in this way can then be marinated, breaded or rubbed with spices before searing on the grill. Poultry can also be roasted, braised, sautéed, fried or poached on the Evo grill. Roast as you would in your kitchen oven placing the roast in a roasting pan with a rack and using the hood to contain the heat from the grill.
food slightly off the surface allowing smoke and air to circulate. When placing Evo’s hood over the food and wood chips you create “hot smoke,” since the food is being cooked and smoked simultaneously. Placing the chips onto one heat zone and the food onto the other heat zone allows you to control the smoke and cooking temperature independently. Items that take longer to cook, such as pork ribs, require you add more chips as the old chips burn out.
R Care & Use Guide for Gas Grills FOR YOUR SAFETY 1) Do not store or use gasoline or other flammable vapors and liquids in the vicinity of this or any other appliance. PLEASE READ THIS CARE & USE GUIDE BEFORE USING GRILL. 2) An LP cylinder not connected for use shall not be stored in the vicinity of this or any other appliance. To installer or person assembling grill... Leave this Care & Use Guide with consumer for future reference. FOR YOUR SAFETY If you smell the odor of gas: To Consumer...
SAFETY PRECAUTIONS 1 • 2 • 3 • 4 • 5 • 6 • 7 • 8 • 9 • 10 • 11 • 12 • 13 • 14 • Installation of grill must conform with local codes, or in absence of local codes, with National Fuel Gas Code, NFPA 54 / ANSI Z223.1 latest edition. CAN/CGA-B149.2 Propane Installation code latest edition. Handling of LP tanks must conform to NFPA / ANSI 58 - latest edition. Do not install or use grill within 36” of combustible materials from back and sides of grill.
7 • LP gas tank must have shut off valve terminating in LP gas cylinder valve outlet compatible with connection on grill and conforming to ANSI Z21.58 / CAN 1.6-88 standards-latest edition. LP tank should have approved TYPE 1 valve. LP gas tank must also be provided with safety relief device having direct communication with vapor space of cylinder. LP gas tank supply system must be arranged for vapor withdrawal and must include collar to protect tank valve. Also, use propane (LP) gas only.
IGNITOR CHECK IMPORTANT: Turn gas off at tank and place both control knobs in Off position. Press ignitor button and hold for 2-3 seconds. A “Click” should be heard and a spark seen each time between collector box and electrode. Be sure to check both collector boxes and both electrodes. Be certain that your battery is clean and operating with a sufficient charge. MATCH LIGHTING YOUR GRILL 1 2 3 4 5 • • • • • 6 • 7 • Be sure gas control knobs are in the Off position.
optimum non-stick cooking surface you will first need to ‘season’ your cooking surface with oil cooked into the steel surface- much like seasoning a cast iron skillet. SEASONING AND USING YOUR COOK SURFACE To provide the non-stick surface preferred for cooking delicate food items, it is necessary to “season” the cook surface with a small amount of vegetable cooking oil. We recommend corn oil because it produces a better seasoned surface than regular vegetable oil.
REMOVAL AND STORAGE OF LP GAS TANK Never store LP gas tank indoors. When grill is stored indoors, shut tank valve off and disconnect tank from grill. Tank must be stored outdoors in well-ventilated area, away from and out of the reach of children. Loosen coupling nut located on tank regulator and tank valve by turning counterclockwise using hand only - do not use tools. Next loosen tank securing screws at foot of tank along with frame-assembly cross member Figure 1 and remove tank.