
User Manual


H.265 VANGUARD II Series
11
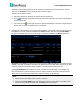
The DVR will automatically detect the IP cameras connected on the same network. You can
also click the Search button to search for the IP cameras again.
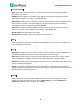
To add IP cameras to the DVR:
a. Select the desired IP camera(s) on the left-side IP camera list.
b. Click to add the selected IP camera(s) to the DVR. Input the User Name and Password
of the IP camera(s).
c. You can also click on the right-side list to add an individual IP camera to a single channel.
Please refer to 4.1.1.2 IP Channels for more details.
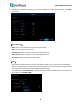
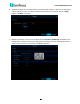
5. Configure the Disk settings. For the first time use HDD or a new HDD, users have to format the
HDD before use. Click to select the HDD in the Select column and then click Format HDD to
format the selected HDD. You can also setup to overwrite the HDD. Click Next to proceed.
Overwrite: Select Auto to enable the overwrite function; Off to disable the overwrite function.
If Auto is selected, the DVR will overwrite the oldest files on the HDD when HDD is full. If Off is
selected, please check the HDD status regularly, to make sure the HDD is not full.
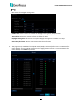
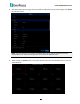
The 1/3/7/14/30/90 Days stands for the max. number of recording days. For example, if 3
days is selected, the system will only record for 3 days and then start the overwrite process,
which means, the system will always keep 3-day-recordings in the storage.
Note:
1. Please connect the HDDs to the system in advance.
2. Clicking the Format HDD button will effectively erase the entire data in the HDD! If you
do not want to format the HDD, click the Next button to proceed.