Instruction Manual TN-100 / T100 Waterproof Portable Turbidity meter ENGLISH Copyright © 2006 All rights reserved. Eutech Instruments Pte Ltd Oakton Instruments VERSION 1.
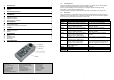
7.3 1 INTRODUCTION 3 2 DISPLAY & KEYPAD FUNCTIONS 3 2.1 2.2 Display Keypad 3 3 Cleaning the vial Scratches, fingerprints, bacterial growth and water droplets on the sample vial or inside the sample well can cause stray light interference leading to inaccurate readings. Clean the vial by washing the interior and exterior in a detergent solution, followed by rinsing thoroughly 8 to 10 times with clean distilled water.
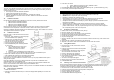
6. Wait for the reading to stabilize. 7. Slowly rotate the vial throughout one complete revolution (360°). While rotating, observe the display and locate the position with the lowest turbidity reading. This position is the indexed position. 8. Mark this position on the vial (not on the cap) against the mark on the meter. 9. Release READ/ENTER. After indexing a vial, make sure the vial is always placed inside the well in the indexed position. 6 6.1 ¾ ¾ ¾ ¾ ¾ 6.
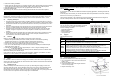
4.1 CALIBRATION Important Information on Meter Calibration The meter was calibrated and tested prior to leaving the factory. It is possible to use the instrument directly. Re-calibration is recommended at least once every month using all 4 standards provided to ensure full-range accuracy. ¾ Do not open the vials with calibration standards. ¾ Check that the standards have not expired. ¾ Make sure the calibration vials are free of dust, smudges and scratches.