INSTRUCTION MANUAL CYBERSCAN TURBIDIMETER TB1000 BENCH TURBIDITY METER Technology Made Easy …
TABLE OF CONTENTS 1 INTRODUCTION 1 2 UNPACKING THE INSTRUMENT 1 2.1 Packing List of Contents 1 2.2 Unpacking and Inspection of the Instrument and Accessories 1 3 BECOMING FAMILIAR WITH THE INSTRUMENT 2 4 ROUTINE OPERATION 3 4.1 Grab Sample Measurement (Routine Measurement) 3 4.2 Pour Through Sample Measurement (Optional Accessory) 4 5 CALIBRATION PROCEDURES 4 5.1 Indexing the Calibration Standard(s) 4 5.2 Calibration Procedure 5 6 USER SELECTABLE PARAMETERS 6 6.
CyberScan TB1000 1 Introduction Thank you for purchasing Eutech Instruments’ CyberScan Turbidimeter TB1000 series White Light or Infrared turbidity meter (CyberScan TB1000 hereafter). These turbidity meters have been designed for simple and easy measurement of turbidity. This manual contains simple steps to follow to ensure that your instrument is operating properly.
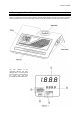
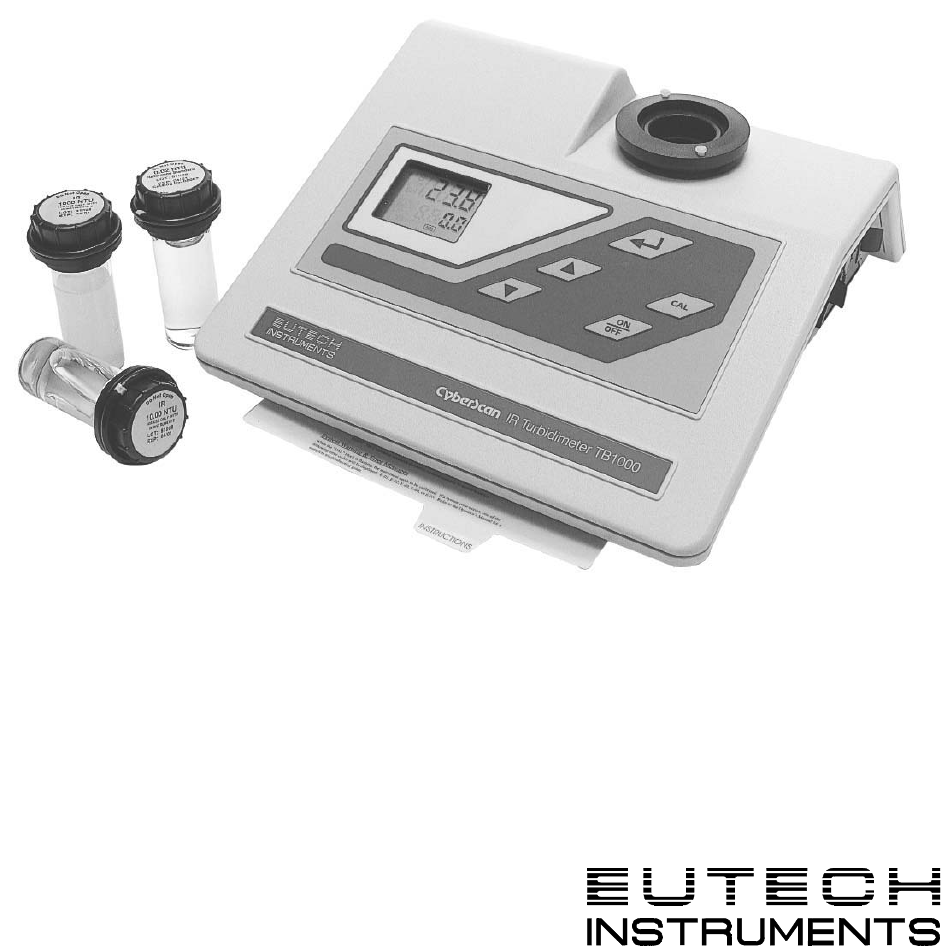
CyberScan TB1000 3 Becoming Familiar with The Instrument Figure 1 is a depiction of the front of the CyberScan Turbidity Series TB1000. Not shown in this picture is the RS232 serial printer port and 12V DC power plug connector, which are located on the back panel of the instrument. Figure 1: Front view of CyberScan Turbidity Meter TB1000 The user interface of the CyberScan TB1000 has been designed with a 5 key touchpad and user display.
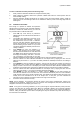
CyberScan TB1000 The ON/OFF key is used to turn the instrument on and off. The CAL key is used to enter, or exit, calibration mode. Both the ▲ and ▼ keys are used to set numerical values and to scroll through lists. The ENTER key stores value on the screen and/or causes the turbidity data to be output to the printer port when pressed. Figure 2 illustrates all the items that can appear on the display.
CyberScan TB1000 4.2 Pour Through Sample Measurement (Optional Accessory) Install the pour through assembly and index it according to the instruction sheet that accompanies the assembly. The following steps describe how to measure the turbidity of a sample using the CyberScan TB1000 fitted with the optional pour through assembly: 1. 2. 3. 4. 5. Turn on the CyberScan TB1000. The instrument will be in the normal automatic mode (the "AUTO" block should be illuminated).
CyberScan TB1000 To index a calibration standard perform the following steps: 1. 2. 3. 5.2 Slowly rotate the calibration standard one complete revolution (360°). While rotating the standard, observe the CyberScan TB1000 and locate the cuvette position with the lowest turbidity reading.
CyberScan TB1000 6 User Selectable Parameters The CyberScan TB1000 provides you the ability to customize your instrument according to your needs at any time during normal operation. This section describes how you can customize your instrument. NOTE: You cannot access any of the user selectable parameters during calibration.
CyberScan TB1000 6.5 Setting the Printing Function After pressing the ENTER key, the upper row of the display will have the letters “Prt” printed in it. This feature allows you to turn the printing option on the instrument on or off. Select the desired printing action (on or off) by pressing ▲ or ▼ key. When you have selected the proper printing option, press ENTER key. If you selected to turn off the printing function, pressing ENTER key will return you back to the normal mode of the instrument.
CyberScan TB1000 ERROR MESSAGE ASSOCIATED MEANING TYPICAL CAUSE E-01 Overall light level detected is too low during calibration Wrong standard is in the optical well or lamp failure. E-02 Overall light level detected is too high during calibration Wrong standard is in the optical well. E-03 Amount of light detected between 0.02 NTU and 10.0 NTU is too small during calibration Wrong standard is in the optical well or bad A/D circuitry. E-04 Amount of light detected between10.
CyberScan TB1000 Before replacing the lamp module ensure that the instrument is turned off. instrument, proceed with the following instructions: 1. 2. 3. 4. Once you have turned off the Remove the lamp module from the instrument by squeezing the two side tabs on the module inward while pulling the module out of the instrument. Pull the module away from the instrument until the in-line power connector is exposed (about 6-8 inches).
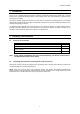
CyberScan TB1000 9 Specifications CyberScan TB1000 WL Conforms to specifications set forth in EPA method 180.1 (Nephelometric Method) § CyberScan TB1000 IR Conforms to specifications set forth in ISO 7027: Water Quality - Determination of Turbidity. Measurement Range 0-1000 NTU Accuracy ±2% of reading or ±0.01 NTU whichever is greater Repeatability < ±1% of reading or ± 0.01 NTU whichever is greater Resolution 0.01NTU in the range 0.00 – 9.99 NTU 0.1NTU in the range 10.0 – 99.
CyberScan TB1000 10 Accessories and Replacement Parts List Accessory or Replacement Part Order Code Number CyberScan TB1000 W Calibration Set with EC-TBDWCALKT EC-TBDW1000 CyberScan TB1000 IR Calibration Set with EC-TBDIRCALKT EC-TBDIR1000 Calibration kit set for EC-TBDW1000 (0.02 NTU, 10.0 NTU, 1000 NTU) EC-TBDWCALKT Calibration kit set for EC-TBDIR1000 (0.02 NTU, 10.
CyberScan TB1000 NOTES 12
CyberScan TB1000 Eutech Instruments Pte Ltd. Blk 55 Ayer Rajah Crescent #04-16 Singapore 139949 Tel: (65) 778 6876 Fax: (65) 773 0836 E-mail: marketing@eutechinst.com Web-site: http://www.eutechinst.