
User Guide


Instruction Manual pH 1000/ 2500
26
12.12 Print Functions and Options
This function allows the printing of measurements directly to a
peripheral device via the RS232C port of the meter.
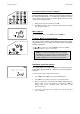
1. Set the mode to the parameter that you wish to print, in the MEAS
mode.
2. Press PRINT key to send the displayed reading. The printer indicator
will flash to show that data is being sent.
3. ‘ERR“ symbol blinks if the cable is not connected properly or setup
does not match PC requirements.
4. Press CAL/MEAS to exit error situation.
12.12.1 Print Function Options
To access Print function options, press the SHIFT key and then
the PRINT/OPT key. Option 1 will appear.
1st Option: Print on READY
Default is OFF. Setting the option to ON will cause data to be sent to the
RS232C port whenever the READY indicator appears.
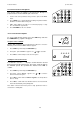
1. Press SHIFT key followed by the PRINT/OPT key.
2. First option - print on READY - appears. Use S or T to set to ON.
3. Press YES to confirm and proceed to the next option.
2nd Option: Print at Time Interval
If no interval is set, the “- - - -”display is shown. Enter the desired
time interval using the numeric keys. The meter sends the data to
the RS232C port at the specified time interval. Press YES to
confirm.
1. Press SHIFT key followed by the PRINT/OPT key.
2. First option - print on READY - appears. Use S or T to select the
Print on Time Interval option.
3. Press YES to confirm and use numeric keypad to set time (between
00.01 to 23.59).
4. Press YES to confirm and meter will then return to the measurement
mode and automatically starts printing data.
Note: Cable connection and meter protocol setup parameters must be
correct before sending data.