
Instruction manual


13
Calibrating for Conductivity:
1. Pour out two separate portions of your
calibration standard and one of deionized
water into separate clean containers.
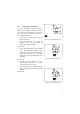
2. If necessary, press the MODE key to select
Conductivity Mode. The µS or mS indicator will
appear on the right side of the display.
3. Rinse your probe with deionized water, then
rinse the probe in one of the portions of
calibration standard.
4. Immerse the probe into the second portion of
calibration standard. The meter’s autoranging
function selects the appropriate conductivity
range (four ranges are possible). Be sure to
tap the probe to remove air bubbles. Air
bubbles will cause errors in calibration.
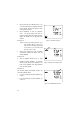
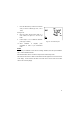
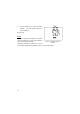
5. Wait for the reading to stabilize. The READY
indicator lights when the reading is stable.
See Figure 13.
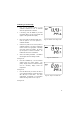
6. Press the CAL/MEAS key. The CAL indicator
appears above the primary display. The
primary display shows the measured reading
and the secondary display shows the
temperature.
See Figure 14.
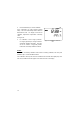
7. Press the V or W key to scroll to the value of
your conductivity standard. Press and hold the
V or W keys to scroll faster. The meter
automatically compensates for temperature
differences using a factor of 2.00 % per °C.
See Figure 15.
Figure 13 - READY when reading is stable
Figure 14- Calibration mode
Figure 15 - Adjust to a standard value