
User Guide
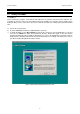
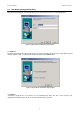
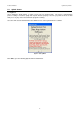
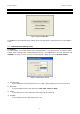
TABLE OF CONTENTS
1 Data Acquisition in Windows Version 1
1.1 The CyberComm DAS Package 1
1.2 System Requirements 1
1.2.1 Setting the Communication Parameters 1
2 Installation of CyberComm Data Acquisition Software (DAS) 2
2.1 Loading of CD-ROM 2
2.2 User Name and Organisation Entry 3
2.3 Splash Screen 4
3 Cybercomm Pro Main Menu 5
3.1 Communication Settings (File) 5
3.2 Data Log Options (File) 6
3.3 Connect to Meter (File) 6
4 Main Window (After connecting Meter to Computer) 7
4.1 CyberComm Pro Manuals (Help) 7
4.1.1 File Options (File) 8
4.1.2 About CyberComm Pro (Help) 8
4.2 Sub menus & Function Icons on the CyberComm Program 9
4.2.1 Function Icons 10
4.2.2 Measurement Mode 12
4.2.3 Show Cursor 12
4.2.4 Information 12
4.2.5 Data Reading 12
4.2.6 Temperature Reading 12
4.2.7 Mode Drop down Menu 12
4.2.8 Store and Recall 13
4.3 To quit CyberComm Program 13
5 Retrieve Recorded Data 14
6 Export Data Readings 16
6.1 Steps to export data readings from CyberComm Professional: 16
6.2 Paste data in Microsoft Word
©
16
6.3 Paste data in Microsoft Excel
©
, WordPad and Notepad 17
7 Print Readings 19
7.1 Printing using a serial printer 19
7.2 Setting Up the Printer 19
7.3 Connecting the Cable to the Computer 19