
User Guide


15
5.6 Setting the Alarm Feature
This menu allows you to change the High and Low Setpoint and
Hysteresis values. See Section 8 for hysteresis applications.
IMPORTANT : When SETUP mode is entered, the 4-20 mA
output (only for transmitter CX model) freezes and the relay de-
activates (if it was in an alarm condition).
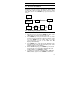
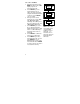
5.6.1 The Hi SET Menu
1. Enter this menu by pressing
MODE key twice to the “SEt”
display if you are in
measurement mode.
2. Press ENTER key. If the
password has been set earlier,
key in the password using the
method described in section
4.1. Press ENTER once to
confirm.
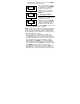
3. After you set the correct
password, you see the “CAL”
and “PH” display blinks
alternately. Press ▼ key twice,
the display shows “Hi” “SEt”
blinking alternately.
1. Press ENTER key to access the
Hi SET menu and the display
shows the last Hi SET value.
Use ▲ and ▼ keys to change
the value of the Hi SET point.
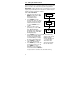
2. Press ENTER to confirm the
value of the Hi SET point.
3. Press MODE key to exit to the
measurement mode. You can
press MODE key (as an
ESCAPE key) to revert to the
measurement value if ENTER is
not pressed; the set value is not stored into memory.
SETUP
MODE
ENTE
R
Hi
SETUP
MODE
ENTE
R
8.5
SETUP
MODE
ENTE
R
SEt
T
E : The Hi SEt relay
activates if the current
pH/ORP reading
exceeds Hi SET point
+ ½ Hi HYS value.
The Hi SET value
cannot be lower than
the Low SET value.