
Instruction manual

Instruction manual αlpha DO 2000
29
6. Selecting the alarm contact type: press the ▲ or ▼ key to select the alarm contact type:
− “STDY” = steady contact
− “FLET” = fleeting (single pulse) contact
Press the ENT key to confirm your selection.
Note: With this parameter you select whether the alarm contact will operate as a
steady contact or a fleeting (single pulse) contact. Pulse contact closing time is 1
second.
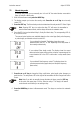
7. Selecting the electrode type: the upper display shows “0-10” or “0-40” and lower display
shows “ELEC”. press the ▲ or ▼ key to select the electrode type:
− “0-10” = 0 to 10 ppm measurement range (low range probe)
− “0-40” = 0.5 to 40 ppm measurement range (high range probe)
− “ELEC” = Electrode or Probe
Note: After each changeover, the factory calibration data for zero point and slope
are overwritten. Be sure to recalibrate (see section 5).
8. Resetting the transmitter settings to factory defaults: The display shows “NO DEF”. Press
the ▲ or ▼ key to select:
− “NO DEF” = keeps old values active, when confirmed with ENT key
− “CAL DEF” = resets all calibrations to factory defaults, when confirmed with ENT key
− “FCT DEF” = resets all settings to factory defaults, when confirmed with ENT key
Press the ENT key. The selected function will be executed and the transmitter returns
automatically to the Measurement mode.
Continue with Setup mode procedures, or return to Measurement mode by pressing the ▲
and ▼ keys simultaneously (escape).
6.10 Calibration (CAL) sub-function
The calibration procedure in Setup mode is identical to the procedure in the Calibration mode
(see section 5). The only difference is that the transmitter remains in Setup mode (instead of
Measurement mode) after calibration is completed.