
Instruction manual

Instruction manual αlpha DO 2000
16
Note: If there is a calibration error, the controller displays “CAL ERR” and exits to the
measurement mode (for direct access calibration mode) or to the setup menu (for
calibration mode accessed via Setup mode).
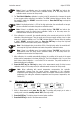
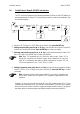
5. For Two-Point Calibration, calibration is carried out at 0% saturation first. Immerse the probe
in zero oxygen solution and allow it to stabilize. The “CAL” indicator flashes at the top. When
the reading is stable, the “READY” annunciator comes on. Press the ENT key to accept the
zero calibration (0%).
Note: If the displayed value is > 10% of the high point value, the controller will not accept
the zero calibration and retains the previous calibration values.
Note: If there is a calibration error, the controller displays “CAL ERR” and exits to the
measurement mode (for direct access calibration mode) or to the setup menu (for
calibration mode accessed via Setup mode).
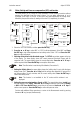
6. If the calibration is successful, the controller switches to the second point, which is the 100%
saturation of dissolved oxygen. Take the probe out of the zero oxygen solution, rinse in clean
water, dry it and then calibrate in air. The “CAL” indicator flashes at the top. When the reading
is stable, “READY” annunciator comes on. Press the ENT key to accept the high-level
calibration (100%) and the status of the probe is displayed.
Note: If the displayed value is not within ±50% of the high point value, the controller will
not accept the high-level calibration and retains the previous calibration values.
Note: If there is a calibration error, the controller displays “CAL ERR” and exits to the
measurement mode (for direct access calibration mode) or to the setup menu (for
calibration mode accessed via Setup mode).
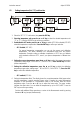
7. After calibration, the controller automatically displays the condition of the probe in the upper
display and the temperature in the lower display (for Two-Point calibration only). You can view
these values without calibration --- see Section 5.4 for instruction. The probe condition is re-
determined after each calibration.
8. Press the ENT key (or CAL key) to return to the measurement mode (for direct access
calibration mode) or to the setup menu (for calibration mode accessed via Setup mode).
Note: When calibrating with manual temperature compensation, the controller
automatically changes from the preset process temperature to the calibration
temperature. After leaving the Calibration mode, the controller switches back to process
temperature (for setting the calibration temperature and the process temperature, see
Section 6.3)
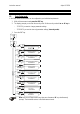
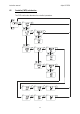
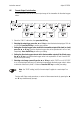
5.4 View actual probe condition
ENT ENT
89.5
89.5
24.5
24.5 24.5
C.CD
1.00
CAL
000
o
C
o
C
CAL
ATC
ATC
%
MEAS
MEAS
%
1. While in Measurement mode press the CAL key. The display will prompt you to enter a
security code. Leave the security code at “000” (view only mode).
2. Press the ENT key. The display shows the actual probe condition.
3. Press the ENT key to return to the Measurement mode.