
User Guide


Operating Manual alpha DO 1000
28
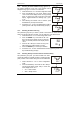
FLEt = fleeting (single pulse) contact
3. Press the ▲ or ▼ keys to select steady or pulse contact.
4. Press the ENTER key to confirm your selection.
5. Proceed to 7.8.5, or return to Measurement mode by pressing the ▲ and
▼ keys simultaneously (escape).
7.8.5 Selecting Dissolved Oxygen Probe Type
Note: After each changeover, the factory calibration data for zero
point and slope are overwritten. Be sure to recalibrate (see
section 6).
This parameter group lets you configure the controller for
low range or high range probes.
1. Follow directions in 7.8.1 to enter Configuration
mode.
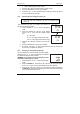
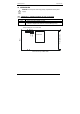
2. Press the ENTER key until the upper display
shows “0-10” or “0-40” and lower display shows
“EL”.
- EL = electrode
- 0-10 = 0 to 10 ppm measurement range
- 0-40 = 0.5 to 40 ppm measurement range
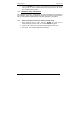
3. Press the ▲ or ▼ keys to select 0-10 or 0-40 ppm
range.
4. Press the ENTER key to confirm your selection.
5. Proceed to 7.8.6 step 3, or return to Measurement mode by pressing the
▲ or ▼ keys simultaneously (escape).
7.8.6 Reverting to Factory Default Settings
Use this parameter to reset all settings to factory default.
Changing from “no” to “YES” and pressing the ENTER
key resets all settings to factory default.
WARNING: If you select yes, all the settings you have
made will be overwritten as a result!
1. Follow directions in 7.8.1 to enter Configuration
mode.
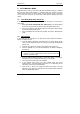
2. Press the ENTER key. Scroll with the ▲ or ▼ keys until the upper display
shows “no” or “YES”, and the lower display shows “deF” (default).
3. Press the ▲ or ▼ keys to select no or yes. Selecting “YES” and pressing
the ENTER key will overwrite all setting you have made and automatically
return you to Measurement mode.
HOLD SETUP
EF
HOLD
HOLD
SETUP
SETUP
0-40
0-10
el
el