
User Guide

Operating Manual alpha DO 1000
23
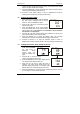
3. Press the ▲ or ▼ keys to select your controller type.
L.Ct = limit value pickup (on/off control).
oFF = controller off.
PLC= pulse length control
PFC= pulse frequency control
4. Press the ENTER key to confirm your selection.
5. Proceed to 7.6.3, or return to Measurement mode by pressing the ▲ and
▼ keys simultaneously (escape).
7.6.3 Choosing Break/Make Contact Relay Type
Note: If the controller type “oFF” is set, the parameters listed in 7.6.3,
7.6.4, and 7.6.5 are blanked out.
This mode lets you determine the relay-state under Non-Alarm condition – dEEN
(de-energised) or EN (energised).
1. Follow directions in 7.6.1 to enter Controller mode.
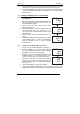
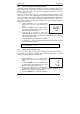
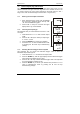
2. Press the ENTER key. Scroll until the lower display
shows “rEL” and the upper display shows the
current selection (de-energised = dEEN or
energised = EN).
3. Press the ▲ or ▼ keys to choose de-energised or
energised relay state.
4. Press the ENTER key to confirm your selection.
5. Continue with Advanced Set-up mode procedures,
or return to Measurement mode by pressing the ▲
and ▼ keys simultaneously (escape).
7.6.4 Selecting Proportional Range Value, Xp
Note: If the controller type “oFF” is set, the parameters listed in 7.6.3,
7.6.4, and 7.6.5 are blanked out.
This mode lets you set a band as a percentage of its full scale value. You can select
this range from 10 to 200%, and the lower display shows “PrP”.
1. Follow directions in 7.6.1 to enter Controller mode.
2. Press the ENTER key. Follow directions in 7.6.2
and select either “PLC” (pulse length control) or
“PFC” (pulse frequency control). Press ENTER key.
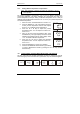
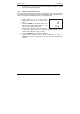
3. Press the ENTER key until the upper display
shows the proportional range (a number from 10 to
200%), and the lower display shows “PrP”.
4. Press the ▲ or ▼ keys to choose the proportional range value Xp.
EL
EL
HOLD
HOLD
SETUP
SETUP
EE
E
HOLD SETUP
100