
Instructions / Assembly


Verify the door unit is square.
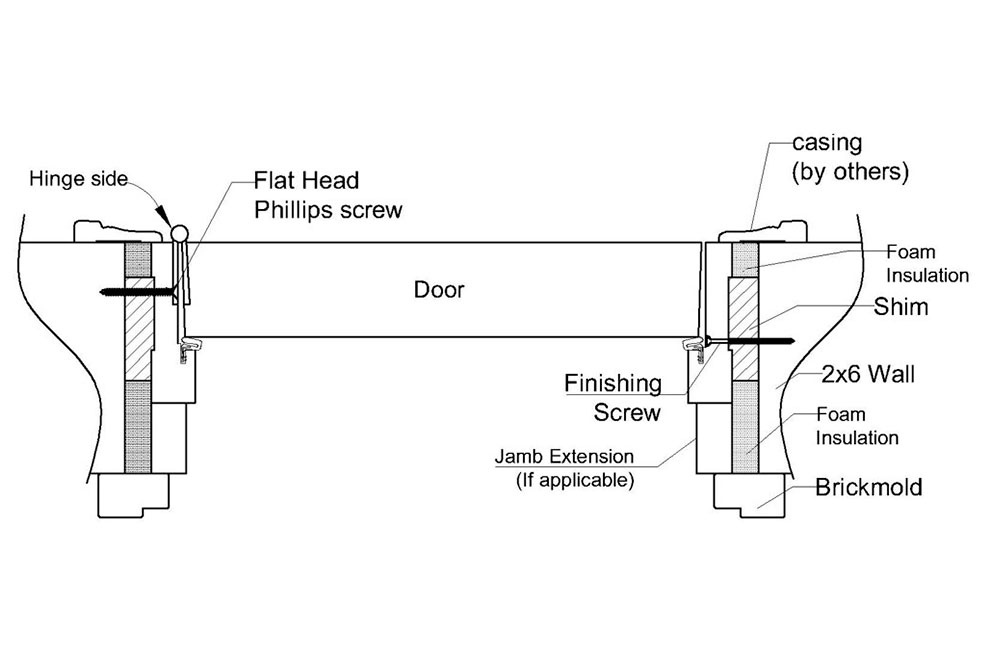
To fasten, tighten the two screws installed earlier.
Test door to make sure the door closes tightly against wheather stripping.
To secure the frame on the hinge side, replace two hinge screws with 3” wood screws on each hinge.
To Secure the frame on the lock side, drive in several 3” finishing screws. For the best apperance, tuck
them behind the wheather stripping so they are not visable after installation.
Important:Drive screw through shims and into the wall stud for maximum strength and stability.
Be sure the door opens freely and that the space between the door and the jamb is even on all sides.
Adjust the threshold with a Phillips screw driver. Use the screws to lift or lower the wooden raiser until
there is even clearence on the bottom of the door.
Insulate the space around the door by applying High Grade Water Resistant Insulation Foam between
frame and rough opening.
Apply Jamb Extension if needed
Finish installtion by applying brickmould to the exterior side of the door. Apply sealant to the back
side of the brickmould before fastening with finishing nails.
Minimize the appearance of finishing nails with touch-up kit
Caulk around the doorway including the front sill edge and along the exterior where it meets the brick
or siding
Step 3 – Adjusting Single Door