
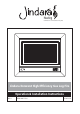
Instruction manual


Installation (Continued)
VERTICAL CHIMNEY FLUE INSTALLATION
1. Connect gas cowl to flexible tubes. The 50mm dia. flexible exhaust tube and the exhaust port at the flue gas
cowl are colour-coded red. Clamp 50mm dia. exhaust flexible tube and 60mm dia. air intake flexible tube to the
flue gas cowl using hose clamps (supplied). (Refer detail above.) Note: Expand both ends of both flexitubes to
allow clamps to firmly secure tubes to outlets.
2. Insert flue gas cowl and attached flexible tubes into weather shield, ensuring the flue gas cowl rests against
the weather shield end. Slide the weather shield over the flue pipe. (Refer detail above.) Affix brackets (x3) to
flue gas cowl and weather shield with rivets supplied (x6).
3. Insert flue assembly into chimney cavity (flexible tubes may need to be expanded to extend to fireplace). Ensure
flexible tubes are free of obstruction.
4. Fix flue weather shield securely to top of chimney and seal to prevent water entry. Seal with high temperature
waterproof sealant prior to cementing to chimney top.
5. Connect 50mm dia. exhaust flexible tube to exhaust terminal on heater body (colour-coded red) and clamp
using hose clamp - smaller diameter (supplied). Connect 60mm dia. flexible tube to remaining heater body
terminal using larger diameter hose clamp.
Installation into an existing fireplace (Vertical Flue Unit)
Jindara AGA
Approved gas cowl
(Supplied by Jindara)
1/2˝ copper pipe
Flashing
(Not
supplied)
Flue
Brackets
(Supplied)
Flue weather
shield (Supplied)
50mm exhaust
flexi tube
(Supplied)
60mm air intake
flexi tube
(Supplied)
4.6 metres
max.
Hose clamps
(Supplied)
Gas Cowl
Derwent High Efficiency Gas Log Fire
8