
Instruction manual


RF Thermostat (Continued)
Teaching RF thermostat ID code to control unit (continued)
4. The 3 LEDs on the front panel will flash once to indicate that the Thermostat ID has been learnt successfully. If the
LEDs do not flash, repeat steps 1 to 3.
5. After the Thermostat ID is successfully learnt by the Receiver/Controller, pressing the <PWR> button on the
Thermostat will switch the Thermostat ON. If the Room temperature is less than the Set temperature, the Flame
symbol will display on the LCD and the Receiver/Controller will initiate the ignition sequence.
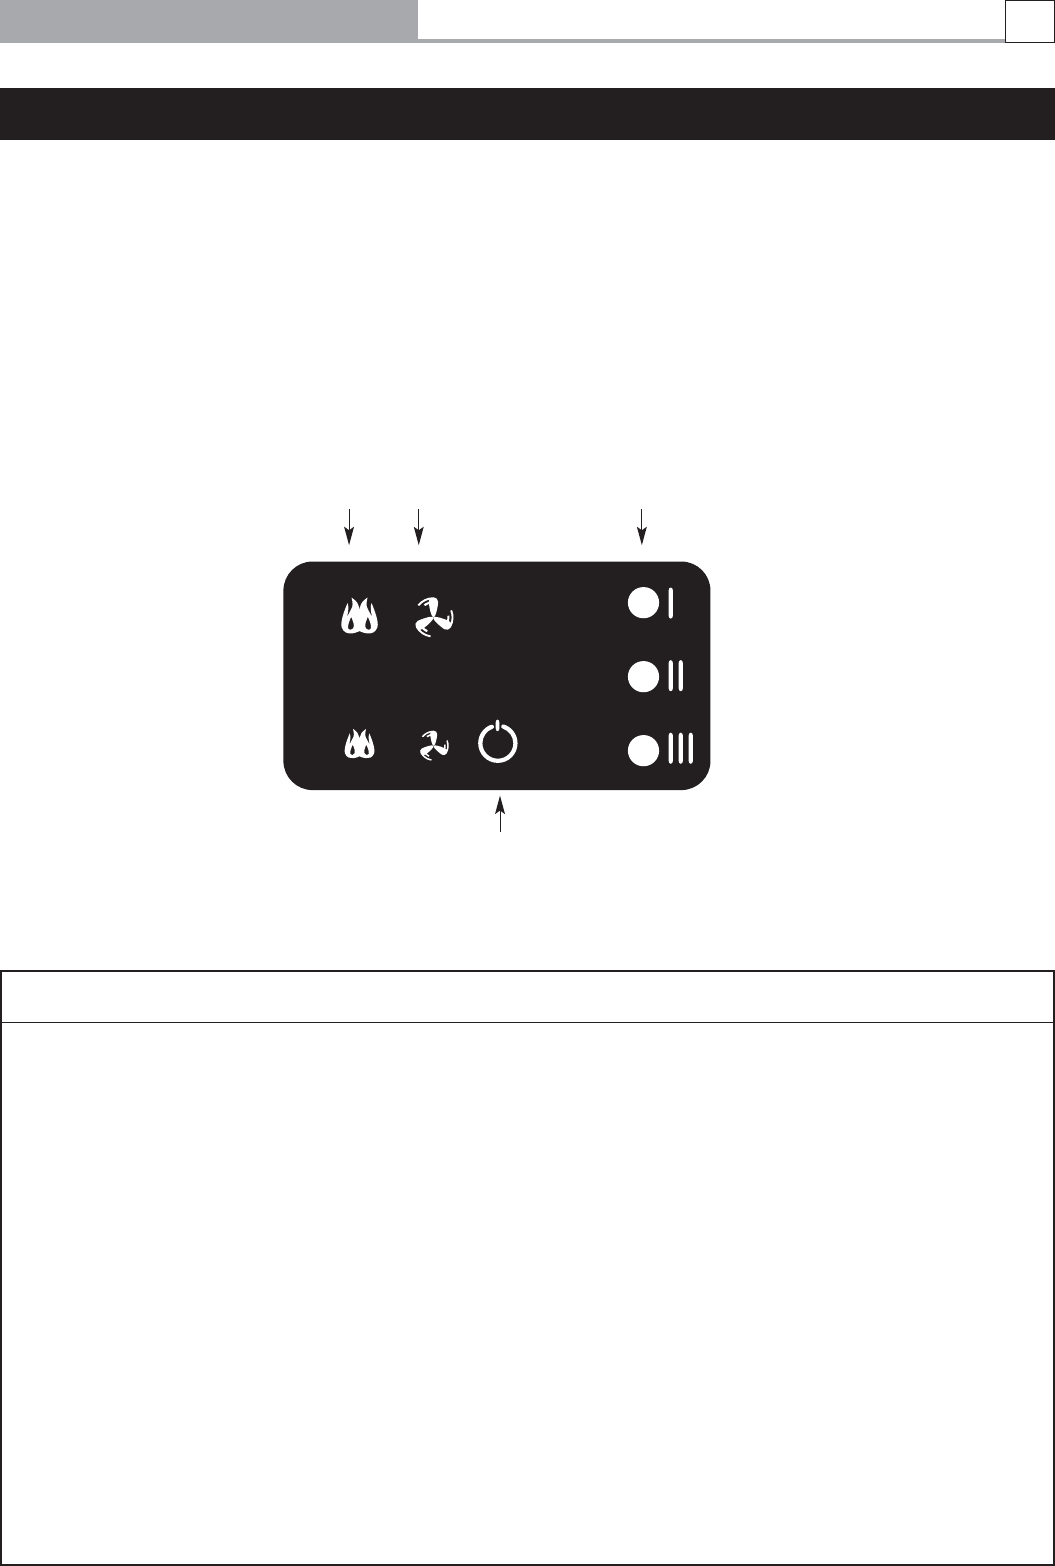
Front PCB Layout
RECEIVER/CONTROLLER
Button or LED Function
• If the Heater is OFF, pressing and releasing this button once will start the Heater.
• The Heater will operate at LOW Flame setting for 2 minutes. After which the Heater
will slowly ramp up the Flame setting to the highest setting over a 70 second
period.
• The Room Fan will remain OFF until the outlet temperature exceeds 50°C, then
start on Low speed and adjust to the settings of the Flame.
• If the Thermostat is within reception range of the Heater and is switched ON, the
Heater will respond to the settings of the Thermostat.
• Likewise if the Thermostat is not within reception range, the Heater will continue to
operate at the manually selected settings.
• If the Heater is ON, pressing and releasing this button once will switch OFF the
Heater.
• The Room Fan will continue to operate until the outlet temperature falls below
40°C i.e. COOL DOWN cycle at which point the Fan will shut down completely.
• The Heater will not respond to any further signals from the Thermostat.
• The Heater can only be switched ON by pressing and releasing the ON/OFF button.
ON/OFF Button
There are five push buttons and three LEDs. Their functions are:
Fan
speed
LED
indicators
Heat
setting
buttons
Fan
speed
setting
buttons
On/Off
Button
Derwent High Efficiency Gas Log Fire
21