
User`s guide
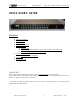


Preliminary Manual RELAY BOX - RB132/GP132 USER’S GUIDE
EUPHONIX INC - RB132/GP132 p8 Wednesday, August 26
th
, 2000
FADER START
1. Connect a MIDI cable from the DSC MIDI OUT (under the Mix Controller) to the GP132
MIDI INPUT.
2. Put the GP132 into Setup mode, using the front panel toggle switch.
3. Select MIDI and SysEx by pressing buttons 1 and 5 on the GP132 front panel.
4. Put the GP132 back to either “Relay Only” mode or “Relay and Tally” mode, using the front
panel toggle switch.
5. Configure the DSC for fader starts. > See page 13-18.
IMPORTANT NOTE: After setup is done, move all faders assigned as the fader start
up and down a couple of times to complete the fader start enable process.
TRACK ARMING (RECORD READY SELECT) FOR MULTI TRACK MACHINES
1. Connect the MIDI cable from the DSC MIDI OUT (under the Mix Controller), to the
GP132's MIDI INPUT.
2. Put the GP132 into Setup mode, using the front panel toggle switch.
3. Select MIDI and MMC by pressing buttons 1 and 2 on the GP132 front panel.
4. To enable Rec ready, press the REC button on the far right side of the DSC, then
press the desired track buttons. > See page 18 for the DSC Record and Track arm keys.
TRACK ARMING (RECORD READY SELECT) WITH THE TT-007
1. Connect a MIDI cable from DSC's MIDI OUT (under the Mix Controller) to the GP132's
MIDI INPUT.
2. Connect another MIDI cable from the GP132's THRU to the TT007's MIDI IN.
3. Connect another MIDI cable from the TT007's MIDI OUT to the DSC's MIDI IN.
4. Select MIDI and MMC by pressing buttons 1 and 2 on the GP132 front panel.
5. To enable Rec ready, press the REC button on the far right side of the DSC, then press the
desired track buttons. > See page 18 for the DSC Record and Track arm keys.
MUTE ON/OFF CONTROLLED BY TALLY SIGNAL
1. Connect a MIDI cable from the MIDI IN port #3 (on the back of the MIDI EXPRESS
interface box), to the GP132’s MIDI output.
2. Select MIDI and N.O. by pressing buttons 1 and 3 on the GP132 front panel.
3. Put GP132 into “ Relay and Tally” mode, using the front panel toggle switch.
4. Configure the DSC to receive MIDI N.O. messages. > See page 10-12.
NOTE: Midi number start from zero, so that Relay 1 of the GP132 is Control number 0, Relay 2 is
control number 1 and so on. Same with the Tally numbers. The control numbers on the CS3000 desk
set-up start from zero. For example, if you want to control mute on the channel 5 from Tally 2
input, enter control number “1” (Tally 2) as the control number for the channel 5 mute. Always
subtract one from the GP132’s front panel number when determining the control number for console
set-up.