
User's Manual


2
II. Hardware Installation
1. Connect the AP RJ45 port to a Ethernet 10BaseT Hub.
2. Connect the power adapter to power source and plug it into power hole of
AP.
III. Software Installation
Following descriptions describe the steps to install the AP Utility
1. Power on the PC and boot it to the windows system
2. Insert the floppy diskette to the floppy driver.
3. Type the “A:\Utility\setup.exe” to start the Installation.
4. Follow the setup wizard to complete the setup process.
IV. Access Point Setup and Configure
After AP Utility is installed, you may start to setup and configure the AP. You
could choose to configure the AP through the Ethernet or WLAN. If you want
to configure the AP by WLAN, you should have a WLAN PC or PCI adapter
installed and associate with the AP in advance. The default SSID of AP is
“WLAN”.
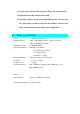
1. Lunch the WLAN AP Utility program from “ Access Point Utility” Folder.
2. Click item “Scan” under the menu item “AP” in the utility program to
search the AP in network.