
User Manual
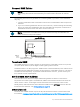
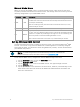
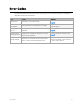
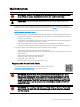
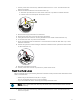
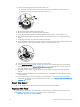

Table Of Contents

Maintenance 17
1. Set the power switch on the HQ-100 Performance Hazer to "OFF" and disconnect the
hazer from power.
2. Detach the haze fluid hose from the tank filter cap.
a. Slide the quick disconnect collar on the tank filter cap down to release the hose.
b. Pull the hose out of the quick disconnect socket.
b
a
3. Remove the empty fluid tank from the hazer.
4. Remove the tank filter cap from the empty fluid tank.
5. Verify that the two hoses are securely attached to the inside of the tank filter cap.
6. Screw the tank filter cap onto a full fluid tank.
7. Place the full fluid tank into the hazer. Orient the tank so that the tank filter cap is near
the haze fluid hose.
8. Attach the quick disconnect fitting on the haze fluid hose to the quick disconnect socket
on the tank filter cap.
9. Reconnect the hazer to power.
10. Set the power switch to the on position to power on the hazer.
Flush the Fluid Lines
We recommend that you periodically flush the fluid lines to help maintain the cleanliness of the
hazer. Flush the lines:
•
After every 10 fluid tanks of use (50L/13gal).
•
Prior to storing the hazer for six or more months.
•
If you use haze fluid that is not the approved HQ-100 Haze Fluid.
Note:
Use of haze fluid other than HQ-100 Haze Fluid is not allowed and will void the
product warranty.
1. Set the power switch on the HQ-100 Performance Hazer to "OFF" and disconnect the
hazer from power.