
Instruction manual
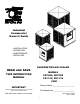


INSTALLATION OF EVAPORATIVE COOLERS
PREPARATION
1. All electrical and duct work must comply with local and federal codes.
2. Make arrangements to get the cooler from ground to roof (crane, hoist, etc.).
LOCATION
1. Cooler should not be mounted near exhaust openings or vent pipes where fumes and odors can be drawn into cooler.
2. Ensure mounting surface is strong enough to support the cooler. Operating weight will be much heavier than shipping
weight.
3. Locate cooler so that fresh air is drawn in; air is not recirculated.
ROOF MOUNT UNITS
1. Select the location, taking into account roof construction and duct requirements. If rafters are cut when the roof
opening is cut, be sure to strengthen them.
2. Purchase or construct a platform to provide a level, mounting surface for the cooler. Always mount the cooler high
enough to allow easy access to the drain fitting.
3. Measure cooler or use the spec sheet to determine size of platform. Platform must be located so that the discharge
opening of the cooler is in line with the ductwork. On pitched roofs, the platform frame may be covered with
galvanized sheet steel or other weatherproof materials. An opening or removable panel must be left to allow access
to the drain fitting. On down discharge coolers the duct should be fastened to the platform collar before cooler is set
in place. The duct should have a standing flange for the cooler discharge opening to fit. Flash and seal the duct and
roof opening to provide weather tightness.
CAUTION: TO AVOID RISK OF FIRE, ELECTRICAL SHOCK, OR SERIOUS PERSONAL INJURY, BE SURE TO
DISCONNECT POWER FROM UNIT BEFORE CLEANING OR SERVICING.
WARNING: TO REDUCE THE RISK OF FIRE OR SHOCK; DO NOT USE THIS FAN WITH ANY SOLID STATE SPEED
CONTROL DEVICE.
DUCT WORK
1. The most important rule to follow when designing duct work is: AN EVAPORATIVE COOLER DEPENDS UPON A
LARGE VOLUME OF AIR COMING OUT OF THE DUCT WORK AT HIGH VELOCITY IN ORDER TO COOL
PROPERLY.
2. Do not “reduce” the discharge opening of the cooler.
3. Do not undersize the duct work and make it much smaller than the discharge opening. (In most cases, air conditioning
duct work is too small for coolers.)
4. Extra long ducts cause static pressure and will reduce airflow. They also pick up heat and diminish the effect of the
cooled air.
5. The motor pulley may be adjusted to compensate for ductwork.
6. Sharp or abrupt bends hinder airflow.
7. Poorly designed ceiling diffusers will ruin a successful installation. Install diffusers that are designed for use with
evaporative coolers.
MOTOR INSTALLATION
After cooler is in place and level, remove the motor from the box
and inspect for shipping damage. Ensure that the motor voltage,
phase and horsepower are correct. Mount motor on motor mount
as shown.
CS75/85, CD75/85
Secure motor to mount using the mounting straps provided. When
using motors with a 143T or 145T frame, remove the yolks from the
motor mount and bolt
the motor to the motor mount using the slots
provided.
CS11/16, CD11/16 & CD21
Mount the motor using the slots that align the motor pulley and blower pulley.
BELT ADJUSTMENT
An improperly adjusted belt will greatly shorten motor life. A deflection of ¾” with finger
force will indicate proper adjustment. (Figure 1)
Do not use the motor pulley to adjust belt tension.
Always use the motor mount to adjust the belt. (Figure 1)
2