
Installation manual


12
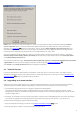
a) Open Advanced setup tree by pressing F5 key, navigate to Server protection > Antispam protection >
Antispam engine and click on Clicking on Setup... button. This will open Antispam engine setup window.
From drop-down menu Configuration select Custom, then click on Open configuration file link. This will
open spamcatcher.conf file in notepad (or other default plain text editor). Use Save As... to save the file to
your chosen folder (you can use the same folder you've used to export the configuration to in step 1.).
b) Navigate to C:\Documents and Settings\All Users\Application Data\ESET\ESET Mail Security\ServerAntispam in
Windows Server 2000 and 2003, and for Windows Server 2008, 2008 R2 navigate to C:
\ProgramData\ESET\ESET Mail Security\ServerAntispam and copy spamcatcher.conf file to your chosen folder.
3. Backup approvedsenders and blockedsenders files the same way as described in step 2. b)
4. Uninstall previous version of ESET security product.
5. Download and install latest version of ESET Mail Security. You can also use automatic deployment in a network
environment by means of ESET Remote Administrator, however the configuration restore described in next
steps still need to be done manually.
6. Replace the spamcatcher.conf, approvedsenders and blockedsenders files with those you have saved in step 2 and step
3. This will restore all the antispam settings including Allowed, Ignored and Blocked IP address lists, Approved
and Blocked senders, etc.
7. Import configuration/settings from previously saved xml file in step 1, using the Import and export settings
feature.
By completing the steps above, you should have new version of ESET Mail Security installed on your system with
your previous custom configuration. This means that you don't have to configure everything from scratch.
2.5 Installation in a clustered environment
A cluster is a group of servers (a server connected to a cluster is called a "node") that work together as a single
server. This type of environment provides high accessibility and reliability of available services. If one of the nodes in
the cluster fails or becomes inaccessible, its functioning is automatically covered by another node in the cluster.
ESET Mail Security fully supports Microsoft Exchange Servers connected in a cluster. In order for ESET Mail Security
to function properly, it is important that each node in a cluster contains the same configuration. This can be
achieved by applying a policy using ESET Remote Administrator (ERA). In the following chapters we will describe
how to install and configure ESET Mail Security on servers in a clustered environment using ERA.
Installation
This chapter explains the push installation method; however this is not the only way to install a product on the
target computer. For information on additional installation methods, refer to the ESET Remote Administrator User
Guide.
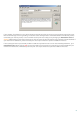
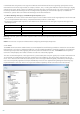
1) Download the ESET Mail Security msi installation package from the ESET website to the computer where ERA is
installed. In ERA > Remote Install tab > Computers, right-click on any computer from the list and choose Manage
Packages from the context menu. In the Type drop-down menu, select ESET Security Products package and click
Add... In the Source, locate the downloaded ESET Mail Security installation package and click Create.
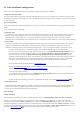
2) In Edit/Select configuration associated with this package, click Edit and configure the settings of ESET Mail
Security according to your needs. ESET Mail Security settings are in the following branches: ESET Smart Security,
ESET NOD32 Antivirus > Mail server protection and Mail server protection for Microsoft Exchange Server. You
may also set the parameters of other modules included in ESET Mail Security (e.g., Update module, Computer scan,
etc.). We recommend exporting configured settings into an xml file which you can later use, e.g. when creating
installation package, applying Configuration Task or a Policy.
3) Click Close. In the next dialog window (Do you want to save the package into server?) select Yes and type the
name of the installation package. The finished installation package (including name and configuration) will be
saved on the server. Most frequently, this package is used for a Push Installation, but it is also possible to save it as
a standard msi installation package and use it for a direct installation on the server (in the Installation Packages
Editor > Save As...).
108