ESET MAIL SECURITY FOR MICROSOFT EXCHANGE SERVER Installation Manual and User Guide Microsoft® Windows® Server 2000 / 2003 / 2008 / 2008 R2 Click here to download the most recent version of this document
ESET MAIL SECURITY Copyright ©2012 by ESET, spol. s r.o. ESET Mail Security was developed by ESET, spol. s r.o. For more information visit www.eset.com. All rights reserved. No part of this documentation may be reproduced, stored in a retrieval system or transmitted in any form or by any means, electronic, mechanical, photocopying, recording, scanning, or otherwise without permission in writing from the author. ESET, spol. s r.o.
Contents 1. Introduction ..................................................5 1.1 What's ........................................................................5 new in version 4.3 ? 3.4 FAQ........................................................................45 4. ESET..................................................48 Mail Security - Server protection 4.1 Antivirus ........................................................................48 and antispyware protection 1.2 System ......................
.6.2 4.6.2.1 4.6.2.2 4.6.2.2.1 4.6.2.3 4.6.3 4.6.4 4.6.4.1 4.6.4.2 4.6.4.3 4.6.5 4.6.6 User ...........................................................................90 Interface and application usage Program ..........................................................................91 Controls Navigating ..........................................................................92 in ESET SysInspector Keyboard ............................................................................
1. Introduction ESET Mail Security 4 for Microsoft Exchange Server is an integrated solution that protects mailboxes from various types of malware content including email attachments infected by worms or trojans, documents containing harmful scripts, phishing and spam. ESET Mail Security provides three types of protection: Antivirus, Antispam and the application of user-defined rules.
1.3 Methods used Two independent methods are used to scan email messages: Mailbox scanning via VSAPI 6 Message filtering on the SMTP server level 6 1.3.1 Mailbox scanning via VSAPI The mailbox scanning process is triggered and controlled by the Microsoft Exchange Server. Emails in the Microsoft Exchange Server store database are scanned continuously.
1.4.3 Application of user-defined rules Protection based on user-defined rules is available for scanning with both the VSAPI and the transport agent. You can use the ESET Mail Security user interface to create individual rules that may also be combined. If one rule uses multiple conditions, the conditions will be linked using the logical operator AND. Consequently, the rule will be executed only if all its conditions are fullfilled.
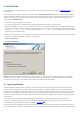
2. Installation After purchasing ESET Mail Security, the installer can be downloaded from ESET’s website (www.eset.com) as an . msi package. Please note that you need to execute the installer under Built-in Administrator account. Any other user, despite being a member of Administrators group, will not have sufficient access rights. Therefore you need to use Built-in Administrator account, as you will not be able to successfully complete the installation under any other user account than Administrator.
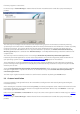
from the program at a later time. In the next step - License Manager - Add the license file that was delivered via email after you purchased your product. The next step is to configure the ThreatSense.Net Early Warning System. The ThreatSense.Net Early Warning System helps ensure that ESET is immediately and continuously informed about new infiltrations in order to quickly protect its customers.
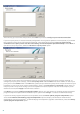
After entering your username and password, click Next to proceed to Configure your Internet connection. If you use a proxy server, it must be correctly configured for virus signature updates to work correctly. If you would like to have the proxy server configured automatically, select the default setting I am unsure if my Internet connection uses a proxy server. Use the same settings as Internet Explorer (Recommended) and click Next.
NOTE: After a program component update, a restart is usually required. We recommend selecting the Never restart computer option. The latest component updates will come into effect after the next server restart (whether it is scheduled 78 , manual or otherwise). You can choose Offer computer restart if necessary if you would like to be reminded to restart the server after the components were updated.
a) Open Advanced setup tree by pressing F5 key, navigate to Server protection > Antispam protection > Antispam engine and click on Clicking on Setup... button. This will open Antispam engine setup window. From drop-down menu Configuration select Custom, then click on Open configuration file link. This will open spamcatcher.conf file in notepad (or other default plain text editor). Use Save As...
4) Now that the installation package is ready, you can initiate the remote installation on the nodes within a cluster. In the ERA > Remote Install tab > Computers, select the nodes on which you want to install ESET Mail Security (Ctrl + Left-click or Shift + Left-click). Right-click on any of selected computers and select Push Installation from the context menu. Using the Set / Set All buttons, set the Username and Password of a user on the target computer (this must be a user with administrator rights).
2.6 License A very important step is to enter the license file for ESET Mail Security for Microsoft Exchange Server. Without it, email protection on the Microsoft Exchange Server will not work properly. If you do not add the license file during installation, you can do so later in the advanced settings, under Miscellaneous > Licenses. ESET Mail Security allows you to use several licenses simultaneously by merging them, as is described in the following: 1) Two or more licenses of one customer (i.e.
If the number of mailboxes in your active directory exceeds your license count a message will be entered into your Microsoft Exchange Server log reading, "Protection status changed due to exceeded number of mailboxes (count) covered by your license (count)." Your ESET Mail Security will also notify you by changing its Protection status to orange and displaying a message informing you that you have 42 days left before your protection will be disabled.
2.7 Post-Installation Configuration There are several options that have to be configured after the product installation. Antispam protection setup This section describes the settings, methods and techniques you can use to protect your network from spam. We recommend reading the following instructions carefully before choosing the most suitable combination of settings for your network.
Before starting full operation, we recommend that you manually configure the lists of restricted and allowed IP addresses. To do so: 1) Open the Advanced settings window and navigate to the section Antispam protection. Make sure to check the Enable antispam server protection field. 2) Navigate to the section Antispam Engine. 3) Click the Setup... button to set Allowed, Ignored and Blocked IP addresses lists. The Blocked IP addresses tab contains the list of restricted IP addresses, i.e.
Let's say you have a server with 4 physical CPUs. For the best performance, according to formula above, you should have 9 scan threads and 9 scan engines. NOTE: Acceptable value is 1-20, so the maximum number of ThreatSense scan engines you can use is 20. The change will be applied only after restart. NOTE: We recommend that you set the number of scan threads equal to the number of ThreatSense scan engines used. It will have no effect on performance if you use more scan threads than scan engines.
3. ESET Mail Security - Microsoft Exchange Server protection ESET Mail Security provides significant protection for your Microsoft Exchange Server. There are three essential types of protection: Antivirus, Antispam and the application of user-defined rules. ESET Mail Security protects from various types of malware content, including email attachments infected by worms or trojans, documents containing harmful scripts, phishing and spam.
normalized value assigned to a message that indicates the likelihood of the message being spam (based on the characteristics of the message header, its subject, content, etc.). A rating of 0 indicates that the message is highly unlikely to be spam, while a rating of 9 indicates that the message is very likely spam. SCL values can be processed further by the Microsoft Exchange Server's Intelligent Message Filter (or Content Filter Agent).
Add... - adds a new rule Edit... - modifies an existing rule Remove - removes a selected rule Clear - clears the rule counter (the Number column) Move up - moves a selected rule up in the list Move down - moves a selected rule down in the list Unchecking a check box (to the left of each rule name) deactivates current rule. This allows for the rule to be reactivated again if needed. NOTE: You can also use system variables (e.g., %PATHEXT%) when configuring Rules.
By email recipient: “J.Smith” or “smith@mail.com” By email subject: “” By attachment name: “.com” OR “.exe” By email body: (“free” OR “lottery”) AND (“win” OR “buy”) 3.1.2.2 Actions taken when applying rules This section allows you to select actions to take with messages and/or attachments matching conditions defined in rules. You can take no action, mark the message as if it contained a threat/spam or delete the whole message.
3.1.3 Log files Log files settings let you choose how the log file will be assembled. More detailed protocol can contain more information, but it may slow down server's performance. If Synchronized writing without using cache is enabled, all the log entries will be immediately written in the log file without being stored in the log cache.
3.1.4 Message quarantine The Message quarantine is a special mailbox defined by the system administrator to store potentially infected messages and SPAM. Messages stored in quarantine can be analyzed or cleaned later using a newer virus signature database. There are two types of message quarantine systems that can be used. One option is to use the Microsoft Exchange quarantine system (this applies only to Microsoft Exchange Server 2007/2010).
Message quarantine by recipient - by using this option, you can define message quarantine mailboxes for multiple recipients. Every quarantine rule can be enabled or disabled by checking or unchecking the check box in its row. Add... - you can add a new quarantine rule by entering the desired recipient's email address and the quarantine email address to which mail will be forwarded Edit...
3.2 Antivirus and antispyware settings You can enable antivirus and antispyware mail server protection by selecting the Enable antivirus and antispyware server protection option. Note that antivirus and antispyware protection is turned on automatically after every restart of the service/computer. ThreatSense engine parameter setup is accessible by clicking on the Setup… button. 3.2.
3.2.1.1 Virus-Scanning Application Programming Interface (VSAPI) Microsoft Exchange Server provides a mechanism to make sure that every message component is scanned against the current virus signature database. If a message was not previously scanned, its corresponding components are submitted to the scanner before the message is released to the client. Every supported version of Microsoft Exchange Server (5.5/2000/2003/2007/2010) offers a different version of VSAPI. 3.2.1.1.1 Microsoft Exchange Server 5.
Server decides whether a background scan will run or not, based on various factors, such as the current system load, the number of active users, etc. Microsoft Exchange Server keeps a record of scanned messages and the virus signature database version used. If you are opening a message that has not been scanned by the most current virus signature database, Microsoft Exchange Server sends the message to ESET Mail Security to be scanned before opening the message in your email client.
3.2.1.1.3 Microsoft Exchange Server 2003 (VSAPI 2.5) This version of Microsoft Exchange Server includes VSAPI version 2.5. If you uncheck the Enable antivirus and antispyware VSAPI 2.5 protection option, the ESET Mail Security plug-in for Exchange server will not get unloaded from the Microsoft Exchange server process. It will only pass through the messages without scanning for viruses. The messages however, will still be scanned for spam 36 and the rules 20 will be applied.
You can set Attachment deletion method to: Truncate file to zero length – ESET Mail Security truncates the attachment to zero size and lets the recipient see the attachment file name and type Replace attachment with action information – ESET Mail Security replaces the infected file with a virus protocol or rule description Delete whole message – delete the entire message, including attachments; you can set what action should be performed when deleting attachments By clicking the Rescan button you will run a
Enabling the Scan RTF message bodies option activates scanning of RTF message bodies. RTF message bodies may contain macro viruses. NOTE: Plain text email bodies are not scanned by VSAPI. 3.2.1.1.4.1 Actions In this section you can specify the actions to be performed when a message and/or attachment is evaluated as infected. The Action to take if cleaning not possible field allows you to Block infected content, Delete object - infected content of the message, Delete whole message or take No action.
3.2.1.1.5 Transport Agent In this section you can enable or disable antivirus and antispyware protection by the transport agent. For Microsoft Exchange Server 2007 and higher it is only possible to install a transport agent if the server is in one of the two roles: Edge Transport or Hub Transport. If there is a message that cannot be cleaned, it will be processed according to the settings in Transport agent section. The message can be deleted, sent to the quarantine mailbox or retained.
3.2.2 Actions In this section you can choose to append a scan task ID and/or scan result information to the header of scanned messages. 3.2.3 Alerts and notifications ESET Mail Security allows you to append text to the original subject or body of infected messages.
Add to the body of scanned messages: offers three options: Do not append to messages Append to infected messages only Append to all scanned messages By enabling Add to the subject of infected messages, ESET Mail Security will append a notification tag to the email subject with the value defined in the Template added to the subject of infected messages text field (by default [virus %VIRUSNAME%]).
3.3 Antispam protection In the Antispam protection section, you can enable or disable spam protection for the installed mail server, configure antispam engine parameters and set other levels of protection. NOTE: It is necessary that the Antispam database is being updated regularly in order for the Antispam module to provide the best possible protection.
3.3.1 Microsoft Exchange Server 3.3.1.1 Transport Agent In this section you can set up options for spam protection using the transport agent. NOTE: The transport agent is not available in Microsoft Exchange Server 5.5.
Example of SMTP response message: Primary response code Complementary status code Description 451 4.7.1 Requested action aborted: local error in processing Warning: Incorrect syntax in SMTP response codes may lead to malfunctioning of greylisting protection. As a result, spam messages may be delivered to clients or messages may not be delivered at all. Time limit for the initial connection denial (min.
3.3.2.1 Antispam engine parameter setup Antispam engine parameter setup You can select a profile from a set of pre-configured profiles (Recommended, Most accurate, Fastest, Custom). The list of profiles loads from the antispam module. For each of the profiles mentioned, different specific settings are loaded from the spamcatcher.conf file and another specific subset of settings is loaded directly from the program, again, different for each of the individual profiles.
In the Allowed IP addresses tab you can specify IPs that should be approved, i.e., if the first non-ignored IP in Received headers matches any address in this list, the message scores 0 and no other checks are made. In the Ignored IP addresses tab you can specify IPs that should be ignored during Real-time Blackhole List (RBL) checks. You should include all internal IP addresses within the firewall not directly accessible from the Internet.
Microsoft Exchange 2007/2010 - list of allowed and ignored IP addresses in the ESET Mail Security settings - list of Safe-senders for a given recipient - the AntispamBypassEnabled option for a given mailbox - list of allowed IP addresses in Microsoft Exchange - the AntispamBypassEnabled option for a given SMTP connection Possibilities of application of whitelisting for antispam General - list of allowed IP addresses in the ESET Mail Security settings - list of mail domains in the approvedsenders file - fi
ignored_ip_list List of ignored IP addresses. There's no need to add the list to the spamcatcher.conf file. You can define it in the GUI of the program (see chapter Antispam engine parameter setup 38 ). rbl_list List of Realtime Blackhole servers to be used when evaluating messages. The RBL request checks for presence of a specific IP address on a given RBL server. Subject to these checks are IP addresses in the Received: sections in the mail header.
of the program (see chapter Antispam engine parameter setup dnsbl_list 38 ). List of DNSBL servers to be used in checks of domains and IP adrresses in the email body. Format of entry is as follows: dnsbl_list=server:response:offset,server2:response2:offset2,... Meaning parameters used: 1) server - DNSBL server name 2) response - DNSBL server response if IP address/domain was found (standard responses are 127.0.0.2, 127.0.0.3, 127.0.0.4., etc.).
Type - can have the following values: SPAM, PHISH, BOUNCE, ADULT, FRAUD. If you enter other value that those listed above, the SPAM value will be used automatically. SPAM defines phrases that occur in classical spam messages (offers of goods and services). PHISH are phrases occurring in fraudulent messages (phishing), that are aimed at extraction of confidential data (names, passwords, credit card numbers, etc.) from users.
negatively influence the performance (delays during message evaluation). spf_list This option allows you to assign importance to a specific SPF entry, thus influencing the overall spam score of a message. spf_*_weight The asterisk represents 14 possible SPF validation results (see spamcatcher.conf for more details). The value entered for this parameter is an offset, that is then applied to the spam score according to individual result types.
3.4 FAQ Q: After installing EMSX with Antispam, emails stopped being delivered into mailboxes. A: If Greylisting is enabled, this is normal behavior. In the first hours of full operation emails may arrive with several hours of delay. If the issue continues for a longer period, we recommend you turn off (or reconfigure) Greylisting.
Q: Is ESET Mail Security 4 for Microsoft Exchange Server compatible with Intelligent Message Filter? A: Yes, ESET Mail Security 4 for Microsoft Exchange Server (EMSX) is compatible with Intelligent Message Filter (IMF). The processing of emails in the case that message is evaluated as spam is as follows: - If ESET Mail Security Antispam has the Delete message (or Quarantine message) option enabled the action will be executed regardless of the action set in Microsoft Exchange IMF.
Q: Users download messages to their email clients via POP3 (bypassing Microsoft Exchange server), but the mailboxes are stored on Microsoft Exchange Server. Will these emails be subject to antivirus and antispam scanning by ESET Mail Security? A: In this type of configuration ESET Mail Security will scan the emails stored on the Microsoft Exchange Server only for the presence of viruses (via VSAPI). Antispam scanning will not be realized as this requires an SMTP server.
4. ESET Mail Security - Server protection While providing Microsoft Exchange Server protection, ESET Mail Security has all of the necessary tools to ensure protection of the server itself (resident shield, web-access protection, email client protection and antispam). 4.1 Antivirus and antispyware protection Antivirus protection guards against malicious system attacks by controlling file, email and Internet communication.
4.1.1.1.1 Media to scan By default, all types of media are scanned for potential threats. Local drives – Controls all system hard drives Removable media – Diskettes, USB storage devices, etc. Network drives – Scans all mapped drives We recommend that you keep the default settings and only modify them in specific cases, such as when scanning certain media significantly slows data transfers. 4.1.1.1.2 Scan on (Event-triggered scanning) By default, all files are scanned upon opening, creation or execution.
4.1.1.3 When to modify real-time protection configuration Real-time protection is the most essential component of maintaining a secure system. Therefore, please be careful when modifying its parameters. We recommend that you only modify its parameters in specific cases. For example, if there is a conflict with a certain application or real-time scanner of another antivirus program.
If Real-time protection does not detect and clean infiltrations Make sure that no other antivirus programs are installed on your computer. If two real-time protection shields are enabled at the same time, they may conflict with each other. We recommend that you uninstall any other antivirus programs on your system.
4.1.2.1.1 Compatibility Certain email programs may experience problems with POP3 filtering (e.g., if receiving messages with a slow Internet connection, timeouts may occur due to checking). If this is the case, try modifying the way control is performed. Decreasing the control level may improve the speed of the cleaning process. To adjust the control level of POP3 filtering, from the Advanced Setup tree, navigate to Antivirus and antispyware > Email protection > POP3, POP3s > Compatibility.
4.1.2.2 Integration with email clients Integration of ESET Mail Security with email clients increases the level of active protection against malicious code in email messages. If your email client is supported, this integration can be enabled in ESET Mail Security. If integration is activated, the ESET Mail Security Antispam toolbar is inserted directly into the email client, allowing for more efficient email protection.
4.1.2.2.1 Appending tag messages to email body Each email scanned by ESET Mail Security can be marked by appending a tag message to the subject or email body. This feature increases the level of credibility for the recipient and if an infiltration is detected, it provides valuable information about the threat level of a given email or sender. The options for this functionality are available through Advanced setup > Antivirus and antispyware > Email client protection.
4.1.3 Web access protection Internet connectivity is a standard feature in a personal computer. Unfortunately, it has also become the main medium for transferring malicious code. Because of this, it is essential that you carefully consider your Web access protection. We strongly recommend that the Enable web access antivirus and antispyware protection option is selected. This option is located in Advanced Setup (F5) > Antivirus and antispyware > Web access protection. 4.1.3.
4.1.3.1.1 Address management This section enables you to specify HTTP addresses to block, allow or exclude from checking. The buttons Add..., Edit..., Remove and Export... are used to manage the lists of addresses. Websites in the list of blocked addresses will not be accessible. Websites in the list of excluded addresses are accessed without being scanned for malicious code.
4.1.3.1.2 Active mode ESET Mail Security also contains the Web browsers feature, which allows you to define whether the given application is a browser or not. If an application is marked as a browser, all communication from this application is monitored regardless of the port numbers involved. The Web browsers feature complements the HTTP checking feature, as HTTP checking only takes place on predefined ports. However, many Internet services utilize changing or unknown port numbers.
Active mode is useful because it examines transferred data as a whole. If it is not enabled, communication of applications is monitored gradually in batches. This decreases the effectiveness of the data verification process, but also provides higher compatibility for listed applications. If no problems occur while using it, we recommend that you enable active checking mode by selecting the checkbox next to the desired application. 4.1.
4.1.4.1 Type of scan Two types of On-demand computer scan are available. Smart scan quickly scans the system with no need for further configuration of the scan parameters. Custom scan… allows you to select any of the predefined scan profiles, as well as choose specific scan targets. 4.1.4.1.1 Smart scan Smart scan allows you to quickly launch a computer scan and clean infected files with no need for user intervention. Its main advantages are easy operation with no detailed scanning configuration.
4.1.4.2 Scan targets The Scan targets drop-down menu allows you to select files, folders and devices (disks) to be scanned for viruses.
4.1.5 Performance In this section, you can set the number of ThreatSense scan engines that will be used for virus scanning. More ThreatSense scan engines on multiprocessor machines can increase the scanning rate. Acceptable value is 1-20.
Block communication that uses the certificate – Terminates connection to the site that uses the certificate. 4.1.6.1.1 Trusted certificates In addition to the integrated Trusted Root Certification Authorities store where ESET Mail Security stores trusted certificates, you can create a custom list of trusted certificates that can be viewed in Advanced Setup (F5) > Protocol filtering > SSL > Certificates > Trusted certificates. 4.1.6.1.
4.1.7.1 Objects setup The Objects section allows you to define which computer components and files will be scanned for infiltrations. Operating memory – Scans for threats that attack the operating memory of the system. Boot sectors – Scans boot sectors for the presence of viruses in the master boot record. Files – Provides scanning for all common file types (programs, pictures, audio, video files, database files, etc.). Email files – Scans special files where email messages are contained.
Potentially unsafe applications – Potentially unsafe applications is the classification used for commercial, legitimate software. It includes programs such as remote access tools, which is why this option is disabled by default. 4.1.7.3 Cleaning The cleaning settings determine the behavior of the scanner during the cleaning of infected files. There are 3 levels of cleaning: No cleaning – Infected files are not cleaned automatically.
4.1.7.4 Extensions An extension is part of the file name delimited by a period. The extension defines the type and content of the file. This section of the ThreatSense parameter setup lets you define the types of files to scan. By default, all files are scanned regardless of their extension. Any extension can be added to the list of files excluded from scanning. If the Scan all files option is deselected, the list changes to show all currently scanned file extensions.
4.1.7.6 Other Scan alternate data streams (ADS) – Alternate data streams (ADS) used by the NTFS file system are file and folder associations which are invisible from ordinary scanning techniques. Many infiltrations try to avoid detection by disguising themselves as alternative data streams. Run background scans with low priority – Each scanning sequence consumes a certain amount of system resources.
If an infected file is “locked“ or in use by a system process, it will usually only be deleted after it is released (normally after a system restart). Deleting files in archives – In the Default cleaning mode, the entire archive will be deleted only if it contains infected files and no clean files. In other words, archives are not deleted if they also contain harmless clean files.
NOTE: The username and password are provided by ESET after purchasing ESET Mail Security.
4.2.1 Update setup The update setup section specifies update source information such as the update servers and authentication data for these servers. By default, the Update server drop-down menu is set to Choose automatically to ensure that update files will automatically download from the ESET server with the least network traffic. The update setup options are available from the Advanced Setup tree (F5 key), under Update.
4.2.1.1 Update profiles Update profiles can be created for various update configurations and tasks. Creating update profiles is especially useful for mobile users, who can create an alternative profile for Internet connection properties that regularly change. The Selected profile drop-down menu displays the currently selected profile, set to My profile by default. To create a new profile, click the Profiles... button and then click the Add... button and enter your own Profile name.
4.2.1.2.1 Update mode The Update mode tab contains options related to the program component update. In the Program component update section, three options are available: Never update program components: New program component updates will not be downloaded. Always update program components: New program component updates will occur automatically. Ask before downloading program components: The default option. You will be prompted to confirm or refuse program component updates when they are available.
4.2.1.2.2 Proxy server In ESET Mail Security, proxy server setup is available in two different sections within the Advanced Setup tree. First, proxy server settings can be configured under Miscellaneous > Proxy server. Specifying the proxy server at this level defines global proxy server settings for all of ESET Mail Security. Parameters here will be used by all modules requiring connection to the Internet.
Select the Do not use proxy server option to specify that no proxy server will be used to update ESET Mail Security. The Connection through a proxy server option should be selected if a proxy server should be used to update ESET Mail Security and is different from the proxy server specified in the global settings (Miscellaneous > Proxy server). If so, the settings should be specified here: Proxy server address, communication Port, plus Username and Password for the proxy server, if required.
4.2.1.2.3 Connecting to the LAN When updating from a local server with an NT-based operating system, authentication for each network connection is required by default. In most cases, a local system account does not have sufficient rights to access the Mirror folder (the Mirror folder contains copies of update files). If this is the case, enter the username and password in the update setup section, or specify an existing account under which the program will access the update server (Mirror).
4.2.1.2.4 Creating update copies - Mirror ESET Mail Security allows you to create copies of update files which can be used to update other workstations located in the network. Updating client workstations from a Mirror optimizes network load balance and saves Internet connection bandwidth. Configuration options for the local Mirror server are accessible (after adding a valid license key in the license manager, located in the ESET Mail Security Advanced Setup section) in the Advanced update setup: section.
4.2.1.2.4.1 Updating from the Mirror There are two basic methods of configuring the Mirror – the folder with update files can be presented as a shared network folder or as an HTTP server. Accessing the Mirror using an internal HTTP server This configuration is the default, specified in the predefined program configuration. In order to allow access to the Mirror using the HTTP server, navigate to Advance update setup (the Mirror tab) and select the Create update mirror option.
the other computer. To specify authentication data, open ESET Mail Security Advanced Setup (F5) and click the Update branch. Click the Setup... button and then click the LAN tab. This setting is the same as for updating, as described in section Connecting to LAN 74 . After the Mirror configuration is complete, proceed to the workstations and set \\UNC\PATH as the update server. This operation can be completed using the following steps: Open ESET Mail Security Advanced Setup and click Update Click Edit...
4.3 Scheduler Scheduler is available if Advanced mode in ESET Mail Security is activated. Scheduler can be found in the ESET Mail Security main menu under Tools. Scheduler contains a list of all scheduled tasks and configuration properties such as the predefined date, time, and scanning profile used.
4.3.2 Creating new tasks To create a new task in Scheduler, click the Add... button or right-click and select Add... from the context menu. Five types of scheduled tasks are available: Run external application System startup file check Create a computer status snapshot On-demand computer scan Update Since Update is one of the most frequently used scheduled tasks, we will explain how to add a new update task. From the Scheduled task: drop-down menu, select Update.
4.4 Quarantine The main task of quarantine is to safely store infected files. Files should be quarantined if they cannot be cleaned, if it is not safe or advisable to delete them, or if they are being falsely detected by ESET Mail Security. You can choose to quarantine any file. This is advisable if a file behaves suspiciously but is not detected by the antivirus scanner. Quarantined files can be submitted for analysis to ESET’s Threat Lab.
4.4.3 Submitting file from Quarantine If you have quarantined a suspicious file that was not detected by the program, or if a file was incorrectly evaluated as infected (e.g., by heuristic analysis of the code) and subsequently quarantined, please send the file to ESET‘s Threat Lab. To submit a file from quarantine, right-click the file and select Submit for analysis from the context menu.
4.5 Log files Logs store information about important events: detected infiltrations, logs from the on-demand scanner, logs from the resident scanners and system information. Antispam and greylisting protection logs (found under other logs under Tools > Log files) contain detailed information about messages that were subject to scanning and the consequent actions performed on those messages. Logs can be very useful when looking for undelivered email, trying to figure why a message was marked as spam, etc.
Antispam All messages categorized by the ESET Mail Security as spam or probable spam are recorded here. Columns description: Time – time of entry into the antispam log Sender – sender's address Recipient – recipient's address Subject – message subject Score – spam score assigned to the message (in range from 0 to 100) Reason – is an indicator which caused the message to be classified as spam. The displayed indicator is the strongest. If you want to see the other indicators, double-click the entry.
HTML Image Type spam Spam messages often take the form of pictures as another evasive strategy applied against antispam detection methods. Such pictures usually contain interactive links to web pages. URL formatting hosting service domain URL address contains the hosting service domain. Spammy keyword ... Message contains words typical for spam. Email header inconsistency Information in the header is altered to pose as a source other than the original sender.
Greylisting All messages that have been evaluated using the greylisting method are recorded in this log.
Detected threats Threat log offers detailed information about infiltrations detected by ESET Mail Security modules. The information includes the time of detection, scanner type, object type, object name, infiltration name, location, the performed action and the name of the user logged in at the time the infiltration was detected. To copy or delete one or more lines from the log (or to delete the whole log), use the context menu (right-click on the item).
Look in columns: - Select what columns will be taken into account when filtering. You can check one or more columns to be used for filtering. By default, all columns are checked: Time Module Event User Record types: - Lets you choose what type of records to show. You can choose one particular record type, multiple types at the same time, or have all of the record types shown (by default): Diagnostic Information Warning Error Critical Time period: - Use this option to have records filtered by time period.
What: - Type in a string (word, or part of a word). Only records that contain this string will be found. The rest of the records will be omitted. Look in columns: - Select what columns will be taken into account when searching. You can check one or more columns to be used for searching. By default, all columns are checked: Time Module Event User Record types: - Lets you choose what type of records to find.
4.5.3 Log maintenance The Logging configuration of ESET Mail Security is accessible from the main program window. Click Setup > Enter entire advanced setup tree... > Tools > Log files.
Security 99 . Please allow some time while ESET SysInspector scans your computer. It may take anywhere from 10 seconds up to a few minutes depending on your hardware configuration, operating system and the number of applications installed on your computer. 4.6.1.1 Starting ESET SysInspector To start ESET SysInspector, simply run the SysInspector.exe executable you downloaded from ESET's website.
4.6.2.1 Program Controls This section contains the description of all program controls available in ESET SysInspector. File By clicking File you can store your current system status for later investigation or open a previously stored log. For publishing purposes we recommend that you generate a log Suitable for sending. In this form, the log omits sensitive information (current user name, computer name, domain name, current user privileges, environment variables, etc.).
4.6.2.2 Navigating in ESET SysInspector ESET SysInspector divides various types of information into several basic sections called nodes. If available, you may find additional details by expanding each node into its subnodes. To open or collapse a node, double-click the name of the node or alternatively click or next to the name of the node. As you browse through the tree structure of nodes and subnodes in the Navigation window you may find various details for each node shown in the Description window.
be found in the Description and Details windows. About Information about version of ESET SysInspector and the list of program modules. 4.6.2.2.
Comparing Ctrl+Alt+O Ctrl+Alt+R Ctrl+Alt+1 Ctrl+Alt+2 Ctrl+Alt+3 Ctrl+Alt+4 Ctrl+Alt+5 Ctrl+Alt+C Ctrl+Alt+N Ctrl+Alt+P opens original / comparative log cancels comparison displays all items displays only added items, log will show items present in current log displays only removed items, log will show items present in previous log displays only replaced items (files inclusive) displays only differences between logs displays comparison displays current log opens previous log Miscellaneous F1 Alt+F4 Alt+Sh
Any comparative log can be saved to a file and opened at a later time. Example Generate and save a log, recording original information about the system, to a file named previous.xml. After changes to the system have been made, open ESET SysInspector and allow it to generate a new log. Save it to a file named current.xml. In order to track changes between those two logs, navigate to File > Compare logs. The program will create a comparative log showing differences between the logs.
4.6.4.1 Generating Service script To generate a script, right-click any item from the menu tree (in the left pane) in the ESET SysInspector main window. From the context menu, select either the Export All Sections To Service Script option or the Export Selected Sections To Service Script option. NOTE: It is not possible to export the service script when two logs are being compared. 4.6.4.
Example: 04) UDP endpoints: - 0.0.0.0, port 123 (ntp) + 0.0.0.0, port 3702 - 0.0.0.0, port 4500 (ipsec-msft) - 0.0.0.0, port 500 (isakmp) [...] When the script runs, it will isolate the owner of the socket at the marked UDP endpoints and stop the socket. 05) DNS server entries This section contains information about the current DNS server configuration. Example: 05) DNS server entries: + 204.74.105.85 - 172.16.152.2 [...] Marked DNS server entries will be removed when you run the script.
Example: 09) Critical files: * File: win.ini - [fonts] - [extensions] - [files] - MAPI=1 [...] * File: system.ini - [386Enh] - woafont=dosapp.fon - EGA80WOA.FON=EGA80WOA.FON [...] * File: hosts - 127.0.0.1 localhost - ::1 localhost [...] The selected items will either be deleted or reset to their original values. 4.6.4.3 Executing Service scripts Mark all desired items, then save and close the script.
How does ESET SysInspector evaluate the risk posed by a particular object ? In most cases, ESET SysInspector assigns risk levels to objects (files, processes, registry keys and so forth) using a series of heuristic rules that examine the characteristics of each object and then weight the potential for malicious activity. Based on these heuristics, objects are assigned a risk level from 1 - Fine (green) to 9 - Risky (red).
Below is a detailed description of the available options: Compare – Allows you to compare two existing logs. It is suitable if you want to track changes between the current log and an older log. For this option to take effect, you must select two snapshots to be compared. Create... – Creates a new record. Before that, you must enter a short comment about the record. To find out the snapshot creation progress (of the currently generated snapshot), see the Status column.
4.7.3 Target selection In addition to CD/DVD/USB, you can choose to save ESET SysRescue in an ISO file. Later on, you can burn the ISO image on CD/DVD, or use it some other way (e.g. in the virtual environment such as VMware or VirtualBox). If you select USB as the target medium, booting may not work on certain computers. Some BIOS versions may report problems with the BIOS - boot manager communication (e.g.
Security solution installed on the computer on which the ESET SysRescue CD is run. 4.7.4.3 Advanced settings The Advanced tab lets you optimize the ESET SysRescue CD according to the amount of memory on your computer. Select 576 MB and more to write the content of the CD to the operating memory (RAM). If you select less than 576 MB, the recovery CD will be permanently accessed when WinPE will be running.
4.7.5 Working with ESET SysRescue For the rescue CD/DVD/USB to work effectively, you must start your computer from the ESET SysRescue boot media. Boot priority can be modified in the BIOS. Alternatively, you can use the boot menu during computer startup – usually using one of the F9 - F12 keys depending on the version of your motherboard/BIOS. After booting up from the boot media, ESET Security solution will start.
The User interface features also include the option to password-protect the ESET Mail Security setup parameters. This option is located in the Settings protection submenu under User interface. In order to provide maximum security for your system, it is essential that the program be correctly configured. Unauthorized modifications could result in the loss of important data.
4.8.1 Alerts and notifications The Alerts and notifications setup section under User interface allows you to configure how threat alerts and system notifications are handled in ESET Mail Security. The first item is Display alerts. Disabling this option will cancel all alert windows and is only suitable for a limited amount of specific situations. For most users, we recommend that this option be left to its default setting (enabled).
4.8.2 Disable GUI on Terminal Server This chapter describes how to disable GUI of ESET Mail Security running on Windows Terminal Server for user sessions. Normally, ESET Mail Security GUI starts up every time a remote user logs onto the server and creates a terminal session. This is usually undesirable on Terminal Servers. If you want to turn off the GUI for terminal sessions follow these steps: 1. Run regedit.exe 2. Navigate to HKEY_LOCAL_MACHINE\SOFTWARE\Microsoft\Windows\CurrentVersion\Run 3.
– no-mail do not scan email files – sfx scan self-extracting archives – no-sfx do not scan self-extracting archives – rtp scan runtime packers – no-rtp do not scan runtime packers – exclude = FOLDER exclude FOLDER from scanning – subdir scan subfolders (default) – no-subdir do not scan subfolders – max-subdir-level = LEVEL maximum subfolder nesting LEVEL (default 0 = unlimited) – symlink follow symbolic links (default) – no-symlink skip symbolic links – ext-remove = EXTENSIONS – ext-ex
Possible exit codes of the scan: 0 – no threat found 1 – threat found but not cleaned 10 – some infected files remained 101 – archive error 102 – access error 103 – internal error NOTE: Exit codes greater than 100 mean that the file was not scanned and thus can be infected. 4.10 Import and export settings Importing and exporting configurations of ESET Mail Security is available under Setup by clicking on Import and export settings. Both import and export use the .xml file type.
The ThreatSense.Net setup is accessible from the Advanced Setup tree, under Tools > ThreatSense.Net. Select the Enable ThreatSense Early Warning System option to activate and then click the Advanced setup... button. 4.11.1 Suspicious files The Suspicious files tab allows you to configure the manner in which threats are submitted to ESET‘s Threat Lab for analysis. If you find a suspicious file, you can submit it for analysis to our ThreatLabs.
files for analysis does not affect submission of statistical information which is configured in its own setup (see section Statistics 110 ). When to submit – By default, the As soon as possible option is selected for suspicious files to be sent to ESET‘s Threat Lab. This is recommended if a permanent Internet connection is available and suspicious files can be delivered without delay. Select the During update option for suspicious files to uploaded to ThreatSense.Net during the next update.
4.11.3 Submission You can select how files and statistical information will be submitted to ESET. Select the By means of Remote Administrator or directly to ESET option for files and statistics to be submitted by any available means. Select the By means of Remote Administrator option to submit files and statistics to the remote administration server, which will ensure their subsequent submission to ESET’s Threat Lab.
4.12 Remote administration ESET Remote Administrator (ERA) is a powerful tool to manage security policy and to obtain an overview of the overall security within a network. It is especially useful when applied to larger networks. ERA not only increases the security level, but also provides ease-of-use in the administration of ESET Mail Security on client workstations. Remote administration setup options are available from the main ESET Mail Security program window.
4.13 Licenses The Licenses branch allows you to manage the license keys for ESET Mail Security and other ESET products such as ESET Mail Security, etc. After purchase, license keys are delivered along with your username and password. To Add/ Remove a license key, click the corresponding button in the license manager window. The license manager is accessible from the Advanced Setup tree under Miscellaneous > Licenses.
5. Glossary 5.1 Types of infiltration An Infiltration is a piece of malicious software trying to enter and/or damage a user’s computer. 5.1.1 Viruses A computer virus is an infiltration that corrupts existing files on your computer. Viruses are named after biological viruses, because they use similar techniques to spread from one computer to another. Computer viruses mainly attack executable files and documents. To replicate, a virus attaches its “body“ to the end of a target file.
Backdoor – An application which communicates with remote attackers, allowing them to gain access to a system and to take control of it Keylogger – (keystroke logger) – A program which records each keystroke that a user types and sends the information to remote attackers Dialer – Dialers are programs designed to connect to premium-rate numbers. It is almost impossible for a user to notice that a new connection was created.
If a file is detected as spyware on your computer, it is advisable to delete it, since there is a high probability that it contains malicious code. 5.1.7 Potentially unsafe applications There are many legitimate programs whose function is to simplify the administration of networked computers. However, in the wrong hands, they may be misused for malicious purposes. ESET Mail Security provides the option to detect such threats.
5.2.1 Advertisements Internet advertising is one of the most rapidly growing forms of advertising. Its main marketing advantages are minimal costs and a high level of directness; what’s more, messages are delivered almost immediately. Many companies use email marketing tools to effectively communicate with their current and prospective customers. This type of advertising is legitimate, since you may be interested in receiving commercial information about some products.
5.2.4.1 Rules In the context of Antispam solutions and email clients, rules are tools for manipulating email functions. They consist of two logical parts: 1) Condition (e.g., an incoming message from a certain address) 2) Action (e.g., deletion of the message, moving it to a specified folder) The number and combination of rules varies with the Antispam solution. These rules serve as measures against spam (unsolicited email).
5.2.4.5 Server-side control Server-side control is a technique for identifying mass spam based on the number of received messages and the reactions of users. Each message leaves a unique digital “footprint” based on the content of the message. The unique ID number tells nothing about the content of the email. Two identical messages will have identical footprints, while different messages will have different footprints. If a message is marked as spam, its footprint is sent to the server.