
Installation manual


14
products within a cluster. You can avoid this by using a policy in ERA. A policy is very similar to a standard
Configuration Task – it sends the configuration defined in the Configuration Editor to the client(s). A policy is
different from a Configuration Task because it is continuously applied to the client(s). So the Policy can be defined
as a configuration that is regularly forced to a client / group of clients.
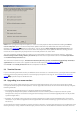
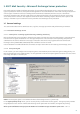
In ERA > Tools > Policy Manager... there is a number of options on how to use a policy. The easiest option is to use
Default Parent Policy which also generally serves as Default policy for primary clients. This kind of policy is
automatically applied to all currently connected clients (in this case, to all ESET Mail Security products within a
cluster). You can configure the Policy by clicking Edit..., or use existing configuration saved in the xml file, if you
have already created one.
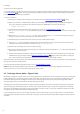
The second option is to create a new policy (Add New Child Policy) and use the Add Clients... option to assign all
ESET Mail Security products to this policy.
This configuration ensures a single policy with the same settings will be applied to all clients. If you wish to modify
existing settings of an ESET Mail Security server within a cluster, it is sufficient to edit the current policy. Changes
will be applied to all clients assigned to this policy.
NOTE: Refer to the ESET Remote Administrator User Guide for detailed information on policies.
Configure Background Scanning
In some cases, particularly when ESET Mail Security is installed in a clustered environment, background scanning
can cause excess system load which can slow the reception and sending of email. If you notice that the
transmission of email is slowed after installing ESET Mail Security we recommend that you disable Background
scanning and create a new scheduled task to perform background scanning during non-work hours. To do so,
follow the step-by-step instructions below:
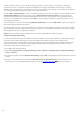
1) Press F5 to enter Advanced setup.
2) Expand Server protection > Microsoft Exchange Server > Antivirus and antispyware > Microsoft Exchange
Server > VSAPI x.x.
3) Deselect the check box next to Background scanning and click OK. Email delivery speed should return to normal
shortly.
4) Create a new scheduled task to perform the Run mail server background scan during non-work hours. For
instructions to set up a scheduled background scan, see the Creating new tasks section of this guide.
89