
User manual


Table Of Contents
- 1. Introduction
- 2. Technical data
- 3. For your safety
- 4. Transport, storage and disposal
- 5. Commissioning
- 6. Functional description
- 6.1 Operation
- 6.2 The Work mode
- 6.3 Parameter mode
- 6.4 Configuration mode
- 6.5 Factory settings (“default”)
- 6.6 Contrast
- 6.7 Replacing the soldering tip
- 6.8 Changing the Heating Element
- 6.9 Sensitive components
- 7. Error diagnosis and remedy
- 8. Maintenance
- 9. Replacement parts
- 10. Warranty
i-CON 1 / 13
3BA00180 • 28.04.2008 • Rev. 1
Operating instructions
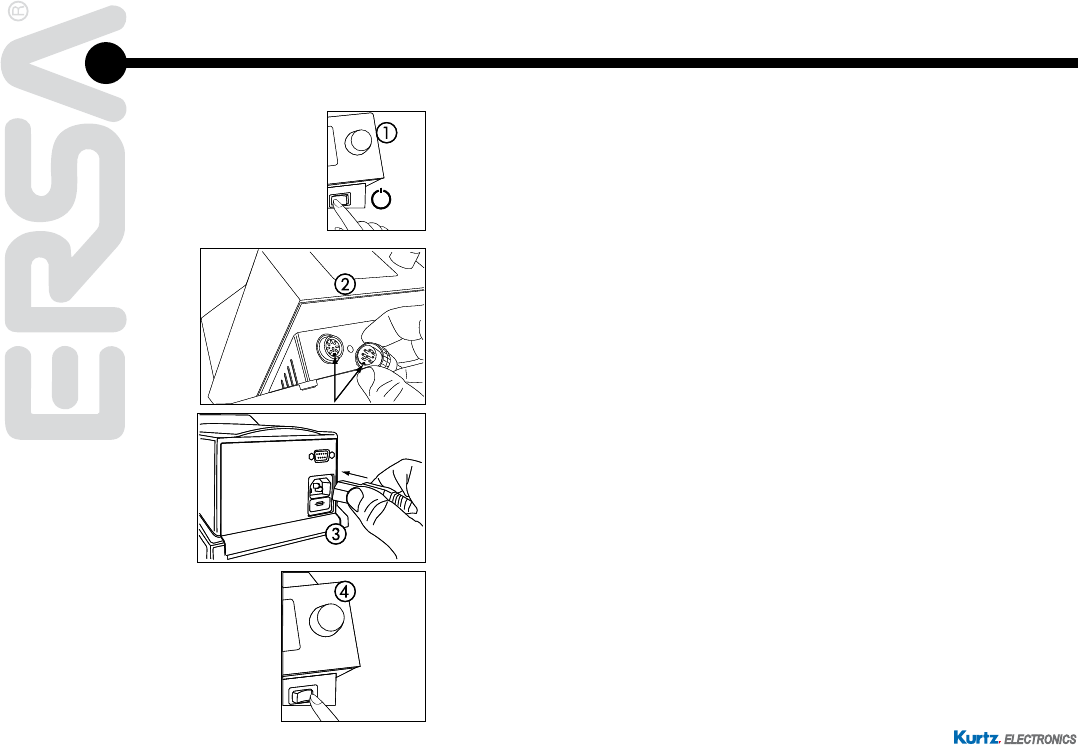
5.2 Switching on for the first time
Be sure to do the following to ensure the safe and long-lasting operation of the sol-
dering tool:
■
Check whether the supply voltage matches the value stated on the
rating plate.
■
Switch off the soldering station with the power switch a.
■
Checktherighttofthesolderingtip.
■
Connect the soldering tool with the control station b and put the sol-
dering iron in the holder.
■
Connect the power cable to the network supply socket c.
■
Switch on the soldering station d.
OFF
_
OFF
_
0
_
ON
0
_
ON