
Specifications


C
888-SV-22FN-00 rev C
5
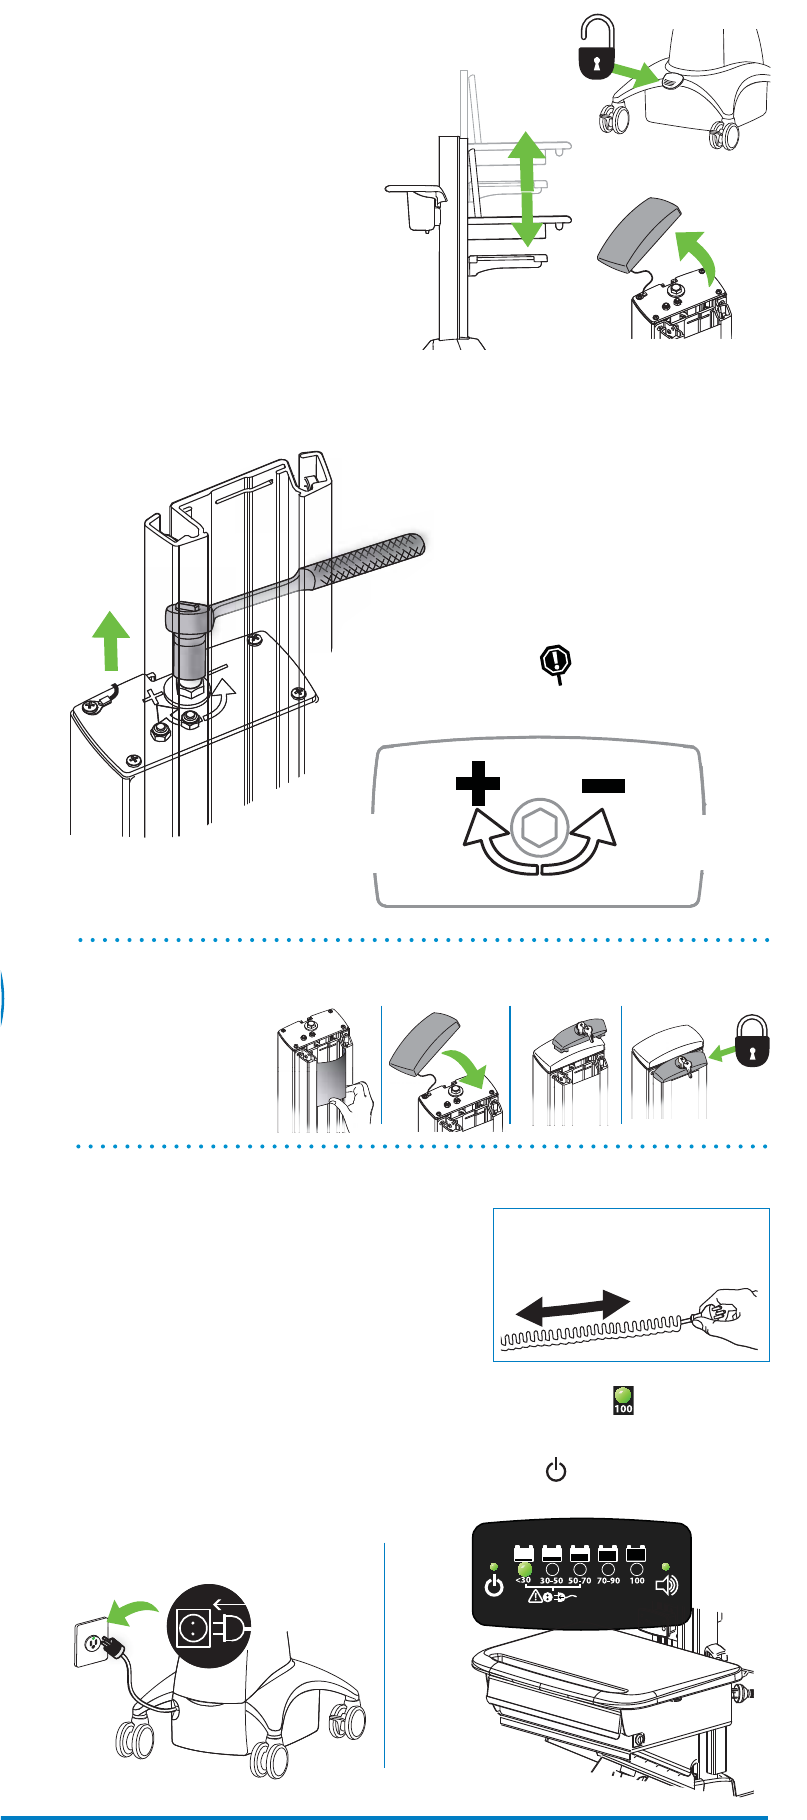
a Unlock riser (lift brake up).
b Move the riser up and down. If you feel
excessive resistance within the range of
motion, or if the riser does not stay in the
desired position, the lift tension should be
adjusted.
c Remove tower cover.
d Lift riser to highest position on tower.
e Turn tension nut up or down as needed.
f After adjustment, check lift tension by moving riser up and down (as described in step 7b). If
more adjustment is necessary, continue turning nut until the riser lift is satisfactory.
Riser Lift Adjustment
7
Set riser lift tension.
b
a
c
8
Attach covers.
a Cover cables on riser.
b Attach tower cover.
c Attach top of riser cover.
d Lock riser cover.
dcab
9/16"
d
e
Decrease Lift
turn toward MINUS sign
Increase Lift
turn toward PLUS sign
IMPORTANT
Lift riser to highest position before making
any adjustments to the tension nut!
Battery Charging Cycle
a Plug power cord into appropriate wall outlet and verify that the green "100" light is ashing
to indicate battery is charging. Continue to charge until light stops ashing and stays lit.
b Turn power system on by holding down the AC Outlet Power ON"
located on the RUI for 1 - 3 seconds. The Power light, the battery charge
indicator lights and the alarm enabled light will come on.
9
Charge Battery
FIRST TIME BATTERY CHARGE
To charge the battery for rst time and/or
to charge the battery after a period of storage
ab
*
Do Not stretch coiled cord
further than 10 feet (3 meters),
damage to the cord may occur.