
Manual


About the Diagnostic Tool
BATTERY REPLACEMENT / ADJUSTMENTS/SETTINGS AND DTC LIBRARY
6 OBD2
On some Asian and European vehicles the DLC is located
behind the “ashtray” (the ashtray must be removed to access it)
or on the far left corner of the dash. If the DLC cannot be
located, consult the vehicle’s service manual for the location.
BATTERY REPLACEMENT
Replace batteries when the battery symbol is visible on display
and/or the 3 LEDS are all lit and no other data is visible on screen.
1. Locate the battery cover on the back of the Diagnostic Tool.
2. Slide the battery cover off (use your fingers).
3. Replace batteries with two AA-size batteries (for longer life, use
Alkaline-type batteries).
4. Reinstall the battery cover on the back of the Diagnostic Tool.
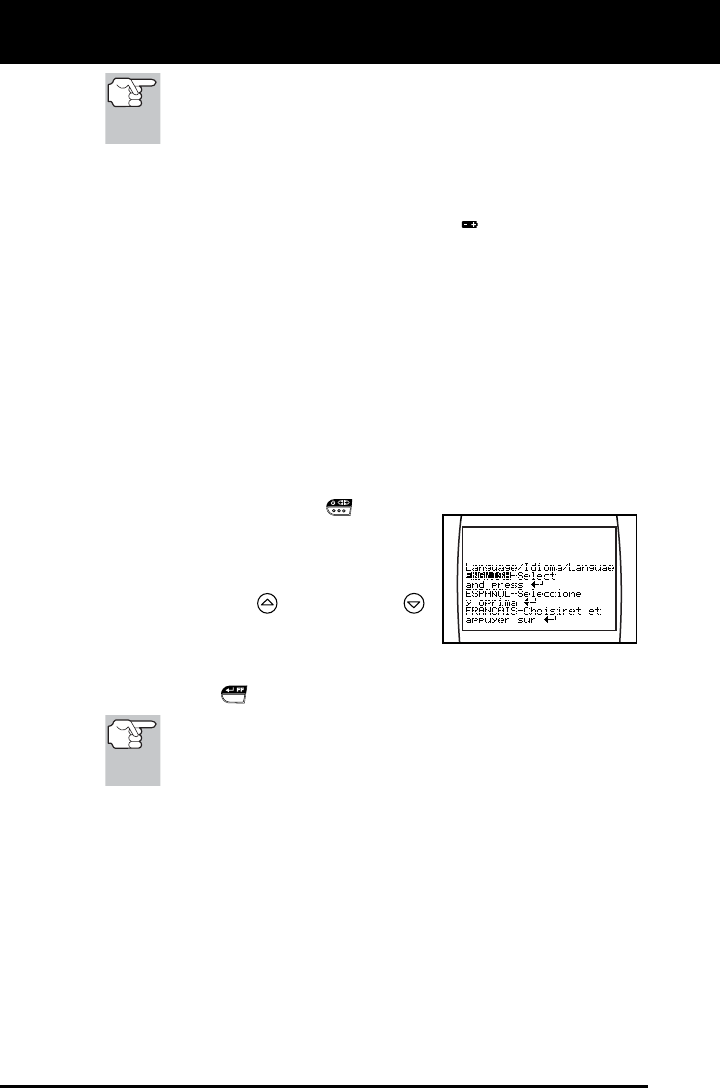
Language Selection After Battery Installation
The first time the unit is turned on, you must select the desired display
language (English, French or Spanish) as follows:
1. Press the POWER/LINK
button to
turn the Diagnostic Tool “ON.”
The Select Language screen
displays.
2. Use the UP
and DOWN
buttons, as necessary, to highlight the
desired display language.
3. When the desired display language is selected, press the
ENTER/FF
button to confirm your selection.
After the initial language selection is performed, it, as well as
other settings, can be changed as desired. Proceed to
“ADJUSTMENTS/SETTINGS AND DTC LIBRARY” below for
further instructions.
ADJUSTMENTS/SETTINGS AND DTC LIBRARY
The Diagnostic Tool lets you make several adjustments and settings to
configure the Diagnostic Tool to your particular needs. It also contains
an OBD2 DTC Library that allows you to search for DTC definitions. The
following functions, adjustments and settings can be performed when
the Diagnostic Tool is in “MENU Mode”:
Adjust Brightness: Adjusts the brightness of the LCD display
screen.
DTC Library: Lets you search the library of OBD2 DTC definitions.