
Manual


About the Diagnostic Tool
ADJUSTMENTS / SETTINGS AND DTC LIBRARY
8 OBD2
Searching for a DTC Definition Using the DTC Library
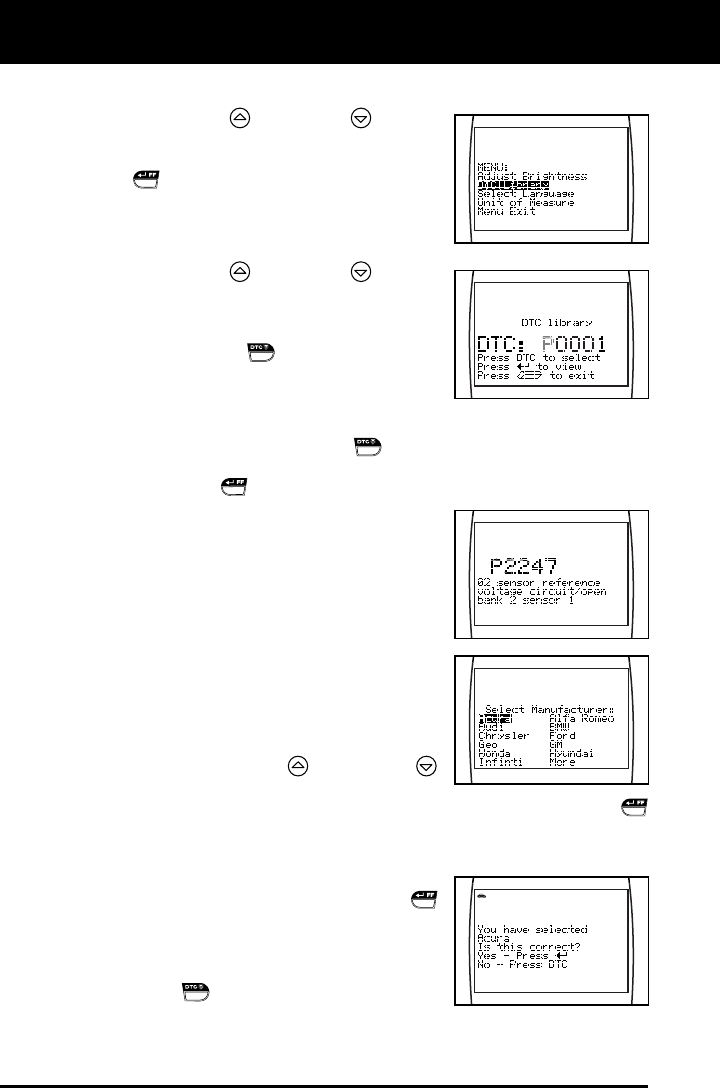
1. Use the UP
and DOWN buttons,
as necessary, to highlight DTC Library
in the MENU, then press the ENTER/FF
button.
The Enter DTC screen displays. The
screen shows the code “P0001”,
with the “P” flashing.
2. Use the UP
and DOWN buttons,
as necessary, to scroll to the desired
DTC type (P=Powertrain, U=Network,
B=Body, C=Chassis), then press the
DTC SCROLL
button.
The selected character displays “solid”,
and the next character begins flashing.
3. Select the remaining characters in the DTC in the same way,
pressing the DTC SCROLL
button to confirm each character.
When you have selected all the DTC characters, press the
ENTER/FF
button to view the DTC definition.
If you entered a “Generic” DTC
(DTCs that start with “P0”, “P2” and
some “P3”):
- The selected DTC and DTC
definition (if available), show on
the Diagnostic Tool’s LCD display.
If you entered a “Manufacturer-
Specific” DTC (DTCs that start with
“P1” and some “P3”):
- The “Select Manufacturer” screen
displays.
- Use the UP
and DOWN
buttons, as necessary, to highlight
the appropriate manufacturer, then press the ENTER/FF
button to display the correct DTC for your vehicle. A
confirmation message shows on the LCD display.
- If the correct manufacturer is
shown, press the ENTER/FF
button to continue.
- If the correct manufacturer is not
shown, press the DTC SCROLL
button to return to the list of
vehicle manufacturers.