
Installation guide


QuadroM32x/8L/26x/12Li/26xi Manual II: Administrator's Guide Administrator’s Menus
QuadroM32x/8L/26x/12Li/26xi; (SW Version 5.3.x)
51
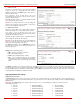
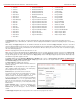
o PBX - local calls to Quadro's extensions.
o SIP - calls through a SIP server.
o PSTN - calls to a global telephone network.
o Auto - used for undefined call types. The destination (independent on whether it is a PBX number, a SIP address or a PSTN
number) will be reached through the Call Routing Table.
The Address text field is used to define the address where the call will be redirected. The value in this field is strictly dependent on the Call
Type defined in the same named drop down list. If the PBX call type is selected, the Quadro extension number should be defined in this field.
For the SIP call type, the
SIP address should be defined, for the PSTN call type, the PSTN user number should be defined here. For the Auto
call type, a routing pattern needs to be defined. The
SIP-Clipboard button at the end of the line can be used only when SIP is selected in the
Call Type drop down list. It opens a small window where one of the previously entered 10 SIP addresses can be automatically selected again.
If the address already exists in the table, selecting Save will cause the error "Caller address already exists".
Wildcard is allowed in this field.
Please Note: To activate the ZeroOut Redirection feature, the caller should dial 0 digit.
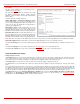
Upload new call queue welcome message allows updating the active Call Queue welcome message (played when a caller joins the extension’s
call queue), downloading it to the PC, or restoring the default one.
The Remove call queue welcome message functional link appears only when the custom call queue welcome message is already uploaded and is
used to remove it and restore the default call queue welcome message.
The Download call queue welcome message functional link appears only when the custom call queue welcome message is already uploaded and
is used to download it to PC and opens the file chooser window where the saving location can be specified.
Upload new call queue message allows updating the active call queue message (played when a caller is being held in the queue), downloading it
to the PC, or restoring the default one.
The Remove call queue message functional link appears only when the custom call queue message is already uploaded and is used to remove it
and restore the default call queue welcome message.
The Download call queue message functional link appears only when the custom call queue message is already uploaded and is used to download
it to PC and opens the file chooser window where the saving location can be specified.
Browse buttons open the file chooser window to browse for a new Call Queue welcome message file. The uploaded files should to be in PCMU
(CCITT u-law, 8 kHz, 8 bit Mono) wave format, otherwise the system will prevent uploading it with the “Invalid audio file, or format is not supported”
warning message. The system also prevents uploading if there is not enough memory available for the corresponding extension, which will cause the
“You do not have enough space” warning message.
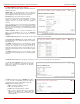
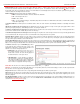
6. Voice Mailbox Settings
This group is used to configure voice mailbox storage and consists of a group of manipulation radio buttons to define the location where voice mails
will be collected.
• Disable Voice Mail – disables the Voice Mail service for the corresponding extension. With this selection, the extension user will be unable to
reach their Voice Mail Settings, but will be able to access their Voice Mailbox and manage the existing voice mails.
• Use Internal Voice Mail – enables the Voice Mail service for the corresponding extension and defines the Quadro’s internal storage as a
location for the Voice Mails.
This selection also allows you to manipulate with the Voice Mail Configuration Wizard used by the extension’s user to setup personal settings
(the password, the voice mail greeting message and the user’s name for Extensions Directory) from the handset. By default, the Voice Mail
Configuration Wizard is enabled when the Quadro’s is in the factory reset state. It can be manually enabled from this page by pressing the
Activate button. When the Voice Mail Configuration Wizard is activated, the extension’s user is prompted to insert personal settings as
he/she enters his/her Voice Mailbox for the first time. Unless the required information is not inserted, the button is changed to Deactivate and
the Configuration Wizard Status becomes Activated. Use Deactivate button to stop Voice Mail Configuration Wizard. When the user
inserted the required information, the Configuration Wizard Status on this page is changed to Passed and a Reactivate button appears.
Using Reactivate button you might re-enable the Voice Mail Configuration Wizard so the user will be again prompted about his/her personal
settings next time entering his/her Voice Mailbox.
Instructions on how to insert the information prompted in the Voice Mail Configuration Wizard are available in the Features Codes (see
Manual III – Extension’s Users Guide).
The Shared Mailbox section is used to setup a mailbox sharing. The Edit Voice Mailbox Access List link goes to the page where a list of
PBX extensions can be defined for which the mailbox of the current extension will be shared and accessible without password authentication.
For more details on how to access Shared Mailboxes, see Feature Codes.