
Installation guide


QuadroM32x/8L/26x/12Li/26xi Manual II: Administrator's Guide Administrator’s Menus
QuadroM32x/8L/26x/12Li/26xi; (SW Version 5.3.x)
143
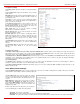
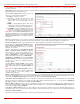
Add opens the Add Entry page where a new RTP
channel can be added.
The Add Entry page includes the following text fields:
The RTP Channel Name text field requires the name or
the number of the RTP channel.
The Port Number text field requires the broadcasting RTP
port number.
The Description text field requires optional information
related to the RTP streaming channel.
Fig. II-239: RTP Streaming Channel page
Fig. II-240: RTP Streaming Channel – Add Entry page
Call Recording Settings
The Call Recording service is optional on the Quadro and is activated from Features page by inserting a feature key.
The Call Recording is used to record PBX, SIP or PSTN calls on the Quadro and store the recorded calls either in the local Recording Box or
upload them to the remote server. From Call Recording Settings page the call recording can be configured to be started automatically once the call
starts or to be started manually from
Administrator’s Main Page of the Quadro's Web Management or by pressing the Record button on the IP phone
during the call. If no such button exists on IP phone, the functional key can be configured from Quadro to handle the recording functionality (see
Programmable Keys Configuration).
To configure Call Recording, an extension of the Recording Box type should be created first. The memory allocated to that extension will be used for
storing the recorded calls. There are two ways to access the recorded calls in the Recording Box: through handset and through Web Management.
Through handset, Recording Box is accessible by calling the Recording Box extension. On Quadro's Web Management, call recordings are available
from
Extensions Management by clicking on the Recording Box extension.
Attention: Following limitations apply to the call recording on the Quadro:
• Calls to Auto Attendant or Voicemail cannot be recorded.
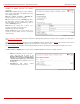
The Call Recording Settings page is used for configuring
the call recording rules. It has two view modes - the Basic
View and Advanced View, which can be switched by
appropriate button.
The Basic View displays the table with the list of all active
extensions, recording states of those extensions and
recording parameters.
The Advanced View displays the table with all existing
call recording rules. Click on the recording box extension
number in the Recorded To column will move to the
corresponding
Recording Box.
Fig. II-241: Call Recording Basic View Settings page
The Call Recording Settings table offers the following functions:
Enable and Disable functional buttons are used to activate and deactivate the selected call recording rule(s). At least one rule should be selected in
order to use these functions, otherwise the following error message will appear: "No record(s) selected."
Add functional button opens the Add Entry page where a new call recording rule is being configured. The Add Entry page consists of the following
components:
The Caller Information requires the Call Type and the caller’s Address.