
User's Guide


50
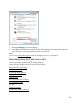
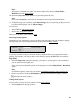
2. Select your product as the Printer setting.
3. Select Print Settings from the pop-up menu.
Note:
In certain programs, you may need to select Advanced before you can select Print Settings.
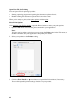
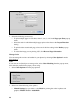
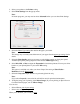
4. Select the Media Type setting
that matches the paper you loaded.
Note:
The settings may not exactly match the name of your paper. See the paper type settings list for
details.
5. Select the Print Quality setting as necessary to select higher quality or faster print speed.
Available print quality settings depend on the selected Media Type setting.
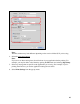
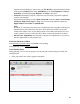
6. Select Min, Mid, or Max to adjust the Expansion for borderless printouts.You may see white
borders on your printed photo if you use the Min setting.
Note:
This option is available only when you chose a Paper Size setting of Sheet Feeder -
Borderless from the Print window
.
7. Select the Grayscale output checkbox to print using black ink only.
Note:
If you select Grayscale, some color ink will still be used for print head maintenance.
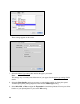
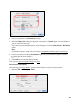
8. To flip the image you’re printing, click Mirror Image. (If you are printing on Epson Iron-on
Cool Peel Transfer paper, turn on Mirror Image.)
You can also:
• Select different print layout settings
• Select color management options
When you’re finished, you’re ready to print.