
User's Guide


134
Note:
If you do not use your product often, it is a good idea to print a few pages at least once a month to
maintain good print quality.
From the Computer
1. Load a few sheets of plain paper in the sheet feeder.
2. Do one of the following:
• Windows:
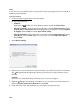
Right-click the product icon in the Windows taskbar and select Nozzle Check.
• Mac OS X 10.6/10.7: In the Apple menu or the Dock, select System Preferences. Select
Print & Scan or Print & Fax, select the FAX option for your product, and select Options
& Supplies. Select Utility and select Open Printer Utility.
• Mac OS X 10.4/10.5: In the Apple menu or the Dock, select System Preferences. Select
Print & Fax, select the FAX option for your product, and select Open Print Queue.
Select Utility.
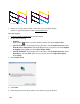
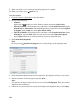
3. Select Head Cleaning.
4. Follow the on-screen instructions to start the cleaning cycle, which lasts around 2 1/2 minutes.
The On light flashes throughout the cleaning cycle and stays on green when the cycle is
finished.
Caution:
Never turn off your product during a cleaning cycle or you may damage it.
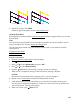
5. When the On light stops flashing and remains on, you can check to see if the nozzles are
clean. Click Print Nozzle Check Pattern and click Print.
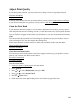
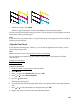
6. Check the nozzle check pattern that prints to see if there are gaps in the lines.