
User`s guide

22 Using EPSON Scan
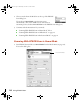
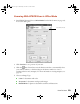
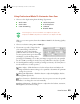
2. Click Preview to see a preview of your scan.
3. Click the Auto Detect button in the Preview window to automatically select
your entire document, or click and drag in the Preview window to create a
scanning selection area (marquee). For more information on using marquees, see
page 25.
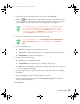
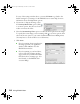
4. Choose the Document Type:
■ Reflective for a photo or printed document
■ Transparency for film or slides (You must have the transparency unit
installed to see this option; see page 33.) If you choose this option, go to
step 6.
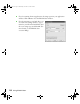
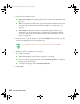
5. If you chose Reflective as the Document Type, do the following:
■ Choose the Document Source: Document Table, or ADF for documents
loaded in the optional automatic document feeder (see page 45).
■ Choose the Auto Exposure Type: Photo to optimize exposure for photos, or
Document to optimize exposure for printed material.
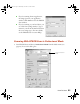
6. If you chose Transparency as the Document Type, choose the Film Type:
Positive Film (for slides and some film), Color Negative Film, or B&W
Negative Film
.
7. Either click Scan to complete your scan, or continue with the instructions in the
next section to fine-tune it.
The Document Type you select determines which options appear in
the EPSON Scan dialog box.
1640XL.book Page 22 Wednesday, November 19, 2003 8:46 PM