
User`s guide

How To Scan 17
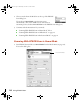
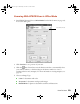
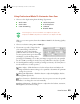
2. If you don’t see an automatic preview of your scan, click Preview.
3. Click the Auto Detect button in the Preview window to automatically select
your entire photo or document, or click and drag to create a scanning selection
area (marquee). For more information on using marquees, see page 25.
4. Choose a document type from the Document Type list.
5. Choose an Image Type:
■ Color for color photos or documents with color
■ Grayscale for black-and-white photos or documents with grayscale images
■ Black&White for plain text documents
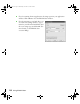
6. Choose a Destination setting:
■ Printer if you’re printing the image
■ Screen/Web if you will only view your image on the screen
■ Other if you’re shrinking or enlarging your image. Then choose the target size
for your final scanned image.
7. Select a target size if you want to specify any size other than that of the original
document.
8. Adjust the Brightness and Contrast settings, if necessary.
9. If you’re scanning printed materials, select Descreening Filter to reduce the
moiré patterns in the image.
10. Click Scan.
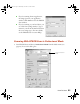
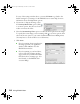
If the scanned image in the Preview window has a blue box around it,
you’re previewing in thumbnail mode and won’t be able to create a
marquee. Click the arrow beside the Preview button in the EPSON
Scan dialog box and select Normal from the pull-down menu. Then
click the Preview button to preview in normal mode.
If you’re scanning film, choose Color Negative Film, B&W Negative
Film, or Positive Film. If you’re scanning slides, choose Positive
Film.
1640XL.book Page 17 Wednesday, November 19, 2003 8:46 PM