
User Setup Information


Testing the Printer
Before continuing, it is recommended that you test the printer
to ensure it is functioning properly. For the self test, use paper
that is 8% inches wide if you have the Stylus Pro, or 13 inches
wide if you have the Stylus Pro XL. Otherwise, ink sprays
directly onto the platen and can smear subsequent pages. Be
sure to load at least several sheets of paper, as described above.
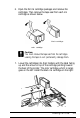
1.
Press the Operate button to turn off the printer.
R
Caution:
Nezm turn
of
the printer by unplugging it
OY
turning o#
a power strip. Always turn off the printer by pressing the
Operate
button.
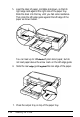
2.
Hold down the Load/Eject button and press the Operate
button. Release the Operate button, but continue holding
down the Load/Eject button for at least 5 seconds, until
the printer advances a sheet of paper.
The self test begins by printing on the first and last lines
of the first sheet of paper to measure the page length. Then
it prints character samples on the next sheet using the
available fonts and colors.
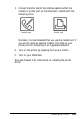
3.
To end the self test, press the Pause button. Otherwise, the
test continues until the paper in the paper tray runs out.
You may need to press the Load/Eject button to eject any
sheet remaining in the printer.
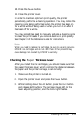
R
Caution:
Do not turn of the printer before pressing the
Pause
button.
4.
Turn off the printer.
If the quality of the test output is not good, clean the print
heads as described in Chapter 3 of the
Reference Guide.
Installing the Printer
1-15