
User Setup Information


Table Of Contents
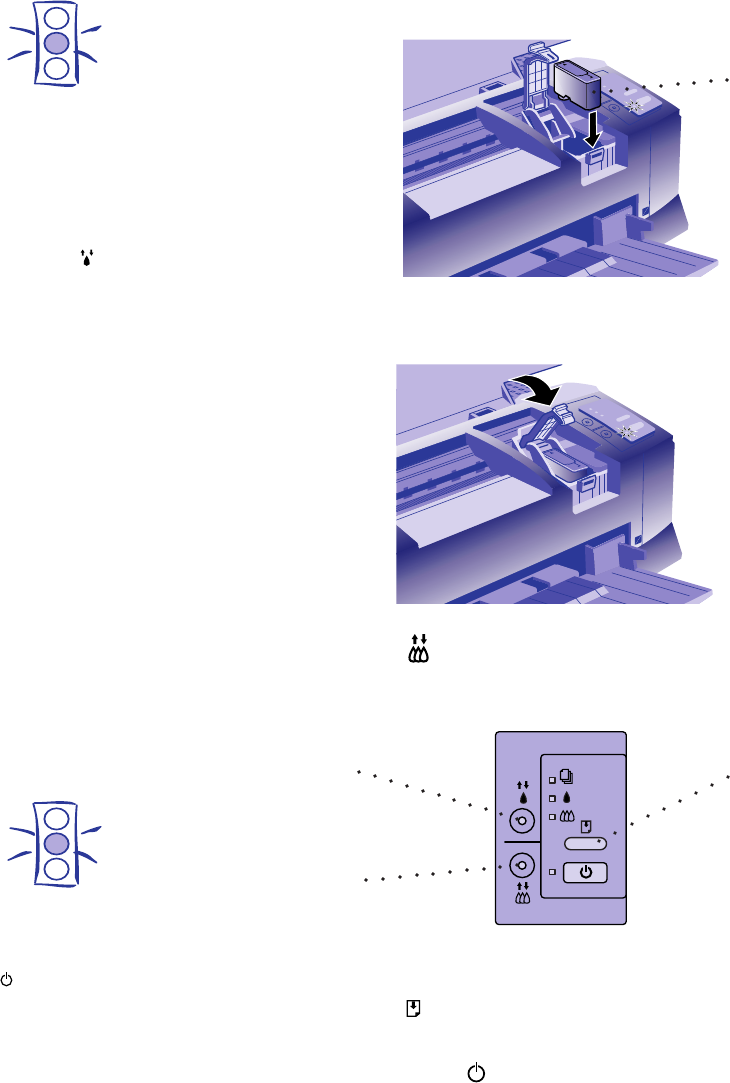
5. Lower the ink cartridge into the holder with the label face
up and the arrow pointing toward the back of the printer.
6. Push down the clamp until it locks in place.
7. Press the color cleaning button. The print heads move
to the left again so you can install the color ink cartridge.
8. Follow steps 3 through 6 to install the color ink cartridge.
9. Press the load/eject button.
The printer moves the print heads and begins charging the ink
delivery system. The power light flashes, and the printer
makes various sounds. Charging can take up to seven minutes.
When it’s finished, you can close the printer cover.
Caution:
Never turn off the
printer when the
power light is
flashing.
Caution:
If the ink cartridge
holders move back to
the right before you
start the installation
process, don't try to
move them by hand.
Press the black
cleaning button and
hold it down for 3
seconds. This moves
the ink cartridge
holders back to the
loading position.
load/eject
button
color
cleaning
button
black
cleaning
button
black ink
cartridge
Untitled-1 5/22/97, 10:20 AM4