
User's Manual


Table Of Contents
- Contents
- Introduction to Your Printer
- Wi-Fi or Wired Networking
- Media Handling
- Printing from a Computer
- Printing with Windows
- Selecting Basic Print Settings - Windows
- Selecting Print Layout Options - Windows
- Selecting Advanced Settings - Windows
- Selecting Additional Settings - Windows
- Printing Your Document or Photo - Windows
- Saving, Sharing, and Customizing the Printer Settings
- Selecting Default Print Settings - Windows
- Changing the Language of the Printer Software Screens
- Changing Automatic Update Options
- Printing with the Built-in Epson Driver - Windows 10 S
- Printing on a Mac
- Printing CAD Drawings
- Printing with Windows
- Printing from a USB Memory Device
- Using Your Printer as a Copier
- Using the Control Panel Menus
- Replacing Ink Cartridges and Maintenance Boxes
- Adjusting Print Quality
- Maintenance and Transportation
- Solving Problems
- Technical Specifications
- Notices
51
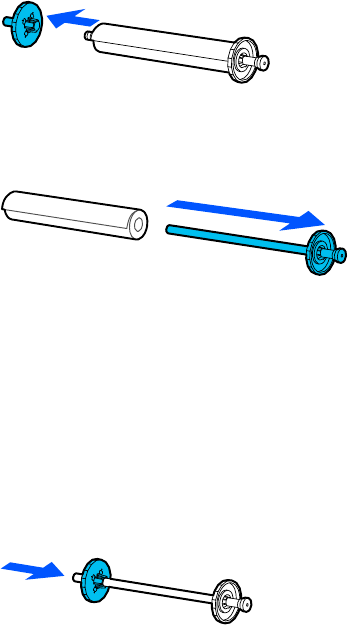
4. Remove the transparent paper stop from the spindle.
5. Remove the spindle from the roll paper.
6. Place the roll paper in its original package.
Note: Store roll paper on its end or horizontally (if the packaging end-caps are installed). Never store
roll paper on its side, as a flat spot can develop and lead to imaging artifacts on the prints. Do not
store roll paper in dusty areas. Print head maintenance and cleanings increase if dust accumulates
on the paper.
7. Attach the transparent paper stop to the empty spindle.