
User's Manual


Table Of Contents
- Contents
- Introduction to Your Printer
- Wi-Fi or Wired Networking
- Media Handling
- Printing from a Computer
- Printing with Windows
- Selecting Basic Print Settings - Windows
- Selecting Print Layout Options - Windows
- Selecting Advanced Settings - Windows
- Selecting Additional Settings - Windows
- Printing Your Document or Photo - Windows
- Saving, Sharing, and Customizing the Printer Settings
- Selecting Default Print Settings - Windows
- Changing the Language of the Printer Software Screens
- Changing Automatic Update Options
- Printing with the Built-in Epson Driver - Windows 10 S
- Printing on a Mac
- Printing CAD Drawings
- Printing with Windows
- Printing from a USB Memory Device
- Using Your Printer as a Copier
- Using the Control Panel Menus
- Replacing Ink Cartridges and Maintenance Boxes
- Adjusting Print Quality
- Maintenance and Transportation
- Solving Problems
- Technical Specifications
- Notices
102
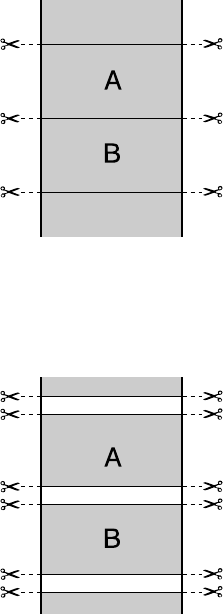
• Single Cut: Prints images end-to-end with no gap between them. Borderless images may overlap
slightly.
• Double Cut: Increases the space between each image and trims each print individually, providing
the cleanest edge for borderless printing.
3. Select the following settings as necessary:
• Select the Auto Rotate checkbox to automatically position the image or print data to fit the roll
paper.
• Select the Print Page Line checkbox to print lines between pages as a guide for manual cutting.
• When Auto Cut is enabled, select the Save Roll Paper checkbox to have the printer cut the roll
paper at the end of the image as positioned on the page.