User's Guide
Table Of Contents
- Contents
- Introduction to Your Projector
- Setting Up the Projector
- Using Basic Projector Features
- Turning On the Projector
- Turning Off the Projector
- Selecting the Language for the Projector Menus
- Adjusting the Image Height
- Image Shape
- Resizing the Image
- Focusing the Image Using the Focus Ring
- Remote Control Operation
- Selecting an Image Source
- Projection Modes
- Image Aspect Ratio
- Color Mode
- Controlling the Volume with the Volume Buttons
- Projecting a PC Free Presentation
- Adjusting Projector Features
- Using the Projector on a Network
- Wireless Network Projection
- Setting Up Projector Network E-Mail Alerts
- Setting Up Monitoring Using SNMP
- Controlling a Networked Projector Using a Web Browser
- Adjusting the Menu Settings
- Using the Projector's Menus
- Image Quality Settings - Image Menu
- Input Signal Settings - Signal Menu
- Projector Feature Settings - Settings Menu
- Projector Setup Settings - Extended Menu
- Projector Network Settings - Network Menu
- Projector Setup Settings - ECO Menu
- Projector Information Display - Info Menu
- Projector Reset Options - Reset Menu
- Maintaining and Transporting the Projector
- Solving Problems
- Projection Problem Tips
- Projector Light Status
- Using the Projector Help Displays
- Solving Image or Sound Problems
- Solutions When No Image Appears
- Solutions When Image is Incorrect Using the USB Display Function
- Solutions When "No Signal" Message Appears
- Solutions When "Not Supported" Message Appears
- Solutions When Only a Partial Image Appears
- Solutions When the Image is Not Rectangular
- Solutions When the Image Contains Noise or Static
- Solutions When the Image is Fuzzy or Blurry
- Solutions When the Image Brightness or Colors are Incorrect
- Solutions to Sound Problems
- Solving Projector or Remote Control Operation Problems
- Solving Network Problems
- Where to Get Help
- Technical Specifications
- General Projector Specifications
- Projector Lamp Specifications
- Remote Control Specifications
- Projector Dimension Specifications
- Projector Electrical Specifications
- Projector Environmental Specifications
- Projector Safety and Approvals Specifications
- Supported Video Display Formats
- USB Display System Requirements
- Notices

5. Use the arrow buttons on the remote control to surround the image area you want to use as the
User's Logo and press Enter.
You see a prompt asking if you want to select this image area.
6. Select Yes and press Enter. (If you want to change the selected area, select No, press Enter, and
repeat the last step.)
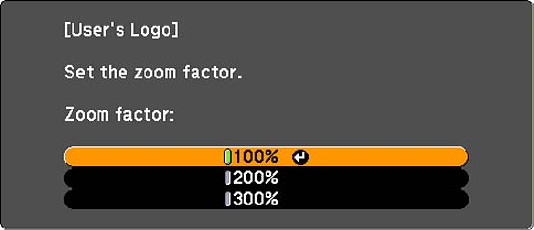
You see the User's Logo zoom factor menu.
7. Select a zoom percentage and press Enter.
You see a prompt asking if you want to save the image as the User's Logo.
8. Select Yes and press Enter.
Note: It takes a few moments for the projector to save the image; do not use the projector, its remote
control, or any connected equipment until it is finished.
You see a completion message.
9. Press Esc to exit the message screen.
10. Select the Extended menu and press Enter.
11. Select Display and press Enter.
12. Select when you want to display the User's Logo screen:
• To display it whenever there is no input signal, select Display Background and set it to Logo.
• To display it whenever you turn the projector on, select Startup Screen and set it to On.
• To display it whenever you press the A/V Mute button, select A/V Mute and set it to Logo.
79


