PowerLite S7/79/W7 Multimedia Projector ® User’s Guide
Important Safety Information WARNING: Never look into the projector lens when the lamp is turned on; the bright light can damage your eyes. Never let children look into the lens when it is on. Never open any cover on the projector, except the lamp and filter covers. Dangerous electrical voltages inside the projector can severely injure you. Except as specifically explained in this User’s Guide, do not attempt to service this product yourself. Refer all servicing to qualified service personnel.
Trademarks Epson and Instant Off are registered trademarks, and Epson Exceed Your Vision is a registered logomark of Seiko Epson Corporation. PowerLite, PrivateLine, and Accolade are registered trademarks, SizeWise and Duet are trademarks, and Extra Care is a service mark of Epson America, Inc. Pixelworks, DNX, and the DNX logo are trademarks of Pixelworks, Inc. General Notice: Other product names used herein are for identification purposes only and may be trademarks of their respective owners.
Contents Welcome . . . . . . . . . . . . . . . . . . . . . . . . . . . . . . . . . . . . . . 9 Using Your Documentation . . . . . . . . . . . . . . . . . . . . . . . . . 10 Getting More Information . . . . . . . . . . . . . . . . . . . . . . . 10 Projector Parts . . . . . . . . . . . . . . . . . . . . . . . . . . . . . . . . . . . 11 Projector Control Panel . . . . . . . . . . . . . . . . . . . . . . . . . 12 Remote Control . . . . . . . . . . . . . . . . . . . . . . . . . . . . . . .
2 Displaying and Adjusting the Image . . . . . . . . 39 3 Presenting With the Remote Control . . . . . . . . 47 4 6 Selecting an Image Source . . . . . . . . . . . . . . . . . . . . . . . . . . 40 Adjusting the Image . . . . . . . . . . . . . . . . . . . . . . . . . . . . . . . 40 Adjusting the Position of the Image . . . . . . . . . . . . . . . . 41 Adjusting the Image Shape. . . . . . . . . . . . . . . . . . . . . . . 41 Focusing and Zooming the Image . . . . . . . . . . . . . . . . .
5 Maintaining the Projector . . . . . . . . . . . . . . . . . . . 69 6 Solving Problems Cleaning the Lens . . . . . . . . . . . . . . . . . . . . . . . . . . . . . . . . . 70 Cleaning the Projector Case . . . . . . . . . . . . . . . . . . . . . . . . . 70 Cleaning the Air Filter . . . . . . . . . . . . . . . . . . . . . . . . . . . . . 70 Replacing the Air Filter. . . . . . . . . . . . . . . . . . . . . . . . . . . . . 71 Replacing the Lamp . . . . . . . . . . . . . . . . . . . . . . . . . . . . . . .
- Welcome The PowerLite ® S7/79/W7 is an easy-to-use, compact, lightweight projector with a built-in speaker. It offers up to 2300 lumens (PowerLite S7) or 2200 lumens (PowerLite W7/PowerLite 79) of white and color light output (brightness). It also provides a native SVGA (PowerLite S7), XGA (PowerLite 79), or WXGA (PowerLite W7) resolution. You can connect it to a wide range of computers and video sources.
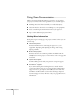
Using Your Documentation This book contains all the information you need to set up and use your projector. Please follow these guidelines as you read through it: ■ Warnings must be followed carefully to avoid bodily injury. ■ Cautions must be observed to avoid damage to your equipment. ■ Notes contain important information about your projector. ■ Tips contain additional projection hints.
Projector Parts Front Zoom ring (PowerLite 79/W7 only) Lamp cover Control panel Focus ring Ventilation slots Air filter cover A/V mute slide (lens cover) Foot release lever Adjustable Infrared foot receiver Air filter Kensington lock port Back USB (TypeB) port S-Video port Audio Out port Video port Monitor Out port Lamp cover screw Infrared receiver Rear adjustable foot AC power inlet Computer (Component Video) port Rear adjustable foot Audio port Welcome 11
Projector Control Panel PowerLite S7 Keystone button (corrects screen shape) Source Search button (searches for connected video sources) Menu button (displays projector menus) Esc button (exits menu items) Power light Help button Power button Wide button (increases image size Lamp and Temperature warning lights Keystone button (corrects screen shape) Tele button (decreases image size Enter button (selects menu items) PowerLite 79/PowerLite W7 Keystone button (corrects screen shape) Source Search but
Remote Control Source Search and Source buttons (select image source) Power button A/V Mute button (turns off image) Aspect button (changes screen size) Page Up/Down buttons (control PowerPoint® slides; USB cable required) E-Zoom +/– buttons (zoom into image) Menu button (accesses projector menus) Freeze button (stops image) User button (lets you assign function) Color Mode button (changes display mode) Num button (activates number buttons) Esc button (exits menus) Menu navigation (arrow) buttons and Ente
Projector Dimensions Use the dimensions below to guide you in placing or installing the projector. 11.61 in. (295 mm) 1.5 in. (38.3 mm) 3.11 in. (79 mm) 1.57 in. (39.8 mm); center of lens to mounting bracket holes 3.03 in. (77 mm) 3.62 in. (92 mm) 9.59 in. (243.5 mm) 0.98 in. (25 mm) 5.04 in. (128 mm) 1.48 in. (37.5 mm) 3.66 in. (93 mm) 0.51 in. (13 mm) 8.98 in.
Registration and Warranty Your projector comes with a basic warranty that lets you project with confidence. For details, see the warranty brochure included with your projector. In addition, Epson offers free Extra Care Road Service. In the unlikely event of an equipment failure, you won’t have to wait for your unit to be repaired. Instead, Epson will ship you a replacement unit anywhere in the United States or Canada. See the brochure included with your projector for details.
Product Part number Component-to-VGA video cable S-Video cable ELPKC19 ELPSV01 DC-06 document camera (ELPDC06) DC-10s document camera V12H321001 ELPDC10S Soft shoulder case for projector and notebook Wheeled soft carrying case Molded hard-shell wheeled carrying case Swiss Gear® backpack ELPKS61 ELPKS62 ELPKS58 ELPKS63 You can purchase screens or other accessories from an Epson authorized reseller. To find the nearest reseller, call 800-GO-EPSON (800-463-7766). Or you can purchase online at www.
1 Setting Up the Projector T his chapter tells you how to unpack the projector and connect it to a notebook or desktop computer or to video equipment, such as a VCR, DVD player, or video camera.
Unpacking the Projector After unpacking the projector, make sure you have all these parts: Password Protected PDF manuals and sticker registration CD-ROM Projector 2 AA batteries (for remote control) Power cord VGA computer cable Remote control Carrying case Save all packaging in case you need to ship the projector. Always use the original packaging (or the equivalent) when you need to send the projector to another location. See page 77 for transportation instructions.
Additional Components Depending on how you plan to use the projector, you may need additional components: ■ To receive a component video signal from a DVD player or other video device, you’ll need a component-to-VGA video cable. One may be included with your video equipment, or you can purchase the ELPKC19 cable from Epson. See “Optional Accessories” on page 15. ■ To receive an S-Video signal, you’ll need an S-Video cable. One may be included with your video equipment, or you can purchase one from Epson.
Image size increases with distance, but can vary depending on the aspect ratio (image shape), how you zoom into the image, and whether you’ve adjusted other image settings. Use the illustrations and tables below to help you determine the projection distance. Center of lens Center of lens You can also use the Image Size Calculator on the Epson website.
PowerLite S7 (16:9 images) Screen size Projection distance (A) Wide to Tele Offset (B) 30 inches (76 cm) 37 to 51 inches (95 to 130 cm) +0.3 inch (+1 cm) 50 inches (127 cm) 63 to 86 inches (161 to 218 cm) + 0.5 inch (+1 cm) 60 inches (152 cm) 76 to 103 inches (193 to 262 cm) +0.6 inch (+2 cm) 80 inches (203 cm) 102 to 138 inches (259 to 350 cm) +0.8 inch (+2 cm) 100 inches (254 cm) 128 to 173 inches (324 to 438 cm) +1.
Screen size Projection distance (A) Wide to Tele Offset (B) 300 inches (762 cm) 359 to 431 inches (912 to 1095 cm) –20 inches (–51 cm) PowerLite 79 (16:9 images) Screen size Projection distance (A) Wide to Tele Offset (B) 30 inches (76 cm) 38 to 46 inches (97 to 117 cm) +0.3 inch (+1 cm) 40 inches (102 cm) 51 to 62 inches (130 to 156 cm) +0.4 inch (+1 cm) 50 inches (127 cm) 64 to 77 inches (163 to 196 cm) +0.5 inch (+1 cm) 60 inches (152 cm) 77 to 93 inches (196 to 236 cm) +0.
Diagonal screen size Projection distance (A) Wide to Tele Offset (B) 100 inches (254 cm) 111 to 133 inches (281 to 338 cm) –7.6 inches (–19 cm) 150 inches (381 cm) 167 to 200 inches (424 to 509 cm) –11.4 inches (–29 cm) 200 inches (508 cm) 223 to 268 inches (566 to 680 cm) –15.1 inches (–38 cm) 320 inches (813 cm) 357 to 429 inches (907 to 1089 cm) –24.
PowerLite W7 (16:9 image) Screen size Projection distance (A) Wide to Tele Offset (B) 40 inches (102 cm) 45 to 54 inches (114 to 137 cm) –2 inches (–5 cm) 50 inches (127 cm) 56 to 68 inches (143 to 172 cm) –2.5 inches (–6 cm) 60 inches (152 cm) 68 to 82 inches (172 to 208 cm) –3 inches (–8 cm) 80 inches (203 cm) 91 to 109 inches (231 to 278 cm) –4 inches (–10 cm) 100 inches (254 cm) 114 to 137 inches (289 to 348 cm) –5.
You can also install the projector in three other viewing setups: ceiling projection, rear projection onto a semi-transparent screen, or rear/ceiling projection. Ceiling projection Rear projection Rear/ceiling projection To project from overhead, you’ll need the optional ceiling mounting hardware (see page 15). You’ll also need to select the appropriate Projection setting in the projector’s Extended menu to orient the image correctly (see page 61).
note The USB Display feature does not support Mac OS. Connecting to the USB Port You can connect a Windows Vista, XP, or Windows 2000 (SP4) computer to the projector’s TypeB (square) USB port and project your computer’s display. A USB 2.0 connection (recommended) provides better picture quality and response than USB 1.1. The first time you connect a computer to the projector’s USB port, software from the projector is installed on your computer. 1.
After the software is installed, you see your computer’s current desktop displayed by the projector. You can switch the projector to other image sources using the Source Search or Search button on the remote control or the projector. 7. You can connect an optional audio cable if you want to play sound through the projector (see page 34). When you’ve finished making connections, see Chapter 2 for instructions on displaying and adjusting the image.
4. You may also be able to use the remote control as a wireless mouse (see page 50). When you’ve finished making connections, see page 36 for instructions on turning on the projector and Chapter 2 for instructions on displaying and adjusting the image. Connecting to Video Equipment You can connect several video sources to the projector at the same time.
Connecting a Composite Video Source 1. If your video cable has an RCA connector, connect it to the yellow video output connector on your player and the yellow Video port on the projector. note If the video cable was not provided with your video device, you can purchase one from an electronics dealer. Video port 2. If you want to play sound through the projector, see page 34 for instructions on connecting an audio cable.
Connecting an S-Video Source note If the S-Video cable was not provided with your video device, you can purchase one from Epson; see page 15. 1. Connect the S-Video cable to the S-Video connector on your player and the S-Video port on the projector. S-Video port 2. If you want to play sound through the projector, see page 34 for instructions on connecting an audio cable.
Connecting a Component Video Source If your video equipment has component video connectors (three connectors labeled either Y/Cb/Cr or Y/Pb/Pr), you can purchase a component-to-VGA video cable from Epson (see page 15) or an electronics dealer. 1. Connect the component end of the cable (3 male RCA) to the Y/Cb/Cr (or Y/Pb/Pr) connectors on your player. 2.
Connecting an RGB Video Source You can connect to an RGB video source using the VGA computer cable provided with the projector. 1. Connect the cable to the RGB video port on your player and the Computer (Component Video) port on the projector. Computer (Component Video) port 2. You may need to change the Input Signal setting in the projector’s Signal menu to RGB (see page 58). 3. If you want to play sound through the projector, see page 34 for instructions on connecting audio cables.
Connecting an External Monitor If you want to monitor your computer presentation close-up (on a monitor placed beside the projector) as well as on the screen, you can connect an external monitor. You can use it to check on your presentation even if you’ve pressed the A/V Mute button or switched to a different picture source. Only computer images will appear on the external monitor, not video images.
Playing Sound Through the Projector You can play sound through the projector’s speaker system. 1. Locate the appropriate cable and connect it to the Audio jack on the projector. Audio jack 2. Connect the other end of the cable to the audio output connector(s) on your computer or video equipment. Connecting External Speakers You can output sound from the projector to external speakers with a built-in amplifier. 1. Locate the appropriate cable to connect your speakers.
2. Connect the stereo mini-jack end of the audio cable to the Audio Out port on the projector. Audio cable 3. Connect the other end of the cable to your speakers. The projector’s internal speaker system is disabled while sound is output to external speakers.
Turning the Projector On and Off Turn on any connected computer or video equipment before starting the projector so it can automatically detect and display the image source. If you turn on the projector first, or have multiple pieces of connected equipment, you may have to select the image source manually (see page 40). Follow these steps to turn on the projector: 1. Open the A/V Mute slide (lens cover). 2. Plug one end of the power cord into the projector, and the other end into an electrical outlet.
The Ppower light turns orange. Power light 3. Press the Ppower button on the projector or on the remote control. Power button The projector beeps once and the Ppower light flashes green as the projector warms up, then an image begins to appear. When the Ppower light stops flashing and remains green, the projector is ready for use. 4. If you are prompted to enter a password, see page 64. warning Never look into the lens when the lamp is on.
2. Choose Operation and press Enter. 3. Choose Direct Power On and press Enter. 4. Highlight On and press Enter. 5. Press Menu to exit. The setting will take effect the next time you plug the projector into a power outlet. Shutting Down the Projector note Lamp life will vary depending upon mode selected, environmental conditions, and usage. This projector incorporates Instant Off technology.
2 Displaying and Adjusting the Image Follow the guidelines in this chapter for: ■ Selecting an image source ■ Adjusting the image 39
Selecting an Image Source You may need to select the image source if you have multiple image sources connected to the projector (such as a computer or DVD player). Selecting the image source lets you switch between images input from different pieces of connected equipment. If you don’t see the image you want, press the Source Search button on the remote control or the projector until you see the image you want to project. Or, press one of the Source buttons on the remote control (Computer, Video, or USB).
Adjusting the Position of the Image If the image is too low on the screen, you can use the front adjustable foot to raise it. 1. Press the foot release lever up and lift the front of the projector. 2. Once the image is positioned where you want it, release the lever to lock the foot in position. 3. If the image is tilted or you need to fine-tune the height of the image, you can turn the projector’s adjustable rear feet.
If your image is distorted, do one of the following: ■ Press the appropriate keystone correction button on the projector’s control panel until the shape is evenly rectangular. PowerLite S7 Keystone correction buttons PowerLite 79/PowerLite W7 Keystone correction buttons ■ 42 Select the Keystone setting in the projector’s Settings menu (see page 59). Then use the arrow buttons on the remote control to adjust the shape of the image.
Focusing and Zooming the Image Turn the focus ring on the projector to sharpen the image. PowerLite 79/PowerLite W7: to enlarge or reduce the image, turn the zoom ring. PowerLite S7: to enlarge or reduce the image, press the Wide (enlarge) or Tele (reduce) button on the projector’s control panel. You can also use the Zoom setting in the projector’s Settings menu; see page 59 for instructions.
Selecting the Color Mode The Color Mode adjusts the brightness, contrast, and color for various common viewing environments. Use this setting to quickly obtain a good picture. Press the Color Mode button on the remote control to select an option. Press it until the option you want is projected in the upper right corner. Color Mode button Select from one of these Color Mode options: ■ Dynamic: Brightest mode; for video games or TV in a bright room.
Resizing Video Images You can resize your images by changing the aspect (width to height) ratio (depending on your input signal). Press the Aspect button on the remote control. Press the Aspect button repeatedly to cycle through the available options. note You cannot change the aspect ratio when displaying from a computer using the USB TypeB port.
■ Full: Displays images using the full width of the projection area, but does not retain the aspect ratio. 4:3 ratio images are elongated horizontally. ■ Native: Displays images as is (aspect ratio and resolution are maintained). Black bands may appear or images may be cut off, depending on the resolution.
3 Presenting With the Remote Control T he projector includes a number of tools to enhance your presentation. All of them can be accessed using the remote control, which lets you operate the projector from anywhere in the room—up to 19.7 feet (6 meters) away.
Using the Remote Control note If a button is pressed for longer than 30 seconds, the remote control stops operating to conserve battery power. When you release the button, normal operation resumes. Using the remote control under bright fluorescent lamps or in direct sunlight may affect projector response. Make sure batteries are installed as described on page 76. Follow these tips for using the remote control: ■ Point the remote control at the front or back of the projector, or at the screen.
You can also set the Lens Cover Timer setting to automatically turn off the projector after 30 minutes to protect the projector if the A/V Mute slide is closed for a long time. See page 60 for instructions. Stopping Action Press the Freeze button on the remote control to stop the action in your video or computer image. The image freezes but the sound continues. To restart the action, press the Freeze button again. Freeze button note The Freeze function pauses the image, not the sound.
Controlling the Volume To change the volume on the projector, press the the remote control. or button on note To temporarily shut off the sound and picture, press the A/V Mute button or close the A/V Mute slide. Volume buttons On the PowerLite 79/PowerLite W7 projector, you can also press the or button on the projector’s control panel You can also adjust the volume using the projector’s menu system. See page 59.
To control presentation slides using the remote control’s Page Up or Page Down buttons, select Page Up/Down as the USB Type B setting on the Extended menu (see page 60). Then you can control your presentation using those buttons. Page up or down to change slides in PowerPoint Right-click Left-click If you want to use the remote control as a wireless mouse, select Wireless Mouse as the USB Type B setting on the Extended menu (see page 60).
Highlighting Your Presentation You can display a pointer to call out important information on the screen. If you want to customize the pointer tool, you can choose from three alternative shapes. Using the Pointer Tool 1. To activate the pointer tool, press the Pointer button on the remote control. A pointer appears on the screen. Pointer button If you prefer to use a different style of pointer, see the instructions in the next section. 2.
4 Fine-Tuning the Projector Y ou can use the projector’s on-screen menus to adjust the image, sound, and other features.
Using the Menu System You can use the remote control or the projector’s control panel to access the menus and change settings. Follow these steps: 1. To display the menu screen, press the Menu button on the remote control or on the projector. You see a menu screen similar to the one below: Options Menu list The menus are listed on the left and the options available for the highlighted menu are shown on the right. 2.
Restoring the Default Settings You can use the Reset option on any menu to restore the factory-default settings for the settings in that menu. To restore all the projector settings to their factory-default values, select the Reset menu, highlight Reset All, press Enter, and select Yes to confirm. note When you select Reset All in the Reset menu, it does not reset the Input Signal, User’s Logo, Language, or Lamp Hours settings. Adjusting the Image 1.
note 2. Adjust the desired options as needed: The available settings vary depending on the input source selected. The Brightness setting changes the opacity of the projector’s LCD panels. You can also change the lamp’s brightness. Select Power Consumption in the Settings menu, then choose Normal or ECO (the default setting is Normal). ■ Color Mode Lets you quickly adjust the color and brightness for various environments. You can save a different setting for each source.
Adjusting Signal Settings Although the projector normally detects and optimizes the input signal automatically, you can use the Signal menu to make manual adjustments. In addition to changing the position of the projected image, you can correct tracking and sync for computer images, or change the aspect ratio. 1. Press the Menu button and select the Signal menu. You see a screen similar to one of those below. (The settings will be different depending on the source you are projecting from.
■ note You can also use the remote control’s Auto button to automatically reset the projector’s Tracking, Sync, and Position settings. See page 87 for details. Tracking Adjust this value to eliminate vertical stripes in computer images. ■ Sync Adjust this value if computer images appear blurry or flicker. ■ Position If the image is slightly cut off on one or more sides, it may not be centered exactly. Select this setting and use the arrow buttons to center it.
Customizing Projector Features You can use the Settings menu to lock the buttons on the projector, adjust audio volume, and customize several other features. PowerLite S7 ■ PowerLite 79/PowerLite W7 Keystone Adjusts the shape of the image if the projector has been tilted upward or downward. If you notice that lines or edge look jagged after adjustment, decrease the Sharpness setting (see page 55). ■ Zoom (PowerLite S7 only) Adjusts the image size from Wide (larger) to Tele (smaller).
■ User Button Lets you create a shortcut to one of the following menu items: Closed Caption, Power Consumption, Info, Progressive, Resolution. When you press the User button on the remote control, the assigned menu item is displayed. Customizing Power and Operation You can use the Extended menu to customize the way the projector displays images, enable Direct Power On, use closed captioning, turn sleep mode on or off, and customize other projector operations.
■ Projection Select Front (to project onto the front of a screen), Front/Ceiling (when the projector is mounted upside-down from the ceiling), Rear (to project from behind onto a transparent screen), or Rear/Ceiling (to project from behind onto a transparent screen when the projector is mounted upside-down from the ceiling). ■ Operation Direct Power On: Enable if you want to be able to start the projector when you connect the power cord (without pressing the Ppower button).
■ Link 21L Select On to enable the projector to be monitored and controlled from a computer using Link 21L software and the Epson USB Communication driver. ■ Language Select a language to use for the projector menus. Using the Projector Security Features To prevent unauthorized use of the projector, you can: 62 ■ Assign a password. You can use the password to prevent the projector from being turned on and prevent your custom startup screen from being changed. See the next section.
Enabling Password Protection caution The default setting for the password is 0000. Follow these steps to create a new password: If you lose the remote control, you will not be able to enter the password. Keep the remote control in a safe place at all times. Also, it’s a good idea to write down your password. 1. Press the Freeze button on the remote control for five to seven seconds. You see this screen: 2.
Starting the Projector With a Password When the password function is enabled, you see this screen when you plug in and turn on the projector: note If you leave the projector plugged in, the Password screen will not appear. It appears only if you unplug and reconnect the power cord. Hold down Hold down the Num button and use the numeric keypad to enter the four digit password. The password screen closes and projection begins.
Creating Your Own Startup Screen You can transfer any image from your computer or video source to the projector and then use it as your startup screen. You can also use it as the screen displayed when the projector is not receiving a signal or when you press the A/V Mute button. The image can be a company logo, slogan, photograph, or any other image you want to use.
7. When the message Save this image as the User’s Logo? appears, select Yes and press Enter. Saving the logo may take a few moments. Do not use your projector, remote control, or video source while the logo is being saved. 8. When you see the message Completed, press Menu to exit. Choosing When to Display the Image After your image is saved, you can set it to display as the startup screen, the screen you see when there’s no signal, or the screen you see when you press the A/V Mute button (see page 48). 1.
3. Select Full Lock (to lock all projector buttons) or Partial Lock (to lock all buttons except the Ppower button) and press Enter. 4. Select Yes and press Enter to confirm the setting. 5. Press the Menu button to exit. To disable the Control Panel Lock function, select Off in the Control Panel Lock menu. Or press and hold the Enter button on the projector’s control panel for seven seconds. A message is displayed and the lock is released.
Fine-Tuning the Projector
5 Maintaining the Projector Y our projector needs little maintenance. All you have to do on a regular basis is clean the lens, and check that the air filter and vents are clean. A clogged air filter or vent can block ventilation needed to cool the projector. warning Before you clean any part of the projector, turn it off and unplug the power cord. Never open any cover on the projector, except the lamp cover. Dangerous electrical voltages in the projector can injure you severely.
Cleaning the Lens Clean the lens whenever you notice dirt or dust on the surface. caution To remove dirt or smears on the lens, use a commercially available cloth for cleaning glasses. Do not rub the lens with harsh materials or subject the lens to shocks, or you may damage it. Cleaning the Projector Case Do not use wax, alcohol, benzene, paint thinner, or other chemical detergents. These can damage the case. Before cleaning, turn off the projector and unplug the power cord.
You can remove the air filter to clean both sides If the filter is too dirty or broken, replace the filter as described below. Replacing the Air Filter You need to replace the air filter if: ■ You cannot remove the dust from it ■ The air filter is damaged or torn ■ You repeatedly see a projected message telling you to clean or replace it Contact your dealer or call Epson at 800-GO-EPSON (800-463-7766) to obtain a new air filter. Request part number V13H134A25. 1.
4. Slide the new air filter into the slot until it clicks into place. Replacing the Lamp note Turn off this product when not in use to prolong the life of the projector. The life span of the projection lamp is about 4000 hours if Power Consumption in the Settings menu is Normal (default), and 5000 hours if this setting is ECO. See page 75 to check the lamp usage. It is time to replace the lamp when: ■ The projected image gets darker or starts to deteriorate.
Contact your dealer or call Epson at 800-GO-EPSON (800-463-7766). Request part number V13H010L54. warning Let the lamp cool fully before replacing it. Follow these steps to replace the lamp: 1. Turn off the projector and unplug the power cord. 3. Loosen the lamp cover screw (you cannot remove it). Then slide the lamp cover off. In the unlikely event that the lamp has broken, small glass fragments may be present and should be removed carefully to avoid injury.
5. Hold the lamp as shown and pull it straight out. note The lamp(s) in this product contain mercury. Please consult your state and local regulations regarding disposal or recycling. Do not put in the trash. 6. Gently insert the new lamp. (If it doesn’t fit easily, make sure it is facing the right way.) Then tighten its screws. 7. Replace the lamp cover, then tighten its screw. note Tighten the lamp cover securely so you do not receive a lamp cover error when you turn the projector back on. 8.
Resetting the Lamp Timer After you replace the lamp, you need to reset the lamp timer using the projector’s menu system. 1. Press the Menu button on the remote control or on the projector’s control panel. You see the main menu. 2. Select the Reset menu and press Enter. You see this screen: 3. Select Reset Lamp Hours and press Enter. 4. When you see the prompt, select Yes and press Enter. 5. When you’re finished, press Menu to exit.
The life span of the lamp is about 4000 hours if Power Consumption in the Settings menu is Normal (default), and 5000 hours if this setting is ECO. Make sure you have a spare lamp handy if the usage hours on this menu are close to the life span of your lamp. Replacing the Remote Control Batteries caution Replace the batteries in the remote as described below: When replacing batteries, take the following precautions: 1. Turn the remote control over. 2.
4. Replace the battery cover and press it down until it clicks into place. Transporting the Projector The projector contains many glass and precision parts. When hand-carrying the projector, use the carrying case. note Follow these guidelines to prevent damage when transporting it: Epson shall not be liable for any damages incurred during transportation. ■ Close the A/V Mute slide (lens cover). ■ If a USB device is connected, remove it from the projector.
Maintaining the Projector
6 Solving Problems T his chapter helps you solve problems with your projector and tells you how to contact technical support for problems you can’t solve yourself.
Using On-Screen Help If the image doesn’t look right or your audio isn’t working, you can get help by pressing the ? Help button on the projector or the remote control. 1. Press the ? Help button on the remote control or on the projector. You see the Help menu: 2. Use the arrow buttons on the remote control or the projector to highlight menu items. 3. Press the Enter button on the remote control or the projector to select the menu item and read the solutions. 4.
Checking Projector Status If your projector isn’t working correctly, first turn it off and unplug it. Then plug the power cord back in and turn on the projector. If this doesn’t solve the problem, check the lights on top of the projector. What To Do When the Lights Flash The lights on top of the projector indicate the projector’s status.
Error light(s) status Error light(s) status P Green or orange Flashing orange Off P Flashing red Off Flashing orange P Red Off Red Description It’s time to replace the lamp. See page 72 for instructions. If you continue to use the lamp after the replacement warning, there is an increased possibility that the lamp may break. Rapid cooling is in progress. Although this is not an abnormal condition, projection will stop automatically if the temperature rises higher.
Solving Projector Operation Problems The power doesn’t turn on. ■ If the projector doesn’t turn on when you press the Ppower button, make sure the power cord is connected to the projector and plugged into a working electrical outlet. ■ The power cord may be defective. Disconnect the cord from the outlet and contact Epson as described on page 90. ■ If you’re using the Direct Power On function and you immediately plug the power cord back in after unplugging it, the power may not turn back on.
■ The attached computer may be in sleep mode or displaying a black screen saver. Try pressing a key on the computer. ■ If you are projecting from a DVD player or other video source, make sure you turn it on and press its Play button. ■ If you are projecting from a composite or S-Video video source, make sure the Video Signal setting is correct (see page 57). ■ You can also try resetting all of the menu settings (see page 55).
If you’re using Mac OS X: 1. Open System Preferences. 2. Click Displays. 3. Click Detect Displays. 4. Make sure the VGA Display or Color LCD dialog box is selected. 5. Click the Arrangement or Arrange tab. 6. Make sure the Mirror Displays checkbox is selected. The message Not Supported is displayed. ■ Make sure the correct input signal is selected in the Signal menu (see page 57). ■ Make sure your computer’s resolution and frequency or refresh rate is supported by the projector (see page 96).
■ If you’re projecting a widescreen computer image, adjust the Resolution setting (see page 57), if necessary. ■ If you’re projecting an image from a computer with dual display activated, turn dual display off. The image isn’t square, but keystone-shaped. If the image isn’t evenly rectangular, adjust its shape as described on page 41. The image contains static or noise. 86 Solving Problems ■ If you’re using a computer cable longer than 6 feet (1.
The image is blurry. ■ There may be dirt or smears on the lens. Clean the lens as described on page 70. ■ Adjust the focus using the focus ring (see page 43). ■ If the projector is angled sharply toward the screen, it may not be possible to focus the entire image. Move the projector to position it more directly in front of the screen. ■ Lower the projection angle to reduce the amount of keystone correction required.
2. Adjust the Tracking to eliminate vertical bands. 3. Adjust the Sync setting to increase the image sharpness. The image is too light or dark, or colors are incorrect. note Because of the different technologies used, your projected image may not exactly match the colors on your notebook or computer monitor. 88 Solving Problems ■ Press the Color Mode button or select a different Color Mode option in the Image menu. See page 44 for details on the available options.
There is no sound, or the sound is not loud enough. ■ Use the Volume buttons to adjust the volume (see page 50), or adjust the Volume setting in the Settings menu. ■ Make sure A/V Mute is not enabled. (Press the A/V Mute button to disable it.) ■ If your presentation includes computer audio, make sure the volume control on your computer is not turned all the way down or muted.
■ Dim the room lights and turn off any fluorescent lights. Make sure the projector is not in direct sunlight. Strong lighting, especially fluorescent lights, may affect the projector’s infrared receivers. Also, turn off any nearby equipment that emits infrared energy, such as a radiant room heater. ■ If any buttons are held for longer than 30 seconds, the remote enters sleep mode. Release any button that is held to wake the remote.
Before you call for support, please have the following information ready: ■ Product name (PowerLite S7, PowerLite 79, or PowerLite W7) ■ Product serial number (located on the bottom of the projector) ■ Proof of purchase (such as a store receipt) and date of purchase ■ Computer or video configuration ■ Description of the problem Purchase Supplies and Accessories You can purchase screens and other accessories from an Epson authorized reseller.
Solving Problems
A Technical Specifications General Type of display Resolution (native format) Color reproduction Light output (brightness) Poly-silicon TFT active matrix PowerLite S7 800 × 600 pixels (SVGA) PowerLite 79 1024 × 768 pixels (XGA) PowerLite W7 1280 × 800 pixels (WXGA) 16.
Contrast ratio 2000:1 (Dynamic color mode, Normal Power Consumption, with Auto Iris setting turned on in the Image menu; see page 55) Image size PowerLite S7 (4:3 image) 30 to 350 inches (76.2 to 889 cm) PowerLite 79 (4:3 image) 30 to 300 inches (76.2 to 762 cm) PowerLite W7 (16:10 image) 33 to 320 inches (83.8 to 812.
Lamp life Approx. 4000 hours (Normal mode) Approx. 5000 hours (ECO mode) Part number V13H010L54 Remote Control Range 19.7 feet (6 meters) Batteries (2) Alkaline AA Dimensions Height 3.0 inches (77 mm), not including feet Width 11.6 inches (295 mm) Depth 9.0 inches (228 mm) Weight 5.1 lb (2.3 kg) note Lamp life will vary depending upon mode selected, environmental conditions, and usage. Brightness decreases over time. Turn off this product when not in use to prolong the life of the projector.
Safety and Approvals United States FCC 47CFR Part 15B Class B (DoC) UL60950-1 Second Edition (cTUVus Mark) Canada ICES-003 Class B CSA C22.2 No. 60950-1-07 Pixelworks™ DNX™ ICs are used in this projector. Compatible Video Formats These projectors support the high definition video and computer display formats listed here. To project images output from a computer, the computer’s video card must be set at a refresh rate (vertical frequency) that’s compatible with the projector.
Computer, component video, composite video, and S-Video Mode Refresh rate (Hz) Resolution XGA—60 XGA—70 XGA—75 XGA—85 60 70 75 85 1024 × 7681 (1024 × 576*) 1024 × 7681 (1024 × 576*) 1024 × 7681 (1024 × 576*) 1024 × 7681 (1024 × 576*) SXGA1—70 SXGA1—75 70 75 1152 × 864 1152 × 864 WXGA—60 WXGA—75 60 75 1280 × 800 1280 × 800 SXGA2—60 60 1280 × 960 SXGA3—60 60 1280 × 1024 WXGA1—60 WXGA2—60 60 60 1280 × 768 1360 × 768 WXGA+60 60 1440 × 900 SXGA+60 60 1400 × 1050 iMAC VGA iMAC SVGA iMAC
PowerLite W7 Computer, component video, composite video, and S-Video 98 Technical Specifications Mode Refresh rate (Hz) Resolution VGA EGA 85 640 × 350 VGA—60 VESA—72 VESA—75 VESA—85 60 72 75 85 640 × 480 (640 × 360*) 640 × 480 (640 × 360*) 640 × 480 (640 × 360*) 640 × 480 (640 × 360*) SVGA—56 SVGA—60 SVGA—72 SVGA—75 SVGA—85 56 60 72 75 85 800 × 600 (800 × 450*) 800 × 600 (800 × 450*) 800 × 600 (800 × 450*) 800 × 600 (800 × 450*) 800 × 600 (800 × 450*) XGA—60 XGA—70 XGA—75 XGA—85 60 70 75 85
Computer, component video, composite video, and S-Video Mode Refresh rate (Hz) Resolution iMAC VGA iMAC SVGA iMAC XGA MAC13 MAC16 MAC19 MAC19-60 MAC21 117 95 75 67 75 75 60 75 640 × 480 (640 × 360*) 800 × 600 (800 × 450*) 1024 × 768 (1024 × 576*) 640 × 480 832 × 624 1024 × 768 1024 × 768 1152 × 870 NTSC NTSC 4:43 PAL N-PAL M-PAL PAL—60 SECAM 60 60 50 50 60 60 50 720 × 480 (720 × 360*) 720 × 480 (720 × 360*) 720 × 576 (720 × 432*) 720 × 576 (720 × 432*) 720 × 576 (720 × 432*) 720 × 576 (720 × 432*) 7
Technical Specifications
B Notices This appendix includes safety instructions and other important information about your projector. Important Safety Instructions Follow these safety instructions when setting up and using the projector: ■ Do not look into the lens when the projector is on. The bright light can damage your eyes. ■ Do not place the projector on an unstable cart, stand, or table. ■ Do not operate the projector on its side, or while tilted to one side.
Notices ■ Never push objects of any kind through the cabinet slots. ■ Do not use or store the projector or remote control in a hot location, such as near a heater, in direct sunlight, or in a closed vehicle. ■ Do not block the slots and openings in the projector case. They provide ventilation and prevent the projector from overheating. Do not operate the projector on a sofa, rug, or other soft surface, or set it on top of loose papers, which could block vents underneath your projector.
■ Use the type of power source indicated on the projector. Use of a different power source may result in fire or electric shock. If you are not sure of the power available, consult your dealer or power company. ■ If you use the projector in a country other than where you purchased it, use the correct power cord for that country. ■ Do not overload wall outlets, extension cords, or power strips. Do not insert the plug into a dusty outlet. This can cause fire or electric shock.
FCC Compliance Statement For United States Users This equipment has been tested and found to comply with the limits for a Class B digital device, pursuant to Part 15 of the FCC Rules. These limits are designed to provide reasonable protection against harmful interference in a residential installation. This equipment generates, uses, and can radiate radio frequency energy and, if not installed and used in accordance with the instructions, may cause harmful interference to radio or television reception.
Index A C A/V Mute button, 48 display settings, 60, 66 A/V Mute slide closing, 48, 61, 77 opening, 36, 48, 83 Accessories, 15 to 16 Air filter cleaning, 70 to 71 ordering, 15 replacing, 71 to 72 Altitude, 61, 82, 95 Anti-theft device, 15, 24, 67 Aspect ratio, 45 to 46, 58, 94 Audio cable, 34 connecting equipment, 34 to 35 controlling volume, 50 problems, troubleshooting, 89 turning off (using A/V Mute), 48 Auto Iris setting, 56 Auto Setup setting, 57 Cables audio, 34 component-to-VGA, 16, 28, 31 composit
Contrast setting, 56 Control Panel Lock setting, 59, 66 to 67, 83 Custom screen, see User’s Logo D Default settings, restoring, 55 Dimensions, projector, 95 Direct Power On, 37 Distance from projector to screen, 20 to 21, 94 Documentation, 10 DVD player, connecting, 28 to 32 Dynamic color mode, 44 E Electrical specifications, 95 Environmental specifications, 95 Epson accessories, 15 to 16 PrivateLine Support, 10 technical support, 10, 90 to 91 warranty, 15 Error status lights, 82 Extended menu, 60 to 62 E
Lens, cleaning, 70 Light output specifications, 93 Lights, status, 81 to 82 Locking buttons, 66 to 67 projector, 67 Logo, saving on projector, 65 to 66 M Macintosh display problems, 85 Manuals, 10 Menus changing settings, 54 default settings, restoring, 55 Extended, 60 to 62 Image, 55 to 56 Info, 75 to 76 Reset, 55, 75 Settings, 59 to 60 Signal, 57 to 58 User’s Logo, 65 to 66 Monitor, connecting external, 33 Mouse, using remote control as, 50 to 51 N No Signal message, 84 to 85 Noise level, 94 Normal aspe
R Raising image, 41 Rear-screen projection, 25, 61 Registration, 15 Remote control A/V Mute button, 48 as wireless mouse, 50 to 51 batteries used, 95 batteries, replacing, 76 to 77 correcting color, 44, 56 E-Zoom buttons, 49 Freeze button, 49 numeric keypad, using, 63 pointer tool, using, 52 problems, 89 range, 95 specifications, 95 troubleshooting, 89 using, 48 Replacing lamp, 72 to 75 Request code, password, 64 Resetting lamp timer, 75 Resetting menu options, 55 Resize image, 45 to 46 Resolution, 45 to 46
Troubleshooting blank screen, 83 to 84 cut-off image, 85 to 86 distorted image, 42 image and sound problems, 83 to 89, ?? to 89 no signal, 84 to 85 projector problems, 79 to 91 remote control problems, 89 tapered image, 42 Turning off picture (using A/V Mute), 48 Turning off projector, 38 U Unpacking projector, 18 USB cable, 26 to 27 connecting for display, 26 to 27 selecting TypeB port usage, 50, 61 User’s Logo creating, 65 to 66 display settings, 66 W Warning lights, 81 to 82 Warranty, 15 Wide button, 4