
User's Guide

62 Displaying and Adjusting the Image
(G5650WNL), or 1920 × 1200 (G5450WUNL/G5750WUNL);
images are cut off if the resolution is over 1024 × 768
(G5550NL/G5950NL), 1280 × 800 (G5650WNL), or 1920 ×
1200 (G5450WUNL/G5750WUNL).
Press the
Aspect button repeatedly to cycle through the available
options.
You can also change the aspect ratio using the projector’s Signal
menu. See page 116 for details.
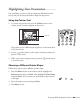
Projecting Two Images Simultaneously
You can use the projector’s split screen feature to divide the screen
into left and right sections and simultaneously project two images.
Follow these steps to activate the split screen:
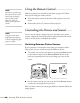
1. Press the
Split button on the remote control. The currently
selected input source will move to the left side of the screen.
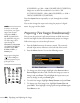
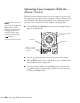
2. Press the
Menu button. You see the following screen:
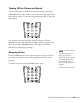
3. To change one of the images, highlight either
Source Left or
Source Right (whichever side contains the image you want to
change) and press
Enter. Then highlight the input source you
want to change to and press
Enter again.
4. To switch the images, highlight
Swap Screens and press Enter.
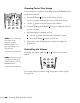
5. To change one of the image sizes, highlight
Screen Size and
press
Enter. Then highlight a sizing option and press Enter again.
Press
Menu to exit.
note
In order to use the Split
Screen feature, one of your
images must be input
through the
HDMI or
DVI-D (G5450WUNL/
G5750WUNL only) port.
The other image can be
input through the
Computer1, Computer2
(G5550NL/G5650WNL/
G5950NL only),
BNC,
S-Video, Video1, or
Video2 ports.
Images input through the
USB or
LAN port
cannot be projected as part
of the split screen.