
User`s guide


Table Of Contents
- Front
- Contents
- Introduction to Your Projector
- Setting Up the Projector
- Using the Projector on a Network
- Wireless Network Projection
- Setting Up Projector Network E-Mail Alerts
- Setting Up Monitoring Using SNMP
- Controlling a Networked Projector Using a Web Browser
- Using Basic Projector Features
- Turning On the Projector
- Turning Off the Projector
- Selecting the Language for the Projector Menus
- Adjusting the Image Height
- Image Shape
- Resizing the Image With the Zoom Ring
- Focusing the Image
- Remote Control Operation
- Selecting an Image Source
- Projection Modes
- Image Aspect Ratio
- Color Mode
- Controlling the Volume with the Volume Buttons
- Projecting a Slide Show
- Adjusting Projector Features
- Adjusting the Menu Settings
- Maintaining and Transporting the Projector
- Solving Problems
- Projection Problem Tips
- Projector Light Status
- Using the Projector Help Displays
- Solving Image or Sound Problems
- Solutions When No Image Appears
- Solutions When Image is Incorrect Using the USB Display Function
- Solutions When "No Signal" Message Appears
- Solutions When "Not Supported" Message Appears
- Solutions When Only a Partial Image Appears
- Solutions When the Image is Not Rectangular
- Solutions When the Image Contains Noise or Static
- Solutions When the Image is Fuzzy or Blurry
- Solutions When the Image Brightness or Colors are Incorrect
- Solutions When There is No Sound or Low Volume
- Solving Projector or Remote Control Operation Problems
- Solutions When Network Alert E-Mails are Not Received
- Where to Get Help
- Technical Specifications
- General Projector Specifications
- Projector Lamp Specifications
- Remote Control Specifications
- Projector Dimension Specifications
- Projector Electrical Specifications
- Projector Environmental Specifications
- Projector Safety and Approvals Specifications
- Supported Video Display Formats
- USB Display System Requirements
- Notices
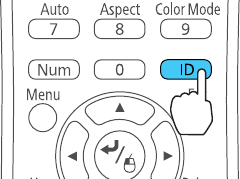
4. Hold down the ID button on the remote control while you press the numeric button that matches the
projector's ID. Then release the buttons.
5. Press the ID button on the remote control to check if the ID-setting process worked.
You see a message displayed by the projector.
• If the remote control is listed as On, the remote control ID is set to operate only the listed projector.
• If the remote control is listed as Off, the remote control ID is not set properly. Repeat the steps
above to set the ID to match the projector you want to control.
Note: You must set the remote control ID to match the projector ID each time you turn on the
projector you have set it to control.
Parent topic: Projector Identification System for Multiple Projector Control
Matching Multiple-Projector Display Quality
You can match the display quality of multiple projectors that will project next to each other.
1. Turn on all the projectors on which you want to match the display quality.
2. Set ID numbers on each projector.
3. Make sure all the projectors are using the same Color Mode setting.
4. It is best to match two projectors at a time, so set the remote control ID to match the first projector.
95