
Multimedia Projector User'sGuide 503c, 713c


Table Of Contents
- Front Matter
- Contents
- Welcome
- Chap 1-Setting Up the Projector
- Chap 2-Using the Projector
- Chap 3-Using the Remote Control
- Chap 4-Fine-tuning the Projector
- Chap 5-Maintaining and Transporting the Projector
- Chap 6-Solving Problems
- Appendix A: Connecting to Additional Equipment
- Appendix B: Notices
- Appendix C: Technical Specifications
- Index
14
Setting Up the Projector
4. If necessary, configure your laptop to work with an external
mouse.
If you don’t need to make any other connections, you can plug in
your projector and turn it on. See page 18 for instructions.
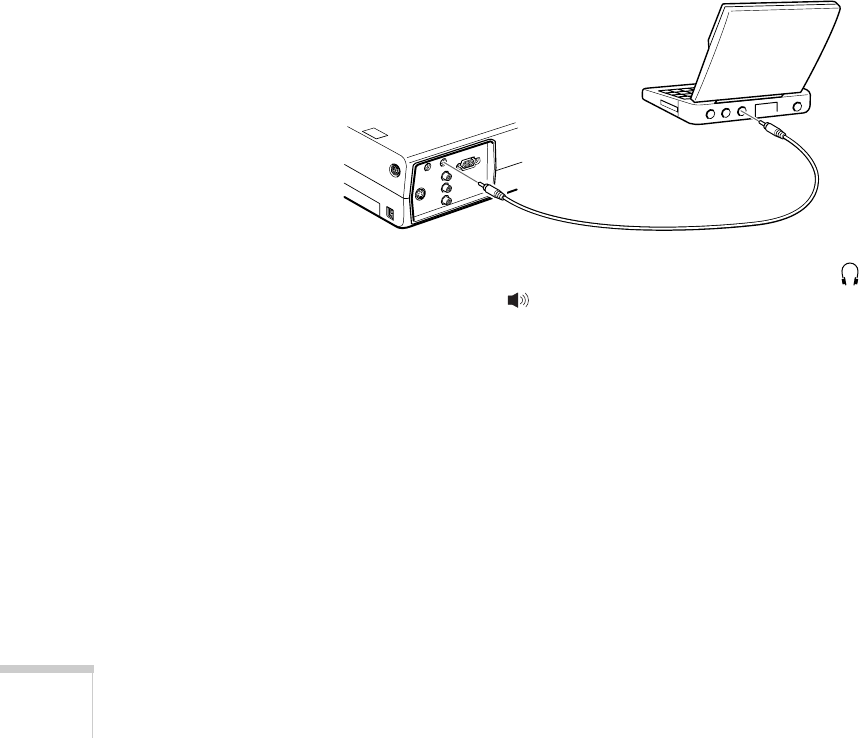
Amplifying Computer Audio
Your laptop probably has its own sound system; however, it may not
be adequate for your presentation. If you need more volume or better
sound quality, you can connect a computer audio cable to take
advantage of the projector’s built-in amplifier and speaker. You can
obtain a computer audio cable (3.5-mm stereo miniplug cable) from a
computer or electronics dealer.
1. Connect one end of the audio cable to the
Audio In
jack on the
projector.
2. Connect the other end of the audio cable to your laptop’s
headphone jack or audio-out jack. (Jack locations vary; see
your computer manual if you’re not sure which jack to use.)
If you don’t need to make any other connections, you can plug in
your projector and turn it on. See page 18 for instructions.