PowerLite 4100/4200W/4300 Multimedia Projector ® User’s Guide
Important Safety Information WARNING: Never look into the projector lens when the lamp is turned on; the bright light can damage your eyes. Never let children look into the lens when it is on. Never open any cover on the projector, except the lamp and filter covers. Dangerous electrical voltages inside the projector can severely injure you. Except as specifically explained in this User’s Guide, do not attempt to service this product yourself. Refer all servicing to qualified service personnel.
Contents Welcome . . . . . . . . . . . . . . . . . . . . . . . . . . . . . . . . . . . . . . 7 Using Your Documentation . . . . . . . . . . . . . . . . . . . . . . . . . . 8 Getting More Information . . . . . . . . . . . . . . . . . . . . . . . . 8 Registration and Warranty . . . . . . . . . . . . . . . . . . . . . . . . . . . 9 Optional Accessories. . . . . . . . . . . . . . . . . . . . . . . . . . . . . . . . 9 1 Setting Up the Projector . . . . . . . . . . . . . . . . . . . . .
2 Displaying and Adjusting the Image . . . . . . . . 27 3 Presenting With the Remote Control . . . . . . . . 35 4 4 Displaying an Image. . . . . . . . . . . . . . . . . . . . . . . . . . . . . . . 28 Adjusting the Image . . . . . . . . . . . . . . . . . . . . . . . . . . . . . . . 28 Adjusting the Position of the Image . . . . . . . . . . . . . . . . 29 Focusing and Zooming the Image . . . . . . . . . . . . . . . . . 30 Adjusting the Image Shape. . . . . . . . . . . . . . . . . . . . . . .
Fine-Tuning the Projector . . . . . . . . . . . . . . . . . . . 53 6 Maintaining the Projector . . . . . . . . . . . . . . . . . . . 73 7 Solving Problems Using the Menu System . . . . . . . . . . . . . . . . . . . . . . . . . . . . 54 Restoring the Default Settings . . . . . . . . . . . . . . . . . . . . 55 Adjusting the Image . . . . . . . . . . . . . . . . . . . . . . . . . . . . . . . 56 Six-Axis Color Adjustment. . . . . . . . . . . . . . . . . . . . . . . 57 Adjusting Signal Settings . . . . .
Solving Problems With the Remote Control . . . . . . . . . . . . 97 Where To Get Help . . . . . . . . . . . . . . . . . . . . . . . . . . . . . . . 97 Internet Support . . . . . . . . . . . . . . . . . . . . . . . . . . . . . . 98 Speak to a Support Representative . . . . . . . . . . . . . . . . . 98 Purchase Supplies and Accessories . . . . . . . . . . . . . . . . . 99 A Projector Installation . . . . . . . . . . . . . . . . . . . . . . . 101 Installation Guidelines . . . . . . . . . . . . . . . . . . .
- Welcome The PowerLite ® 4100/4200W/4300 is an easy-to-use, lightweight projector. It offers up to 4500 lumens (PowerLite 4100/4200W) or 5200 lumens (PowerLite 4300) of brightness, and provides a native XGA (PowerLite 4100 and 4300) or WXGA (PowerLite 4200W) resolution. You can connect it to a wide range of computers and video sources.
■ When you present with PowerPoint®, project only the slide images while viewing handout notes and controls on the computer screen ■ Perform six-axis color adjustment for fine art and photography Using Your Documentation This electronic User’s Guide contains all the information you need to set up and use your projector. Please follow these guidelines as you read through this manual: ■ Warnings must be followed carefully to avoid bodily injury.
■ epson.com/support (U.S.) or epson.ca/support (Canada) Download FAQs and e-mail your questions to Epson support. ■ PrivateLine® support If you still need help after checking this User’s Guide and the sources listed in this section, you can use the Epson PrivateLine Support service to get help fast. Call (800) 637-7661 and enter the PIN on the PrivateLine card. See page 97 for more information. Registration and Warranty Your projector comes with a basic warranty that lets you project with confidence.
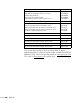
Product Part number Advanced projector ceiling mount with precision gear Adjustable suspended ceiling channel kit False ceiling plate kit Structural round ceiling plate Adjustable extension column (pipe) 8”–11” ELPMBPRG ELPMBP01 ELPMBP02 ELPMBP03 ELPMBC01 Kensington® MicroSaver®security lock ELPSL01 ES3000 Ultra Portable Projector Screen 50-inch portable screen (4:3 aspect ratio) 60-inch portable pop-up screen (4:3 aspect ratio) 80-inch portable pop-up screen (4:3 aspect ratio) DUET™ portable projecto
1 Setting Up the Projector T his chapter tells you how to unpack the projector and connect it to a notebook or desktop computer, to video equipment, and/or to your local area network.
Unpacking the Projector After unpacking the projector, make sure you have all these parts: PDF manuals and registration CD-ROM Projector and lens cap Lens theft deterrent screw Power cord Remote control and 2 AA batteries VGA computer cable Password Protected sticker Interface label stickers note If you mount the projector on the ceiling, the interface and button names on the projector will appear upside down. Attach the interface label stickers so that you can more easily read the names.
■ To receive an RGB or component video signal from a video device that has RGB or component (PrPbY or CrCbY) connectors, you’ll need a BNC-type video cable. One may be provided with your video equipment. Positioning the Projector If the projector isn’t already installed in the room you’re using, you’ll probably want to place it on a table in front of the screen. This lets you stand in the front of the room, face the audience, and remain close enough to the equipment to be able to control it.
PowerLite 4100/4300, 4:3 image Projection distance (A) Wide to Tele Offset (B) 30 inches 30 to 56 inches (77 to 142 cm) 0 to 18 inches (0 to 46 cm) 40 inches 41 to 75 inches (104 to 190 cm) 0 to 24 inches (0 to 61 cm) 50 inches 52 to 94 inches (131 to 239 cm) 0 to 30 inches (0 to 76 cm) 60 inches 62 to 113 inches (158 to 287 cm) 0 to 36 inches (0 to 91 cm) 80 inches 84 to 151 inches (213 to 385 cm) 0 to 48 inches (0 to 122 cm) 100 inches 105 to 190 inches (267 to 482 cm) 0 to 60 inches (0
PowerLite 4200W, 16:10 image Projection distance (A) Wide to Tele Offset (B) 30 inches 32 to 59 inches (81 to 149 cm) -1.5 to 17.4 inches (-4 to 44 cm) 40 inches 43 to 79 inches (109 to 200 cm) -2 to 23.2 inches (-5 to 59 cm) 50 inches 54 to 99 inches (138 to 251 cm) -2.5 to 29 inches (-6 to 74 cm) 60 inches 66 to 119 inches (167 to 302 cm) -3 to 34.8 inches (-8 to 88 cm) 80 inches 88 to 159 inches (224 to 405 cm) -4 to 46.
note After positioning the projector, you may want to connect a Kensington MicroSaver® anti-theft device to the lock port on the projector. You can purchase this from Epson; see page 9. Ideally, you should place the projector directly in front of the center of the screen, facing it toward the screen squarely. The base of the lens should be about level with the bottom of the screen.
Connecting to the Computer Port You can connect to the projector using the VGA computer cable that came with it (the monitor port on your computer must be a mini D-sub 15-pin port). 1. If you’re using the VGA computer cable, connect one end to the projector’s Computer1 port, and the other end to your computer’s monitor port. caution Don’t try to force a connector to fit a port with a different shape or number of pins. You may damage the port or connector. 2.
Connecting to the BNC Connectors 1. Obtain a commercially available standard BNC to VGA video cable. 2. Plug the BNC connectors into the projector’s B/Cb/Pb, G/Y, and R/Cr/Pr connectors as shown below. Depending on your computer’s video card, you may have to connect to the projector’s V Sync and H/C Sync connectors too. (See your computer documentation for more information.) 3. Plug the VGA connector on the other end of the cable into your computer’s monitor port. 4.
Connecting to Video Equipment You can connect several video sources to the projector at the same time. Before starting, look at your video equipment to determine its available video output connections: ■ If your video player has a component video port (three connectors labeled either Y/Cb/Cr or Y/Pb/Pr), see “Connecting a Component Video Source” on page 21. ■ If you’re using a coax video cable, see “Connecting a Composite Video Source” on page 20.
Connecting a Composite Video Source note If the video cable was not provided with your video device, you can purchase one from an electronics dealer. 1. If your cable has a bayonet connector (BNC), connect it to the Video1 connector on the projector. 2. When you’ve finished making any connections, see page 23 for instructions on turning on the projector and Chapter 2 for instructions on displaying and adjusting the image.
Connecting a Component Video Source 1. Look at the connectors at one end of your component video cable. If they are bayonet (BNC) connectors, go on to step 2. If they are RCA connectors, you’ll need to attach commercially available BNC adapters to plug the cable into your projector, then continue with step 2. 2. Connect the cable to your player and the BNC connectors on the projector. Match the Y/Cb/Cr (or Y/Pb/Pr) connectors on your player to the corresponding connectors on the projector.
Connecting an RGB Video Source note Be sure your video player is not a component video source. If you select the wrong source, image quality may suffer. Check your video player’s documentation. Connecting Using a VGA Computer Cable 1. Locate the VGA computer cable provided with the projector. 2. Connect the cable to the video port on your player and the Computer1 port on the projector. 3. You may need to change the Input Signal setting in the projector’s Signal menu to RGB (see page 59). 4.
Connecting Using a BNC Cable 1. Locate a BNC video cable (one may be included with your video equipment). 2. Connect the cable between your player and the corresponding R/G/B connectors on the projector. 3. You may need to change the Input Signal setting in the projector’s Signal menu to RGB (see page 59). 4. When you’ve finished making any connections, see page 23 for instructions on turning on the projector and Chapter 2 for instructions on displaying and adjusting the image.
Follow these steps to turn on the projector: 1. Remove the lens cover. note You can set the projector to automatically turn off the lamp and enter “sleep mode” when it has not received any signals for 1 to 30 minutes (see page 67 to enable, disable, or adjust this setting). This conserves electricity, cools the projector, and extends the life of the lamp. If you want to start projecting again, press the P power button. If you are done using the projector, unplug the power cord. 2.
3. Press the Ppower button on the remote control or on the back of the projector. The projector beeps once and the Ppower light flashes green as the projector warms up, then an image begins to appear. When the Ppower light stops flashing and remains green, the projector is ready for use. 4. If you are prompted to enter a password, see page 63. warning Never look into the lens when the lamp is on. This can damage your eyes, and is especially dangerous for children and pets.
Shutting Down the Projector note Turn off this product when not in use to prolong the life of the projector. This projector incorporates Instant Off technology. To turn it off, you can press its Ppower button as described below, unplug it, or turn off a power switch that supplies power to the projector. You don’t have to wait for the projector to cool down first. 1. To turn off the projector, press the Ppower button on the remote control or projector. You see a confirmation message.
2 Displaying and Adjusting the Image Follow the guidelines in this chapter for: ■ Displaying an image ■ Adjusting the image 27
Displaying an Image You may need to select the image source if you have multiple video sources connected to the projector (such as a computer or DVD player). Selecting the image source lets you switch between images input from different pieces of connected equipment. If you don’t see the image you want, press the Search button or one of the Source buttons on the remote control, or the Source Search button on the projector until you see the image you want to project.
Adjusting the Position of the Image You can use the vertical lens shift dial on the top of the projector to move your image up or down, or you can use the horizontal lens shift dial to move your image left or right. Vertical Horizontal Additionally, if the projector is on a table, you can use the projector’s adjustable feet to adjust the image: 1. Stand behind the projector. Press the foot release lever up and lift the front of the projector.
3. If necessary, you can fine-tune the height or level the image by turning any of the projector’s adjustable feet. Focusing and Zooming the Image Turn the focus ring on the projector to sharpen the image. Turn the zoom ring (using the knobs on the ring) to reduce or enlarge the image. Focus Zoom If the image still isn’t large enough, you may need to move the projector farther away from the screen. You can also use the E-Zoom buttons on the remote control to zoom in on a portion of the image.
You see this screen: 5. Use the pointer button on the remote control (or the arrow buttons on the projector) to select the corner you want to adjust, and press Enter. 6. Use the pointer button on the remote control (or the arrow buttons on the projector) to adjust the shape, then press Esc when you are finished. note To undo your Quick Corner adjustments, press and hold the Esc button for about 2 seconds, select Reset Quick Corner from the screen that appears, then press Enter. 7.
5. Select H-Keystone (for horizontal adjustment) or V-Keystone (for vertical adjustment) and use the pointer button on the remote control to adjust the shape of the image. Vertical keystone adjustment Horizontal keystone adjustment If the image becomes smaller, use the zoom ring to enlarge the image so it fits the screen. If the image contains faint lines or a gridlike pattern, decrease the sharpness setting (see page 57). 6. When you’re done, press Menu to exit.
■ sRGB: Matches the color palette of standard sRGB computer displays. ■ DICOM SIM: Ideal for projecting X-ray photographs and other medical images. ■ Customized: For manual color adjustment (see page 57). note The projector is not a medical device and cannot be used for medical diagnosis. You can also change the Color Mode using the projector’s Image menu. See page 56 for details.
(PowerLite 4200W); images are cut off if the resolution is over 1024 × 768 (PowerLite 4100 and 4300) or 1280 × 800 (PowerLite 4200W). Press the Aspect button repeatedly to cycle through the available options. You can also change the aspect ratio using the projector’s Signal menu. See page 58 for details.
3 Presenting With the Remote Control T he projector includes a number of tools to enhance your presentation. All of them can be accessed using the remote control, which lets you operate the projector from anywhere in the room—up to 49 feet (15 meters) away. You can use the remote control to adjust the picture (page 36), as a pointer to highlight your presentation (page 38), or to control two or more projectors at the same time (page 40).
note If a button is pressed longer than 30 seconds, the remote control stops operating to conserve battery power. When you release the button, normal operation resumes. Using the Remote Control Make sure batteries are installed as described on page 82. Follow these tips for using the remote control: ■ Point the remote control at the front of the projector or at the screen. ■ Stand within 49 feet (15 meters) of the projector.
Turning Off the Picture You can temporarily turn off the image by pressing the A/V Mute button on the remote control. This turns the image black. To turn the image back on, press the button again. You can have the screen turn blue (using the Display setting as described on page 67) or display an image such as a company logo when you press the A/V Mute button. (See page 64 for more information on displaying an image.
2. Use the pointer button to position the crosshair. 3. Continue pressing the E-Zoom area up to 4 times. button to enlarge the selected 4. While the image is enlarged, you can: note You cannot use the Progressive or Noise Reduction features (see page 58) while you are using E-Zoom. ■ Use the pointer button to move around the screen. ■ Press the E-Zoom button to zoom out. 5. When done, press the Esc button to return the image to its original size.
Choosing a Different Pointer Shape Follow these steps to select a different pointer shape: 1. Press the Menu button on the remote control, highlight the Settings menu, and press Enter. Then highlight Pointer Shape and press Enter. You can select one of the pointer shapes shown at the right. 2. Select the shape you want and press Enter. 3. Press Menu to exit.
■ Use the pointer button to move the pointer on the screen. ■ Press the Enter button once to left-click, or twice to double-click. Press the Esc button to right-click. ■ To drag-and-drop, hold down the Enter button. Then use the pointer button to drag the object. When it’s where you want it, release the Enter button.
3. Use the pointer button to highlight the new ID, and press Enter to select it. 4. When you’re done, press Menu to exit. Checking the Projector ID You can check the projector’s ID by following these steps: 1. Move the remote control ID switch to the On position. 2. Point the remote control at the projector you want to check. 3. While holding the ID button, press the Help button.
Setting the Remote Control ID The remote control’s default ID is zero. This lets you operate any projector. To set it to operate a specific projector, follow these steps: 1. Move the remote control ID switch to the On position. note When the remote control ID switch is in the Off position, you can control any projector regardless of the projector or remote control ID settings. 2. Press and hold the ID button on the remote control. 3.
4l Using the Projector on a Network Y ou can use EasyMP Monitor (available for Windows only) to monitor and control your projector through the network. For information on installing and using EasyMP Monitor, see the EasyMP Monitor Operation Guide.
Connecting to a Wired Network With an Ethernet cable, you can connect the projector to your network and configure it with an IP address. 1. Connect the projector to your network using a commercially available 100BaseTX or 10BaseT network cable. Connect the cable to the LAN port on the projector as shown. To ensure proper data transmission, use a shielded, Category-5 cable or better. 2. Connect the other end to your Ethernet hub or router. 3. Turn on the projector. 4.
5. Choose Wired LAN and press Enter. You see the following screen: 6. Do one of the following: ■ If your network assigns addresses automatically, turn on the DHCP setting. ■ If your network does not assign addresses automatically, turn off DHCP and enter the projector’s IP Address, Subnet Mask, and Gateway Address. To enter numbers, use the pointer button on the remote control to highlight the number you want to input, then press the Enter button. 7. Press Menu to exit.
Configuring Basic Settings You can give your projector a unique name, enable a projector keyword, or create a password for controlling the projector over the Web. 1. Press the Menu button, then choose Network and press Enter. You see a screen like the following: 2. If you want to create a password for using PJLink to control the projector, highlight PJLink Password, press Enter, and enter a password of up to 8 alphanumeric characters. When you’re done, highlight Finish and press Enter. 3.
4. If you want to create a password for remote access to the projector, highlight Web Control Password, press Enter, and enter a password of up to 8 alphanumeric characters. When you’re done, highlight Finish and press Enter. 5. Press Menu to exit. Using Projector E-mail Alerts When this feature is enabled, the projector sends you an e-mail alert if it has any problems. 1. Press the Menu button, select the Network menu, then press Enter. 2. Choose Mail, then press Enter.
note If a critical problem develops with a projector which causes it to suddenly stop working, it may not be possible for the projector to send a message. If Standby Mode is set to Communication On in the Extended menu, the projector can still be monitored even if the projector is in standby mode (when the power is off but the projector is still connected to power and the network). 6. Choose one of the Address fields, then enter the e-mail address where you want to receive a message when a problem occurs.
2. Choose SNMP and press Enter. You see the following screen: 3. Turn on the SNMP setting. 4. Enter up to two IP addresses for notification. You can enter a number from 0 to 255 in each field of the address. However, the following IP addresses cannot be used: 127.x.x.x, 224.0.0.0 to 255.255.255.255 (where x is a number from 0 to 255). 5. When you’re done making all necessary changes, highlight the Return button at the top of the screen, then press Enter. 6.
display the IP address of the projector. Do not enter leading zeroes. 3. Press Enter, or, if you set a Web control password in the projector’s Network menu, enter the user name EPSONWEB and your password, then press Enter. 4. Select one of the menu options listed on the screen, then change any of the settings as needed. These settings correspond to those found in the projector’s menu system.
From the Projector Control menu, select Web Remote. You see the following screen: Power button Search button note Video button Some buttons are not available with your projector. Computer button BNC button Pause button A/V Mute button Closed captioning button ■ The Power button turns the projector on and off. ■ The Search button searches for signal sources (see page 28). ■ The Computer button changes the input source to Computer1. ■ The Video button changes the input source to Video1.
Using the Projector on a Network
5 Fine-Tuning the Projector Y ou can use the projector’s on-screen menus to adjust the image and other features.
Using the Menu System You can use the remote control or the projector’s control panel to access the menus and change settings. Follow these steps: 1. To display the menu screen, press the Menu button on the remote control or on the projector. You see a menu screen similar to the one below: Options Menu list The menus are listed on the left and the options available for the highlighted menu are shown on the right. note For a complete list of menus and options, see page 70.
4. After highlighting the option you want to adjust, use the pointer button to change the setting. In some cases, you may have to press the Enter button to view a sub-screen for changing the setting. ■ Press the left or right side of the a slider bar. pointer button to adjust ■ To select from two or more settings, use the pointer button to highlight the desired setting and press Enter. 5.
Adjusting the Image You can use the Image menu to adjust the brightness, sharpness, color, tint, and contrast. 1. Press the Menu button on the projector or remote control and select the Image menu. You see a screen similar to one of those below. (The settings will be different depending on the source you are projecting from.) Computer/RGB Video note The available settings vary depending on the input source selected. Component Video/ Composite Video/ S-Video 2.
■ ■ Sharpness Adjusts the sharpness of the image. note If you select Advanced, you can access more detailed settings: Adjust Thin Line Enhancement to enhance or soften objects like hair or fabric patterns. Adjust Thick Line Enhancement to enhance or soften outlines of objects or backgrounds. Adjust Vert. Line Enhancement to enhance or soften the image in the horizontal direction. Adjust Horiz. Line Enhancement to enhance or soften the image in the vertical direction.
Hue changes the balance of color, and saturation changes the strength of the color. 5. Use the pointer button to adjust the hue and saturation. You see the adjustments reflected on the screen. When you are satisfied with the color, press Esc. 6. Repeat steps 4 and 5 for each color axis you want to adjust. You may need to readjust the color as the lamp in your projector changes over time.
■ Resolution Set to Auto to have the projector automatically identify the resolution of the input signal. If necessary (because some of the image is missing, for example), adjust to Wide or Normal. You can also select Manual and specify a resolution. ■ Tracking Adjust this value to eliminate vertical stripes in computer images. ■ Sync Adjust this value if computer images appear blurry or flicker.
■ Aspect Sets the image’s aspect ratio (ratio of width to height). Depending on your projector model and input source, you can select Auto, Normal, 4:3, 16:9, Full, Zoom, or Native; see page 33 for more information. ■ Overscan Allows you to reduce the image size slightly when the edges of the image are not visible. The range of trimming can be set to Off, 4%, or 8%. Customizing Projector Features You can use the Settings menu to lock the buttons on the projector and customize several other features.
■ Pointer Shape Lets you choose from three pointer shapes. See page 39 for more information. ■ Power Consumption Lets you select from two levels of brightness. The ECO setting reduces power consumption and noise, and extends the lamp’s operating life. ■ Remote Receiver Deactivates the projector’s front and/or back sensors that detect signals from the remote control. Use this setting to prevent use of the remote control or to stop interference from bright fluorescent lights.
Using the Projector Security Features note You can also attach a security cable to the projector to prevent theft (see page 102). caution If you lose the remote control, you will not be able to enter the password. Keep the remote control in a safe place at all times. Also, it’s a good idea to write down your password. To prevent unauthorized use of the projector, you can do the following: ■ Assign a password.
4. Hold down the Num button on the remote control and use the numeric keypad to enter a four digit password. (The default setting is 0000.) 5. When you see a confirmation message, reenter the password. Then press the Menu button to exit the screen. To set security options, access the Password Protect screen as described on page 62, and then turn on any of the following options: ■ Hold down Power On Protect to prevent unauthorized use of the projector.
If the password is not correct, you see a message prompting you to re-enter the password. If you enter an incorrect password three times in succession, you see the message The projector’s operation will be locked. Request code xxxxx. Write down the request code. The message displays for approximately 5 minutes, and then the projector switches to standby mode. Once the projector is in standby mode, disconnect the projector’s power cord from the electrical outlet, reconnect it, and turn the projector back on.
2. Highlight User’s Logo and press Enter. 3. When you see a message asking Choose this image as the User’s Logo?, select Yes and press Enter. A selection box displays over the image. 4. Use the pointer button on the remote control (or the arrow buttons on the projector) to select the area of the image you want to use. Then press Enter. 5. When you see the message Select this image?, highlight Yes and press Enter. 6. Highlight a zoom factor (display size) and press Enter. 7.
3. Choose from these display options: note You can lock these settings to prevent them from being changed without a password (see page 62). ■ Set Display Background to Logo to display your image when there is no signal. ■ Set Startup Screen to On to display your image when the projector is warming up. ■ Set A/V Mute to Logo to display your image when you press the A/V Mute button. 4. When you’re finished, press Menu to exit.
Customizing Power and Operation You can use the Extended menu to customize the way the projector displays images, enable quick startup, turn sleep mode on or off, and customize other projector operations. ■ Display Use this setting to turn off the display of messages, change the background color, enable logo display, or turn off the startup screen display. ■ Closed Caption Lets you display closed captioning for content that provides it.
Sleep Mode: Enable if you want the projector to turn off automatically if it is idle and no signal is received for 1 to 30 minutes (you can adjust the amount of time using the next setting). Sleep Mode Timer: When Sleep Mode is on, you can set the period of time before the projector turns off automatically, from 1 to 30 minutes. High Altitude Mode: Enable when you are using the projector above 4,900 feet (1,500 meters) to ensure that the temperature is regulated properly.
■ Multi-screen Use this option if you want to color-match two or more projectors that are being used to display images near each other. You can make image adjustments at each of five adjustment levels. First choose an Adjustment Level and then adjust the settings for each level: Brightness Correct to adjust the brightness, and Color Correct to adjust the balance between red and green, or blue and yellow. See the next section for more information about multi-screen color adjustment.
8. If you are using three or more projectors, repeat steps 4 through 7 to match projector 3 to projector 2, then match projector 4 to projector 3, and so on. Projector Menu and Options List The table below shows the options you can select based on the projector menu you are viewing. Some options may not be available depending on the projector model and input source you are using. For more information on these menus and options, read this chapter.
Menu Options Extended Display Closed Caption User’s Logo Projection Operation Standby Mode Air Filter Notice Projector ID Multi-screen Language Reset Network Wired LAN PJLink Password Web Control Password SNMP Mail AMX Device Discovery Projector Name Reset Info Lamp Hours Source Input Signal Resolution Video Signal Refresh Rate Sync Info Status Serial Number Reset Reset All Reset Lamp Hours Fine-Tuning the Projector 71
Fine-Tuning the Projector
6 Maintaining the Projector Y our projector needs little maintenance. All you have to do is keep the lens clean. You may also need to clean the air filter and vent. A clogged air filter or vent can block ventilation needed to cool the projector. warning Before you clean any part of the projector, turn it off and unplug the power cord. Never open any cover on the projector, except the lamp cover. Dangerous electrical voltages in the projector can injure you severely.
Cleaning the Lens caution Do not rub the lens with harsh materials or subject the lens to shocks, as it can easily become damaged. Clean the lens whenever you notice dirt or dust on the surface. To remove dirt or smears on the lens, use a commercially available cloth for cleaning glasses. Cleaning the Projector Case caution Do not use wax, alcohol, benzene, paint thinner, or other chemical detergents. These can damage the case. Before you clean the case, turn off the projector and unplug the power cord.
Follow these steps: 1. Press the Ppower button on the back of the projector to turn it off. After the projector beeps twice, unplug the power cord. 2. Grip the air filter cover tab and remove the air filter cover as shown. 3. Place your finger into the groove and remove the air filter as shown.
4. With the front of the air filter facing down, tap it four or five times to shake off the dust. Turn it over and tap the other side in the same way to shake off the dust. 5. To clean any dust remaining on the air filter, use a small vacuum cleaner designed for computer and other office equipment to clean the front. If you don’t have one, gently clean the vent with a soft brush (such as an artist’s paintbrush). 6. Insert the air filter back into the holes in the cover, then press it firmly into place.
7. Slide the air filter cover in until it clicks into place. 8. If the dirt is difficult to remove, the filter is broken or discolored, or you continue to see air filter related messages even after cleaning, replace the filter as described in the next section. Contact your dealer or call Epson at 800-GO-EPSON (800-463-7766) to obtain a new filter. Replacing the Air Filter Follow these steps to replace the air filter: 1. Press the Ppower button on the back of the projector to turn it off.
3. Place your finger into the groove and remove the air filter as shown. note The air filter contains Polypropylene. Dispose of used air filters properly in accordance with your local regulations. 4. Insert the new air filter into the holes in the cover, then press it firmly into place. 5. Slide the air filter cover in until it clicks into place. note Turn off this product when not in use to prolong the life of the projector. Do not turn the projector on immediately after turning it off.
It is time to replace the lamp when: ■ The projected image gets darker or starts to deteriorate. ■ The message Replace the lamp appears on the screen when the lamp comes on. ■ The Lamp light flashes orange. note To maintain projector brightness and image quality, replace the lamp as soon as possible. You may also need to replace the lamp if the red. See page 87. Epson recommends that you clean the air filter whenever you replace the lamp.
3. Loosen the lamp cover screws (you don’t need to remove them). Then remove the lamp cover. note Even when the lamp cover is removed, it is still attached to the projector to prevent it from falling when the projector is mounted on the ceiling. 4. Loosen the two screws holding the lamp in place (you can’t remove them). Loosen, but don’t remove these screws note The lamp(s) in this product contain mercury. Please consult your state and local regulations regarding disposal or recycling.
7. Once the lamp is fully inserted, tighten its screws. 8. Replace the lamp cover, then tighten its screws. 9. Reset the lamp timer as described in the next section. Resetting the Lamp Timer After you replace the lamp, you need to reset the lamp timer using the projector’s menu. 1. Press the Menu button on the remote control or on the projector’s control panel. You see the main menu. 2.
5. When you’re finished, press Menu to exit. Checking Lamp Usage note The information displayed depends on the input signal currently selected. To check the number of hours the lamp has been used, press the Menu button and highlight the Info menu. You see a screen like this: caution When replacing batteries, take the following precautions: ■ Replace the batteries as soon as they run out. If the batteries leak, wipe away battery fluid with a soft cloth. If fluid gets on your hands, wash immediately.
3. Install two AA alkaline batteries, inserting the + and – ends as shown. 4. Position the cover as shown, then press down until it snaps into place. Transporting the Projector The projector contains many glass and precision parts. Follow these guidelines to prevent damage: note ■ If you are moving the projector by hand, use the projector handle. ■ Attach the lens cover to the lens. ■ Return the projector feet to their stored (highest) positions.
Maintaining the Projector
7 Solving Problems This chapter helps you solve problems with your projector, and tells you how to contact technical support for problems you can’t solve yourself.
Using On-Screen Help If the image doesn’t look right, you can get help by pressing the ? Help button on the back of the projector or on the remote control. 1. Press the ? Help button on the remote control or on the projector. You see the Help menu: 2. Use the pointer button on the remote control or the navigational buttons on the projector to highlight menu items. 3. Press the Enter button on the remote control or on the projector to select the menu item. 4.
Checking Projector Status If your projector isn’t working correctly, first turn it off and unplug it. Then plug the power cord back in and turn on the projector. If this doesn’t solve the problem, check the lights on top of the projector. What To Do When the Lights Flash The lights on top of the projector indicate the projector’s status.
Status lights (continued) Light Status Description Flashing green The air filter may be clogged. Clean or replace the air filter as described on pages 74 to 78. Red or flashing red There is a problem with the projector. Check the other two lights and the information on page 88 to diagnose the problem. Flashing orange It’s time to replace the lamp. See page 78 for instructions. If you continue to use the lamp after the replacement warning, there is an increased possibility that the lamp may break.
Status lights (continued) Light Status Description Flashing red The lamp may be burnt out. First make sure the lamp cover is securely installed. If that’s not the problem, the air filter may be clogged. Clean or replace the air filter as described on pages 74 to 78. If this does not resolve the problem, let the lamp cool and then remove it. If the lamp is cracked, replace it as described on page 78. If the lamp is not cracked, reinstall it. If reinstalling doesn’t work, replace the lamp.
Solving Problems With the Image No image appears on the screen. ■ Check that the Ppower light is green, not flashing, and that the lens cover is removed. ■ The projector may be in standby or sleep mode. If the Ppower light is orange, press the Ppower button to turn the projector on. ■ If the power was switched off and then on again, the projector may be cooling down. Wait until the Ppower light stops flashing and remains orange; then press the Ppower button again.
If you’re using a PC notebook: ■ Press the function key on your keyboard that lets you display on an external monitor. It may be labeled CRT/LCD or have an icon such as . You may have to hold down the Fn key while pressing it. Allow a few seconds for the projector to sync up after changing the setting. Check your notebook’s manual or online help for details. On most systems, the key lets you toggle between the LCD screen and the projector, or display on both at the same time.
The projector and notebook don’t display the same image If you’re using a PC notebook: ■ On most systems, there’s a function key that lets you toggle between the LCD screen and the projector, or display on both at the same time. It may be labeled CRT/LCD or have an icon such as . You may have to hold down the Fn key while pressing it. Allow a few seconds for the projector to sync up after changing the setting.
Only part of the computer image is displayed. ■ Press the Auto button on the remote control or the Enter button on the projector. ■ Make sure the image Position setting is correct in the Signal menu. See page 59 for more information. ■ Press the Aspect button on the remote control. ■ Press the Esc button on the remote control to cancel the E-Zoom function. ■ Make sure your computer’s resolution setting is correct. See the compatible video formats listed on page 109.
■ Make sure the correct input signal is selected in the Signal menu (see page 59). ■ If you’ve used the Quick Corner or Keystone adjustment, you may need to decrease the Sharpness setting in the Image menu (see page 57). ■ If you’re projecting from a computer, make sure its signal is compatible with the projector. See page 109. ■ Press the Auto button on the remote control or the Enter button on the projector to reset the projector’s Tracking, Sync, and Position settings.
You see vertical bands or the image still looks blurry after trying the solutions in the previous section. ■ ■ If you’re projecting from a computer and displaying an image that contains a lot of fine detail, you may notice vertical bands or some of the characters may look heavy or blurred. Press the Auto button on the remote control or the Enter button on the projector to reset the projector’s Tracking, Sync, and Position settings.
■ Try adjusting the Brightness and Contrast settings on the Image menu. ■ Try adjusting the Power Consumption setting (see page 60). ■ Check your computer display settings to correct the color balance. ■ The projector’s lamp may need to be replaced. See page 78 for instructions. ■ Make sure the correct input signal is selected in the Signal menu (see page 59). ■ Make sure that all cables are connected to the proper ports and connected securely.
Solving Problems With the Remote Control The projector doesn’t respond to remote control commands. ■ Point the remote control towards the receiver. ■ Make sure the projector and remote control IDs match. To operate all projectors by remote control regardless of ID settings, set the ID switch on the side of the remote control to Off. ■ The remote control’s batteries may not be installed correctly or may be low on power. To change the batteries, see page 82.
Internet Support Visit Epson’s support website at www.epson.com/support for solutions to common problems. You can download utilities and documentation, get FAQs and troubleshooting advice, or e-mail Epson with your questions. Speak to a Support Representative To use the Epson PrivateLine Support service, call (800) 637-7661 and enter the PIN on the included Epson PrivateLine Support card. This is the fastest way of speaking to a live representative, and it’s free.
Purchase Supplies and Accessories You can purchase screens and other accessories from an Epson authorized reseller. To find the nearest reseller, call 800-GO-EPSON (800-463-7766). Or you can purchase online at www.epsonstore.com (U.S. sales) or www.epson.ca (Canadian sales).
Solving Problems
A Projector Installation T his appendix provides guidelines on installing the projector in a permanent location, such as a theater or conference room.
If you’re mounting the projector on the ceiling and you place it above screen level, you’ll have to tilt the projector down to position the image on the screen. This causes the image to lose its square shape. You can correct the image using the projector’s Quick Corner and/or Keystone functions, as described on page 30. Security Features The projector includes security features to prevent its theft when installed or used in public locations: ■ Security cable attachment.
■ Lens theft deterrent screw. You can lock the lens with the supplied screw, so that the lens cannot be removed. In addition, the projector includes several menu-operated security features. See page 62.
Projector Installation
B Technical Specifications General Type of display Epson poly-silicon TFT active matrix Resolution (native format) PowerLite 4100/4300: 1024 × 768 pixels (XGA) PowerLite 4200W: 1280 × 800 pixels (WXGA) Color reproduction 16.
Image size PowerLite 4100/4300 (4:3 image): 30 to 300 inches (76.2 to 762 centimeters) PowerLite 4200W (16:10 image): 30 to 300 inches (76.2 to 762 centimeters) Projection distance PowerLite 4100/4300 (4:3 image): 2.5 to 47.7 feet (.8 to 14.5 meters) PowerLite 4200W (16:10 image): 2.7 to 50.2 feet (.8 to 15.
Approx. 3000 hours (ECO Power Consumption mode) Part number PowerLite 4100: V13H010L62 PowerLite 4200W/4300: V13H010L63 Remote Control Range 49.2 feet (15 meters) Batteries (2) Alkaline AA Dimensions Height 5.3 inches (135 mm), feet retracted Width 18.5 inches (470 mm) Depth 12.3 inches (311.5 mm), not including lens Weight 14.6 lb (6.6 kg) Electrical Rated frequency 50/60 Hz AC Power supply Powerlite 4100: 100/240 VAC, 3.9 A/1.7 A PowerLite 4200W/4300: 100/240 VAC, 4.7 A/2.
mode) Standby: 100 to 120 VAC 0.38 W (Communication off) 10 W (Communication on) 220 to 240 VAC 0.47 W (Communication off) 11 W (Communication on) PowerLite 4200W/4300: Operating: 100 to 120 VAC 464 W (Normal Power Consumption mode) 383 W (ECO Power Consumption mode) 220 to 240 VAC 442 W (Normal Power Consumption mode) 367 W (ECO Power Consumption mode) Standby: 100 to 120 VAC 0.38 W (Communication off) 10 W (Communication on) 220 to 240 VAC 0.
Safety and Approvals United States FCC 47CFR Part 15B Class B (DoC) UL60950-1 Second Edition (cTUVus Mark) Canada ICES-003 Class B CSA C22.2 No. 60950-1-07 (cTUVus Mark) Pixelworks™ DNX™ ICs are used in this projector. Compatible Video Formats These projectors support the high definition video and computer display formats listed below, as well as traditional NTSC, PAL, and SECAM video standards.
Compatible video formats (continued) 110 Technical Specifications Mode Refresh Rate (Hz) Resolution SXGA1—70* SXGA1—75* SXGA1—85* 70 75 85 1152 × 864 1152 × 864 1152 × 864 WXGA—60 WXGA—75* WXGA—85* 60 75 85 1280 × 800 1280 × 800 1280 × 800 SXGA2—60 SXGA2—75* SXGA2—85* 60 75 85 1280 × 960 1280 × 960 1280 × 960 SXGA3—60 SXGA3—75* SXGA3—85* 60 75 85 1280 × 1024 1280 × 1024 1280 × 1024 WXGA1—60* WXGA1—75* WXGA1—85* WXGA2—60* 60 75 85 60 1280 × 768 1280 × 768 1280 × 768 1360 × 768 WXGA+60* W
Compatible video formats (continued) Mode Refresh Rate (Hz) Resolution TV525i (480i) TV625i (576i) SDTV525p (480p) SDTV625p (576p) HDTV750p (720p) HDTV750p (720p) HDTV1125i (1080i) HDTV1125i (1080i) 60 50 60 50 60 50 60 50 720 × 480 720 × 576 720 × 480 720 × 576 1280 × 720 1280 × 720 1920 × 1080 1920 × 1080 *Analog RGB only ** Available only when Wide is selected as the Resolution with the PowerLite 4200W.
Technical Specifications
C Notices This appendix includes safety instructions and other important information about your projector. Important Safety Instructions Follow these safety instructions when setting up and using the projector: ■ Do not look into the lens when the projector is on. The bright light can damage your eyes, and is especially dangerous for children and pets. ■ Do not place the projector on an unstable cart, stand, or table. ■ Do not operate the projector on its side, or while tilted to one side.
Notices ■ Do not use sprays containing flammable gas to clean the lens or filter. Do not spray a liquid of any kind directly on the projector or its lens. Do not use the projector where there may be flammable, explosive, or corrosive gases present in the atmosphere. ■ Do not place containers of liquid on top of the projector. Never spill liquid of any kind into the projector. ■ Do not use the projector where it may be exposed to smoke, steam, or excessive dust.
distinct change in performance; if smoke, strange odors, or strange noises come from the projector; if the power cord or plug is damaged or frayed; if liquid or foreign objects get inside the projector, or if it has been exposed to rain or water; if it has been dropped or the housing has been damaged. ■ Except as specifically explained in this User’s Guide, do not attempt to service this product yourself. Refer all servicing to qualified personnel.
■ Never try to remove the lamp immediately after use because it will be extremely hot. Before removing the lamp, turn off the power and wait at least an hour to allow the lamp to cool completely. ■ Do not place the source of an open flame, such as a lit candle, on or near the projector. ■ Do not modify the power cord. Do not place heavy objects on top of the power cord or bend, twist, or pull it excessively. Keep the power cord away from hot electrical appliances.
frequency energy and, if not installed and used in accordance with the instructions, may cause harmful interference to radio communications. However, there is no guarantee that interference will not occur in a particular installation.
Notices
Index A A/V Mute button, 37 display settings, 66 Accessories, 9 to 10 Air filter cleaning, 74 to 77 ordering, 9 replacing, 77 to 78 Altitude, 68, 88, 89, 108 Anti-theft device, 10, 16, 102 to 103 Aspect ratio, 106 Auto Setup setting, 58 B Background screen settings, 66 Bands, vertical, 95 Blank screen, 90 to 91 Blurry image, 94 Brightness, 105 Brightness setting, 56 Browser control, 49 C Cables BNC to VGA, 18 component, 10, 19, 21 composite, 19, 20 Ethernet, 44 illustrations, 12 network, 44 ordering, 9 to
E-mail alerts, 47 to 48 Environmental specifications, 108 Epson accessories, 9 to 10 PrivateLine Support, 9 technical support, 9, 97 to 99 warranty, 9 Ethernet connection, 44 to 45 Extended menu, 67 to 69 E-Zoom button, 37 F FCC compliance statement, 116 Filter, see Air filter Focusing image, 30 Freeze button, 37 H HDTV images, video formats, 111 Height of image, adjusting, 29 to 30 Help, 97 to 99 Help system, using, 86 Help, Epson, 8 High altitude, 68, 88, 89 I Image adjusting, 28 to 34, 56 to 58 blurry
Menus changing settings, 54 to 55 default settings, restoring, 55 Extended, 67 to 69 Image, 56 to 57 Info, 82 Network, 46 network, 44, 47 Settings, 60 to 61 Signal, 58 to 60 User’s Logo, 64 to 65 Monitoring projector EasyMP Monitor, 43 e-mail notifications, 47 to 48 SNMP, 48 to 49 using browser, 49 Mouse compatibility, 106 using remote control as, 39 Multiple projectors, controlling, 40 to 42 Multi-screen color adjustment, 69 N Network cable, 44 managing projector remotely, 47 to 51 problems, 96 settings,
Projector cleaning, 74 disabling buttons, 66 distance from screen, 13, 106 installing, 101 to 102 lamp specifications, 106 Menu and Options List, 70 to 71 monitoring remotely, 47 to 51 options, 9 to 10 password protection, 62 to 64 positioning, 13 to 16, 101 to 102 resolution, 105 security features, 62 to 66, 102 to 103 specifications, 105 to 109 transporting, 83 troubleshooting, 85 to 99 turning off, 26 turning on, 23 to 25 unpacking, 12 viewing information about, 82 Projector ID checking, 41 setting, 40 t
Sharpness setting, 57 Signal menu, 58 to 60 Six-axis color adjustment, 57 to 58 Sleep mode, 24, 68 SNMP, 48 to 49 Source, selecting, 28, 36 Specifications brightness, 105 dimensions, 107 electrical, 107 environmental, 108 general, 105 lamp, 106 remote control, 107 resolution, 105 safety, 109 Sports color mode, 32 sRGB color mode, 33 Startup screen creating, 64 to 66 settings, 66 user’s logo, see User’s Logo Status lights, 87 to 89 Support, see Technical support Switching picture source, 28, 36 Sync setting,
Index