
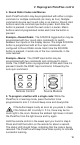
Installation guide


19
VI. Configuring Special Features cont’d
It will time out of cloning mode in about 15 seconds, so have
both devices on hand. If the PixiePlus times out of cloning
mode, repeat this procedure to return it to cloning mode.
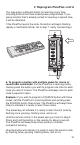
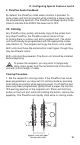
2. Position the two units face to face with both units held
upright, approximately one inch apart. They should be directly
across from each other with the bezels lined up. This will
position the IR receiver window of the cloning PixiePlus directly
across from the IR transmitter in the donor PixiePlus.
Be sure not to obstruct the IR receiver window or
transmitter with your hands.
When the units are correctly lined up, the donor PixiePlus will
automatically enter cloning mode. Its Status LED will turn solid
red and both units will chirp rapidly.
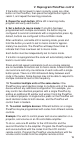
3. Hold the recipient steadily in front of the donor. If the
connection is broken (the recipient ceases to chirp), reposition
the recipient unit to re-establish communication and the units
will continue where they left off. If communication is broken for
more than 15 seconds, the recipient will time out of cloning
mode and you will need to begin again.
4. When the recipient has completed copying codes from the
donor, it will beep three times and reset. After the PixiePlus has
reset it will be fully operational with the same codes and
configuration settings programmed into the donor unit.
After cloning is complete, the donor unit will remain in cloning
mode for 15 seconds until it times out. It will then return to
normal operation.
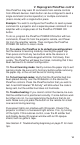
VIII. Complete Installation
To complete the installation, secure a Leviton Decora™ wall
plate (not included) over the face of the PixiePlus. The outer
screw holes on the PixiePlus should be used to secure the wall
plate.