
Installation guide

9
V. Reprogram PixiePlus cont’d
1. Power the PixiePlus: the LED backlights will be illuminated.
2. Enter learning mode: Gently insert a paper clip into the
small hole labeled “insert paperclip to enter learning mode.” The
PixiePlus will remain in learning mode while the paper clip
remains in the aperture. Removing the paper clip will return the
PixiePlus to normal operation.
Be gentle with the paper clip to ensure that you do not
damage the switch mechanism.
The Status LED will blink red while the PixiePlus is in
learning mode.
Be sure that you are not pressing any of the PixiePlus buttons
when you insert the paper clip, or you will toggle the PixiePlus
Audio Mode on or off (see Section IV, Part 5).
If the room is too bright, the PixiePlus will not enter learning
mode. The LED will glow solid red, the buttons will beep
continually when pressed, and they will not arm for learning.
Darken the room or shield the PixiePlus from the ambient light
while learning. Direct sunlight is always too bright.
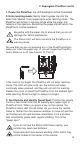
3. Test Remote and Identify Sweet Spot: Position the remote
control a few inches from the IR learning eye (upper right of
PixiePlus front). When you press a key on the remote, the
PixiePlus status LED should flicker. As you move the remote
closer or farther from the receiver window, or move off axis the
red flashes will dim and become intermittent. Find a position
that consistently yields clear, regular blinking. This is the
"sweet spot."
If you do not see the Status LED flicker rapidly, your
remote may need new batteries.
Some remotes have several emitting LEDs, which may
not be located in the center of the remote.