
Using Guide


8
3. Close any open windows to return to the Optional Software
installation.
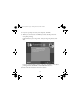
4. Click
Epson PhotoCenter Link, then click Add Icon on the next
screen and follow the on-screen instructions.
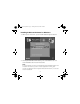
5. When you’re done installing software, click
Exit. The registration screen
appears.
6. Follow the on-screen instructions to register PictureMate.
7. Remove and store your PictureMate CD.
8. Restart your computer.
Note:
If you have any problems installing the PictureMate software, see page 16.
You’re ready to print your photos! Insert your memory card or open your
photo file on your computer, as described in the on-screen User’s Guide.
Double-click the
PictureMate Deluxe User’s Guide icon on your screen
to open the User’s Guide.
Usingwcomputer.fm Page 8 Tuesday, March 29, 2005 3:48 PM