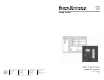
Setup Guide MLC 104 IP Plus www.extron.com Extron Electronics, USA Extron Electronics, Europe Extron Electronics, Asia Extron Electronics, Japan 1230 South Lewis Street Anaheim, CA 92805 USA 714.491.1500 Fax 714.491.1517 Beeldschermweg 6C 3821 AH Amersfoort The Netherlands +31.33.453.4040 Fax +31.33.453.4050 135 Joo Seng Road, #04-01 PM Industrial Building Singapore 368363 +65.6383.4400 Fax +65.6383.4664 Kyodo Building 16 Ichibancho Chiyoda-ku, Tokyo 102-0082 Japan +81.3.3511.7655 Fax +81.3.3511.
Precautions Safety Instructions • English This symbol is intended to alert the user of important operating and maintenance (servicing) instructions in the literature provided with the equipment. This symbol is intended to alert the user of the presence of uninsulated dangerous voltage within the product’s enclosure that may present a risk of electric shock. Caution Read Instructions • Read and understand all safety and operating instructions before using the equipment.
安全须知 • 中文 警告 这个符号提示用户该设备用户手册中 有重要的操作和维护说明。 电源 • 该 设 备 只 能 使 用 产 品 上 标 明 的 电 源 。 设 备 必须使用有地线的供电系统供电。 第三条线 (地线)是安全设施,不能不用或跳过。 这个符号警告用户该设备机壳内有暴 拔掉电源 • 为安全地从设备拔掉电源,请拔掉所有设备后 或桌面电源的电源线,或任何接到市电系统的电源线。 露的危险电压,有触电危险。 电源线保护 • 妥善布线, 避免被踩踏,或重物挤压。 注意 阅读说明书 • 用 户 使 用 该 设 备 前 必 须 阅 读 并 理 解所有安全和使用说明。 保存说明书 • 用户应保存安全说明书以备将来使 用。 遵守警告 • 用户应遵守产品和用户指南上的所有安 全和操作说明。 避免追加 • 不要使用该产品厂商没有推荐的工具或 追加设备,以避免危险。 维护 • 所有维修必须由认证的维修人员进行。 设备内部 没有用户可以更换的零件。为避免出现触电危险不要自 己试图打开设备盖子维修该设备。 通风孔 • 有些设备机壳上有通风槽或孔,它们是用来防止 机内敏感元件过热。 不要用任何东西挡住通风孔。
Table of Contents Chapter One • Introduction ................................................... 1-1 About this Manual ..................................................................... 1-2 About the MLC 104 IP Plus Medialink™Controllers . ....... 1-2 About Global Configurator ..................................................... 1-3 System Requirements ............................................................... 1-4 Installing the Software ............................................................
Table of Contents, cont’d Step 11: Build and Upload a Configuration ................... 3-22 Building a configuration ...................................................... 3-22 Uploading a configuration ................................................... 3-23 Accessing GlobalViewer® .....................................................
Introduction About this Manual This setup guide allows you to easily and quickly set up and configure the Extron MLC 104 IP Plus Controller.
Introduction, cont’d Global Configurator provides the following features for the MLC 104 IP Plus: Offline configuration — Using Global Configurator, you can configure your MLC 104 IP Plus Medialink controller without having the device on hand, eliminating the need to connect your MLC before starting the configuration. GlobalViewer Web pages — GlobalViewer Web pages (HTML, XML, and JavaScript) allow you to control and manage devices such as VCRs, DVDs, and displays connected to an MLC 104 IP Plus.
Introduction, cont’d MLC 104 IP Plus 2 Chapter Two MLC 104 IP Plus Hardware Setup Right Side Panel Features and Connections Left Side/Top Panel Features and Connections Front Panel Features and Basic Operation 1-6 MLC 104 IP Plus • Introduction
Hardware Setup This chapter describes right, left, and front panel features; basic front panel operation; and how to connect cables to the MLC 104 IP Plus controller. For infrared (IR) output, wire an IR Emitter (2 emitters are the maximum), as shown below, for a modulated signal and ground.
Hardware Setup, cont’d 3. SCP 104 A +12 VDC B Ground ( ) C IRCM, ACM, RCM, CM DISPLAY ON OFF VCR 1 DVD 2 PC 3 E SCP communication (IR) IR IN SCP +V OUT GROUND CM VOLUME Connect the MLC 104 IP Plus' digital I/O wires (from digital I/O ports 1, 2, and 3) to the IPA T RLY4's inputs (1, 2, and 3), as shown below. The Extron Comm-Link (CTL and CTLP) cable is recommended for these connections.
Hardware Setup, cont’d N Power the controller via an external power supply, not Both digital input and output modes of the digital I/O ports have the ability to turn on an internal pull-up resistor to + 5 VDC (equivalent to SW2 on the previous illustration). from an Extron switcher. The controller requires a separate 12 VDC power supply. N Check the power supply’s polarity before connecting it to N Refer to the MLC 104 IP Plus User's Manual for further the MLC. See the diagram below.
Hardware Setup, cont’d Left Side/Top Panel Features and Connections IR MLC 104 IP Plus Top Panel RESET 2"–12" (4–30 cm) 1 2 3 4 5 6 7 8 9 0 IR 1 2 The IR learning range for the MLC 104 IP Plus N Because the top panel of the MLC 104 IP Plus is obscured after wall mounting, perform all IR learning prior to installation.
Hardware Setup, cont’d Front Panel Features and Basic Operation There are several features that must be set up prior to using the MLC. Refer to chapter 4 in the MLC 104 IP Plus User's Manual for details. Volume control c 2 1 If the MLC is configured for use with a MediaLink Switcher or projectors, the MLC’s LEDs light to indicate volume ranges (with steadily lit LEDs) and minimum/maximum volume limits (with flashing LEDs).
Hardware Setup MLC 104 IP Plus 3 Chapter Three MLC 104 IP Plus Software Setup Step 1: Download Device Drivers Step 2: Create a New Project Step 3: Add an MLC 104 IP Plus Controller and Define its Location Step 4: Define E-mail Settings Step 5: Add a Serial and an IR Device Step 6: Configure the Front Panel Buttons Step 7: Configure the Control Modules Using the Auto Fill Feature Step 8: Create a Display Shutdown Schedule Step 9: Create a Display Lamp Hour Warning E-mail Step 10: Create a Display Discon
Software Setup This chapter provides the steps for setting up your MLC 104 IP Plus controller using the Global Configurator (GC) software. By means of example, you will learn how to • Add drivers that allow control of A/V devices. • Configure the controller's power buttons, and input selection buttons to control a video projector. • Configure an IRCM-DV+ control module to control the functions of a DVD/VCR player.
Software Setup, cont’d Step 2: Create a New Project 1. If the GC 2 Start Options dialog is displayed, select the "Create a New Project" option and click the OK button. The Project Settings dialog box appears, as shown below. N You can also access the Project Settings dialog box via the Edit menu. Step 3: Add an MLC 104 IP Plus Controller and Define its Location The most essential step in creating a configuration in a GC project is to add an IP Link device.
Software Setup, cont’d Add Device dialog box (Advanced) 5. 3-6 Select the Auto Configure IP Address check box. The MAC Address text box becomes active and the first three octets of the MAC address appear. 6. Locate the MAC address on the rear of the Extron IP product or obtain it from your network administrator. 7. Enter the remainder of the MAC address in the MAC Address text box (the first three octets should be filled in). 8. Click the Set button.
Software Setup, cont’d 4. Complete each of the fields with your mail server IP address, mail server domain, and, if necessary, your user name and password. 5. Click the OK button. 6. Go back to the Settings menu to complete the entries for your subnet mask and gateway settings. Setting up e-mail notifications The Email Manager provides preset messages for some of the most common actions performed in GC. To set up an e-mail notification for a specified action, do the following: 1.
Software Setup, cont’d Step 5: Add a Serial and an IR Device Adding an A/V device (projector displays, VCRs, DVDs, etc.) for an MLC to control requires that you first add the device’s driver to the GC configuration. Adding a serial driver 1. From the IP Link tab (on the left pane), select the port named Display. Downloading additional drivers If you successfully downloaded device drivers in "Step 1: Download Device Drivers", proceed to "Adding a serial driver" on the following page.
Software Setup, cont’d Adding an IR driver 5. Rename the folder according to the function of the device and/or any name that allows you to easily recognize the device. In this case, use the name "DVD_VCR". 6. Under the IR Driver Function(s) field, select the desired functions (e.g., Power or Menu). 7. Use the small green arrows between the two fields to populate the DVD_VCR folder with the functions you require. You can also drag and drop them into the folder. To add an IR driver to a port: 1.
Software Setup, cont’d Configuring an input button Input buttons on the MLC 104 include the following, grouped together on the MLC front panel: VCR, DVD, PC, and a blank button for custom use. 4. N Failure to configure the On or Off buttons on Release may N The steps in the following example require using a serial cause problems with the PIN Mode feature. Refer to the MLC 104 IP Plus User's Manual for details.
Software Setup, cont’d A dialog box appears. Control module main window 4. Select the Address #1 tab. The Address 1 IRCM-DV+ [DVD] window appears. 5. In the upper left corner drop-down menu (under DVD & VCR Control), select Input 2, as illustrated below. This assigns the input button (Input 2) to activate the IRCM-DV+ [DVD] control panel. Control module configuration 7. From the Auto Fill Dual-Function DVD and VCR IR Control Module dialog box, select the Hitachi DV-PF7E DVD/VCR IR driver.
Software Setup, cont’d Step 8: Create a Display Shutdown Schedule Global Configurator’s (GC) scheduling feature enables you to schedule actions and events for a selected device. Scheduling is often useful for setting a projector or other device to shut down or turn on at a predetermined time (e.g., in a school, all projectors can be set to power off at 5:00 P.M.). 3. Enter a name (Shutdown) in the Enter Scheduled Action Name field. 4.
Software Setup, cont’d Step 9: Create a Display Lamp Hour Warning E-mail Global Configurator’s monitoring feature enables you to configure an MLC 104 IP Plus controller to monitor many parameters of the connected display devices. For example, a monitor alert can warn the school administrator if a display lamp hour limit is close to expiration or if a display is inexplicably disconnected from the MLC 104 IP Plus controller. 5.
Software Setup, cont’d Step 10: Create a Display Disconnection E-mail To set a display disconnected e-mail alert, do the following: 1. Click the Monitor tab in the Global Configurator window. 2. Click the Add Monitor button below the Monitored Conditions window. The Monitored Conditions Wizard window appears. 3. Enter a name (Disconnected) in the Enter Monitored Condition Name field area. The label now appears in the left pane. 4. Click Next to specify a condition. 5.
Software Setup, cont’d To begin the upload, do the following: 1. Click Begin. The Upload Manager monitors the progress of the upload. 2. When the upload is finished, click Close. The configuration should now be successfully uploaded to the appropriate product(s). Accessing GlobalViewer® After uploading a configuration file to an MLC 104 IP Plus controller, there are three ways to access the GlobalViewer Web page: • From the Upload Manager window, click the Test GV System button.