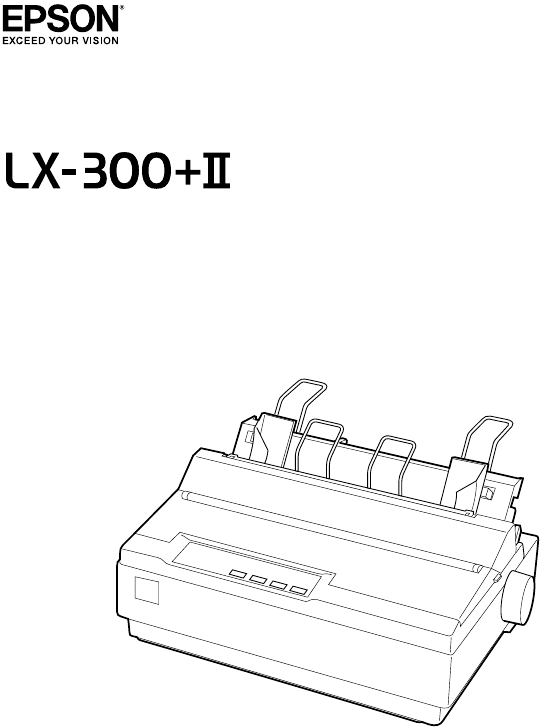
9-pin Dot Matrix Printer User’s Guide
All rights reserved. No part of this publication may be reproduced, stored in a retrieval system, or transmitted in any form or by any means, electronic, mechanical, photocopying, recording, or otherwise, without the prior written permission of Seiko Epson Corporation. The information contained herein is designed only for use with this Epson printer. Epson is not responsible for any use of this information as applied to other printers.
Contents Introduction Options . . . . . . . . . . . . . . . . . . . . . . . . . . . . . . . . . . . . . . . . . . . . . . . . . . 5 1 Setting Up the Printer Unpacking the Printer. . . . . . . . . . . . . . . . . . . . . . . . . . . . . . . . . . . . . . 7 Choosing a Place for the Printer . . . . . . . . . . . . . . . . . . . . . . . . . . . . . 8 Assembling the Printer . . . . . . . . . . . . . . . . . . . . . . . . . . . . . . . . . . . . . 8 Connecting the Printer . . . . . . . . . . . . . . . . . . . .
3 Using the Control Panel Buttons and Lights . . . . . . . . . . . . . . . . . . . . . . . . . . . . . . . . . . . . . . . . Selecting a Built-in Font. . . . . . . . . . . . . . . . . . . . . . . . . . . . . . . . . . . . Changing the Printer’s Default Settings . . . . . . . . . . . . . . . . . . . . . . Using Default Setting mode. . . . . . . . . . . . . . . . . . . . . . . . . . . . 33 35 36 37 4 Troubleshooting Using the Error Indicators. . . . . . . . . . . . . . . . . . . . . . . . . . . . . . . . .
Introduction This manual covers the following basic information to get you started using your printer: ❏ Setting up the printer ❏ Paper handling ❏ Using the control panel ❏ Troubleshooting ❏ Product information For detailed information about your printer, refer to the online Reference Guide (which you’ll copy to your computer when you install the printer software). It describes all the printer’s functions, optional products, printer software, troubleshooting, and technical specifications.
Introduction
Chapter 1 Setting Up the Printer This chapter describes how to unpack and set up your printer. Unpacking the Printer Make sure you have the following items. Knob Ribbon cartridge Paper guide Printer Paper supports USB cable holder Printer software Carefully remove all the protective materials from the printer, as shown below, before you assemble or turn it on. Save all packing and protective materials in case you need to ship the printer in the future.
Choosing a Place for the Printer ❏ Place the printer on a flat, stable surface. ❏ Avoid using or storing the printer in places subject to rapid changes in temperature and humidity. Keep it away from direct sunlight, strong light, heat sources, or excessive moisture or dust. ❏ Place the printer near a wall outlet where you can easily unplug the power cord. Position the power cord and interface cable so they do not interfere with paper feeding.
4. Attach the paper guide by aligning the notches on each side with the tabs on the printer. Then lift up the paper guide and push it into the printer slightly to lock it in place. 5. Attach the paper supports. 6. To install the ribbon cartridge, you need to remove the printer cover. First flip the cover open all the way and then pull it straight off the printer.
7. Remove the new ribbon cartridge from the package and gently turn the ribbon tightening knob counterclockwise to take up any slack in the ribbon. 8. Use your hand to slide the print head to the middle of the printer, then insert the ribbon cartridge as shown below and make sure it clicks into place. Print head 9. 10 Use a pencil point or similar object to guide the ribbon between the print head and the ribbon guide. Be careful not to twist or crease the ribbon.
10. Replace the printer cover and close it. Connecting the Printer Attach the power cord and connect the printer to your computer as follows: 1. Connect the power cord to the printer and to a grounded electrical outlet. 2. Connect the printer to your computer using a USB, parallel, or serial interface cable, as shown on the following page.
USB Connect firmly and route the cable through the USB cable holder. IEEE1284 (Parallel) Connect firmly and fasten the screw. Connect firmly. RS-232C (Serial) Connect firmly and fasten. Note: You can connect cables to multiple interfaces simultaneously; the printer switches automatically to the correct interface when it receives data.
Installing the Printer Software After you connect the printer to your computer, you need to install the printer software on the CD-ROM that came with your printer. The software includes the printer driver and Epson Status Monitor 3, which displays printer status information and notifies you of printer errors. Note: ❏ Installing the printer software may require administrator privileges. (Ask your administrator for more information.
5. When the following screen appears, turn on the printer. 6. After the printer software has been installed, you see the Installation screen again. Select Install Reference Guide and click . 7. To register your printer, select Epson Product Registration and click . Follow the on-screen instructions. 8. When you’re done, click to exit the installation.
Chapter 2 Paper Handling This chapter covers the basic instructions you need to load and use continuous paper, single sheets, and special paper such as multipart forms and labels.
3. Unlock the sprockets on the tractor by pulling the blue lock levers forward. 4. Slide the left sprocket so the pins are above the 0 mark on the printer scale (beneath the tractor). The printer starts printing to the right of the position marked 0. 0 mark 5. Push the lock lever back to lock it in place. Then slide the right sprocket to match the width of your paper, but do not lock it. Move the paper support so it is midway between the sprockets. 6. Stack your continuous paper behind the printer.
7. Make sure your paper has a clean, straight, leading edge. Then open the sprocket covers and fit the first holes of the paper over the sprocket pins. 8. Close the covers. Slide the right sprocket to remove any slack in the paper and lock it in place. 9. To separate the incoming paper from the printed paper, attach the paper guide by holding it horizontally and fitting its notches over the printer’s mounting posts as shown below.
14. After you finish printing, follow the steps in the next section to tear off your printed document. If the first printed line on your page appears too high or too low, you can change its position by using the Micro Adjust feature. See “Adjusting the top-of-form position” on page 23. c Caution: Never use the paper feed knob to adjust the top-of-form position; this may damage the printer or cause it to lose the top-of-form position.
To feed continuous paper backward to the standby position, where you can remove the paper, first tear off any printed sheets. Then press the Load/Eject button. Open the sprocket covers on the tractor and remove the paper. c Caution: Always tear off your printed document before you press the Load/Eject button. Reverse feeding several pages at a time may cause a paper jam.
Printing with the pull tractor To load continuous paper using the pull tractor, you must move the tractor to the pull tractor position, as described below. If your tractor is already installed in this position, make sure the printer is turned off and skip to step 6. 1. Turn off the printer; then remove the printer cover and the paper guide. 2. Remove the paper tension unit by gently squeezing the lock tabs and pulling it out of the printer. 3.
5. Lower the tractor onto the mounting slots at the top of the printer as shown below, and tilt it back until you feel it lock into place. 6. Unlock the sprockets by pulling the blue lock levers forward. 7. Feed the paper into the rear paper slot as shown below, and pull it up. Position the paper using the scale on the printer as a guide. Printing starts to the right of the position marked 0 (under the paper now).
8. Slide the left sprocket so its pins are aligned with the holes in the paper and push the blue lock lever to lock the sprocket in place. Then slide the right sprocket to match the width of your paper, but do not lock it. Move the paper supports midway between the two sprockets. 9. Make sure your paper has a clean, straight leading edge. Open the sprocket covers. Fit the first holes of the paper over the sprocket pins and then close the sprocket covers.
13. Turn on the printer. 14. Set the Auto tear off feature in the Default Setting mode to Off; otherwise, the paper may jam. (See page 36 for more information.) When the printer receives data, it begins printing automatically. If you want to change the position where printing begins on the page, press the LF/FF button to advance the page to the next top-of-form position, and then see the next section to adjust the loading position.
4. Press the LF/FF D button to move the top-of-form position higher on the page, or press the Load/Eject U button to move the top-of-form position lower on the page. Note: ❏ The printer has a minimum and a maximum top-of-form position. If you try to adjust it beyond these limits, the printer beeps and stops moving the paper. ❏ 5. When the paper reaches the default top-of-form position, the printer beeps and stops moving the paper briefly.
Advancing paper to the tear-off edge When the push tractor is installed, you can use the tear-off feature to advance your continuous paper to the printer’s tear-off edge when you finish printing. You can then easily tear off the printed document. When you resume printing, the printer automatically feeds the paper back to the top-of-form position; so you can save the paper normally lost between documents.
Adjusting the tear-off position If your paper’s perforation is not aligned with the tear-off edge, you can use the Micro Adjust feature to move the perforation to the tear-off position. Follow these steps to adjust the tear-off position: 1. Make sure the Tear Off (Font) lights are flashing (the paper is at the current tear-off position). You may need to press the Tear Off (Font) button to advance the paper to the tear-off position. 2. Open the printer cover. 3.
When you resume printing, the printer automatically feeds the paper back to the top-of-form position and begins printing. Note: Your tear-off position setting remains in effect until you change it, even if you turn off the printer. (If you want to restore the printer’s default tear-off position, you can reset the printer. See page 37 for instructions.) Printing on Single Sheets You can load single sheets of paper one at a time using the printer’s paper guide.
2. Push the paper release lever back to the single-sheet position and make sure the paper guide is in the upright position, as shown below. 3. Slide the left edge guide until it locks in place at the guide mark. Then adjust the right edge guide to match the width of your paper. 4. Insert a sheet of paper between the edge guides until it meets resistance. The printer automatically pulls it into the correct printing position. When the printer receives data, it begins printing.
Printing on Special Paper With the LX-300+II, you can print on a wide variety of special paper types, including multipart forms, labels, and envelopes. c Caution: When printing on multipart forms, thicker-than-normal paper, labels, or envelopes, make sure your application software settings keep the printing entirely within the printable area. Printing past the edge of these papers can damage the print head.
3. The numbers next to the lever indicate the thickness setting. Use the table below to select the appropriate paper thickness. Paper type Lever position Standard paper (single sheets or continuous) 0 Multipart forms 0 1 2 3 2-sheet 3-sheet 4-sheet 5-sheet Labels 1 Envelopes 2 or 4 4. Close the printer cover. 5. Turn on the printer. Multipart forms You can use continuous or single-sheet carbonless multipart forms of up to five parts (one original plus four copies).
Labels To print on labels, you must use continuous paper loaded on the pull tractor. Keep the following tips in mind: ❏ Set the paper thickness lever to the correct position for labels. (See page 29.) ❏ Choose labels mounted on a continuous backing sheet with sprocket holes designed for tractor use. Do not print labels as single sheets, because the shiny backing causes the paper to slip slightly. ❏ Load labels the same way you load ordinary continuous paper. See page 20 for loading instructions.
Paper Handling
Chapter 3 Using the Control Panel The buttons and lights on the control panel let you: ❏ Adjust line and form feeding ❏ Load and eject paper ❏ Select a built-in font ❏ Change the printer’s default settings Buttons and Lights 1 Tear Off (Font) lights Flash when continuous paper is in the tear-off position; otherwise, the lights indicate the selected font. 2 Tear Off (Font) button ❏ Advances continuous paper to the tear-off position.
3 LF/FF button ❏ Feeds paper line by line when pressed and released. ❏ Ejects a single sheet or advances continuous paper to the next top-of-form position when held down. ❏ In Micro Adjust mode, adjusts the top-of-form and tear-off position. 4 Load/Eject button ❏ Loads a single sheet of paper. ❏ Ejects a single sheet of paper. ❏ Loads continuous paper from the standby position. ❏ Feeds continuous paper backward to the standby position.
Selecting a Built-in Font It is best to use your application program to select the font you want to use in a document. However, you may sometimes need to select one of the printer’s six built-in fonts using the buttons on the control panel, as described below. (The settings you make in application programs usually override settings you make from the printer’s control panel.
Changing the Printer’s Default Settings While you can often change the printer’s settings through your software or printer driver, you may sometimes need to change one or more of the printer’s default settings from the printer’s control panel using the Default Setting mode. The table below lists the settings and available options. For detailed descriptions, see your Reference Guide. Setting Options (default in bold) Page length for tractor Length in inches: 3, 3.5, 4, 5.5, 6, 7, 8, 8.
Using Default Setting mode Follow the steps below to enter Default Setting mode. If you use single sheets, you’ll need to load a new sheet of paper each time the printer ejects a printed page. 1. Make sure paper is loaded and the printer is off. 2. Hold down the Tear Off (Font) button and then turn on the printer. The printer enters Default Setting mode and prints instructions for selecting the language. The current language is indicated by which control panel lights are on.
Using the Control Panel
Chapter 4 Troubleshooting This chapter explains the error indicators and describes how to clear paper jams and print a self test. For more troubleshooting information, see the Reference Guide. If you cannot resolve the problem using the information in the manuals, see “Where To Get Help” on page 43. Using the Error Indicators Use the following table to diagnose printer errors. Light status Beep pattern Problem Solution n Pause – The printer is paused. Press the Pause button to resume printing.
Light status Beep pattern Problem Solution f Paper Out n Pause ••• Continuous paper is not fed back to the standby position. Tear off the printed document at the perforation; then press the Load/Eject button. The printer feeds the paper to the standby position. Press the Pause button to turn off the Pause light, if necessary. ••• A single sheet of paper is not fully ejected. Press the Load/Eject button to eject the sheet. Then press the Pause button to turn off the Pause light, if necessary.
Clearing a Paper Jam If paper becomes jammed in the printer, follow these steps to remove it: 1. Turn off the printer, open (or remove) the printer cover, and remove the paper guide. 2. If continuous paper is jammed in the printer, tear off the fresh supply at the perforation nearest the paper entry slot. 3. Gently remove any paper inside the printer, including any torn pieces. You can use the knob on the right side of the printer to help feed the paper out.
1. Make sure paper is loaded and the printer is turned off. 2. To run the test using a draft font, turn on the printer while holding down the LF/FF button. To run the test using the printer’s near letter-quality font, hold down the Load/Eject button while you turn on the printer. (Either self test can help you determine the source of your printing problem, but the draft self test prints faster.) After a few seconds, the printer begins printing the self test (a series of characters).
Where To Get Help If your Epson printer is not operating properly and you cannot solve the problem using the troubleshooting information, see the support information below. Internet support Visit Epson’s support website at http://support.epson.com and select your printer for solutions to common problems. You can download drivers and documentation, get FAQs and troubleshooting advice, or e-mail Epson with your questions.
Troubleshooting
Chapter 5 Product Information This chapter contains important information about your printer, including the safety instructions and product warranty. Safety Information Read all of these safety instructions before using the printer. In addition, follow all warnings and instructions marked on the printer itself. Hot Parts Caution Symbol K This symbol is placed on the print head and other parts to indicate that they may be hot. Never touch those parts just after the printer has been used.
❏ Unplug the printer before cleaning it, and always clean it with a piece of damp cloth only. ❏ Do not spill liquid onto the printer. ❏ Except as specifically explained in this guide, do not attempt to service the printer yourself.
WARNING The connection of a non-shielded equipment interface cable to this equipment will invalidate the FCC Certification of this device and may cause interference levels which exceed the limits established by the FCC for this equipment. It is the responsibility of the user to obtain and use a shielded equipment interface cable with this device. If this equipment has more than one interface connector, do not leave cables connected to unused interfaces.
Declare under sole responsibility that the product identified herein, complies with 47CFR Part 2 and 15 of the FCC rules as a Class B digital device. Each product marketed is identical to the representative unit tested and found to be compliant with the standards. Records maintained continue to reflect the equipment being produced can be expected to be within the variation accepted, due to quantity production and testing on a statistical basis as required by 47CFR §2.909.
What Epson Will Do To Correct Problems: Should your Epson product prove defective during the warranty period, please bring the product securely packaged in its original container or an equivalent, along with proof of the date of original purchase, to your Epson Dealer or Epson Customer Care Center. You are responsible for all costs (shipping, insurance, travel time) in getting the product to the service location.
THE WARRANTY AND REMEDY PROVIDED ABOVE ARE EXCLUSIVE AND IN LIEU OF ALL OTHER EXPRESS OR IMPLIED WARRANTIES INCLUDING, BUT NOT LIMITED TO, THE IMPLIED WARRANTIES OF MERCHANTABILITY OR FITNESS FOR A PARTICULAR PURPOSE. SOME LAWS DO NOT ALLOW THE EXCLUSION OF IMPLIED WARRANTIES. IF THESE LAWS APPLY, THEN ALL EXPRESS AND IMPLIED WARRANTIES ARE LIMITED TO THE WARRANTY PERIOD IDENTIFIED ABOVE. UNLESS STATED HEREIN, ANY STATEMENTS OR REPRESENTATIONS MADE BY ANY OTHER PERSON OR FIRM ARE VOID.